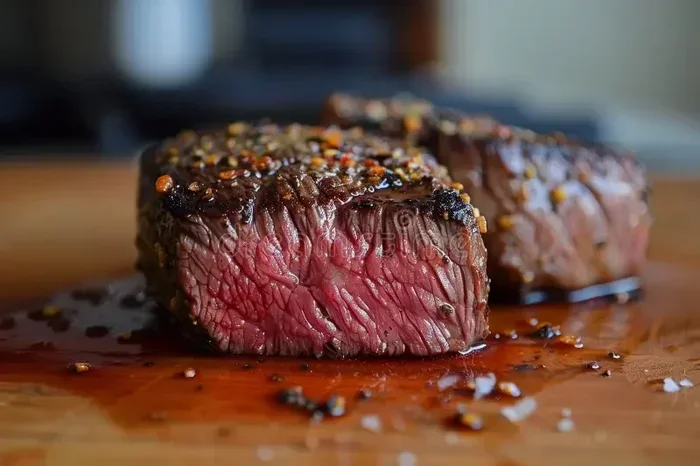
What Temperature To Cook Steak In Oven After Searing Guide
Learning what temperature to cook steak in oven after searing is the key to a perfect, restaurant-quality steak at home. After you create a beautiful golden crust on the stovetop, finishing the steak in the oven gives you even cooking from edge to edge. Most steaks do best at 375°F to 400°F, depending on thickness and how done you like your meat. This guide walks you through every step so you can nail the perfect steak every single time.
There is nothing quite like a perfectly cooked steak. The outside is crispy and browned, and the inside is juicy and tender. But getting that balance right at home can feel tricky. Many people wonder what temperature to cook steak in oven after searing. The answer might surprise you. It is simpler than you think.
Finishing a steak in the oven after searing it on the stove is a technique used by chefs and home cooks alike. It gives you control over the final doneness. You get a great crust on the outside and a perfect pink center on the inside. Whether you are cooking a thick ribeye, a filet mignon, or a strip steak, this method works beautifully. Let us walk through everything you need to know.
Key Takeaways
- Ideal Oven Temp: Most steaks cook best at 375°F to 400°F after searing on the stovetop.
- Use a Meat Thermometer: Checking the internal temperature is the only way to know your steak is perfectly done.
- Rest Your Steak: Letting the steak rest for 5-10 minutes keeps the juices locked in.
- Thickness Matters: Thicker cuts need lower temps and longer cooking times than thin steaks.
- Cast Iron Works Best: A cast iron skillet gives you the best sear before moving to the oven.
- Avoid Overcooking: Pulling the steak early and letting carryover cooking finish the job is a pro tip.
- Season Simply: Salt, pepper, and a little garlic go a long way for a great steak.
📑 Table of Contents
- Why Sear First and Then Finish in the Oven
- Best Oven Temperature After Searing
- How to Sear Your Steak Perfectly
- What Temperature Is the Steak Done
- How Long to Cook Steak in the Oven After Searing
- Resting Your Steak After Cooking
- Common Mistakes to Avoid
- Expert Tips for the Perfect Steak
- Best Cuts of Steak for Oven Finishing
- Final Thoughts
Why Sear First and Then Finish in the Oven
You might wonder why you cannot just cook the steak entirely in the oven. The reason is the crust. A hard, caramelized crust on the outside of your steak adds flavor and texture that an oven alone cannot create. Searing on the stovetop with a hot pan gives you that Maillard reaction. That is the fancy term for the browning process that makes food taste amazing.
Once you have that beautiful sear, moving the steak to the oven finishes the cooking gently and evenly. The oven surrounds the steak with heat. This is much better than trying to flip it on the stove. You avoid hot spots and uneven cooking. The result is a steak that is done to your liking from edge to edge.
The Reverse Sear Method
Some cooks prefer the reverse sear method. This means you put the steak in the oven first at a low temperature and then sear it at the end. It works great for very thick cuts. But for this guide, we are focusing on searing first and then finishing in the oven. Both methods are excellent. They just suit different situations and preferences.
Best Oven Temperature After Searing
The temperature you choose depends on how thick your steak is and how done you want it. Here is a simple breakdown to help you decide.
375°F for Medium-Rare Perfection
For most steaks that are about 1 to 1.5 inches thick, 375°F is the sweet spot. This temperature cooks the steak gently without drying it out. If you like your steak medium-rare, this is the temperature to use. You will get a beautiful pink center with a firm outer edge. The steak stays juicy and full of flavor.
At 375°F, a 1-inch thick steak will need about 8 to 10 minutes of oven time after searing. Use a meat thermometer to check the internal temperature. You want it to reach about 130°F to 135°F for medium-rare. Remember that the temperature will rise a few degrees while the steak rests.
400°F for a Faster Cook
If you are short on time, 400°F works well. This higher temperature cooks the steak a bit faster. It is great for thinner steaks or when you want to speed things up. At 400°F, a 1-inch steak might only need 6 to 8 minutes.
The tradeoff is that the outside can cook a little faster, so you need to watch it closely. Use your meat thermometer and pull the steak when it is a few degrees below your target. Carryover cooking will bring it up to the right temperature.
350°F for Very Thick Cuts
If your steak is 2 inches thick or more, consider lowering the oven to 350°F. Thicker cuts need more time, and a lower temperature prevents the outside from overcooking before the center is done. This approach gives you more even cooking throughout the steak.
At 350°F, a 2-inch steak might need 12 to 15 minutes after searing. Again, a meat thermometer is your best friend here. Check the temperature often so you do not overshoot your target doneness.
How to Sear Your Steak Perfectly
The sear sets the stage for everything that follows. A great sear adds flavor, texture, and color. Here is how to do it right.
Choose the Right Pan
A cast iron skillet is the best choice for searing steak. It holds heat incredibly well and distributes it evenly. Stainless steel pans work too, but avoid nonstick pans. They do not get hot enough to create a proper crust. If you do not have cast iron, a heavy stainless steel pan will do the job.
Get the Pan Really Hot
Place your pan on the burner and let it heat up for a few minutes. You want it smoking hot before the steak touches the surface. Add a high smoke-point oil like avocado oil or grapeseed oil. Do not use olive oil for searing. It has a low smoke point and can burn, which creates off-flavors.
Season the Steak Well
Keep it simple. Kosher salt and freshly ground black pepper are all you need for a great steak. Pat the steak dry with paper towels before seasoning. Dry meat sears better than wet meat. If you want to add garlic or herbs, you can toss them in the pan after the steak has seared.
Sear Each Side for 2 Minutes
Place the steak in the hot pan and do not touch it. Let it sear for about 2 minutes on each side. You should see a deep brown crust forming. For thicker steaks, you can also sear the edges briefly. Use tongs to hold the steak on its sides for 30 seconds each.
What Temperature Is the Steak Done
Knowing when your steak is done is all about the internal temperature. This is where a meat thermometer becomes essential. You cannot guess this accurately by feel alone, especially if you are still learning.
Temperature Guide for Doneness
Here is a quick reference guide for steak doneness temperatures. These are the temperatures you want the steak to reach in the oven, right before it goes to rest.
- Rare: 120°F to 125°F. The center will be cool and red.
- Medium-Rare: 130°F to 135°F. This is the most popular choice. Warm red center with a juicy texture.
- Medium: 140°F to 145°F. A pink center that is slightly firmer.
- Medium-Well: 150°F to 155°F. Very little pink, but still moist.
- Well-Done: 160°F and above. Fully cooked through with no pink.
Remember that the temperature will rise 5 to 10 degrees after you pull the steak from the oven. This is called carryover cooking. So if you want a medium-rare steak, pull it at 125°F to 130°F. It will reach the perfect 130°F to 135°F while resting.
Why Carryover Cooking Matters
Carryover cooking is one of the most important concepts in steak preparation. After the steak comes out of the oven, the residual heat continues to cook the inside. This happens because the outer layers are much hotter than the center. The heat slowly moves inward.
This is why experienced cooks pull the steak off early. It prevents the steak from going past your target doneness. If you wait until the thermometer reads exactly 135°F for medium-rare, the steak will keep cooking on the cutting board and might reach 145°F. That puts you in medium territory, which is not what you wanted.
How Long to Cook Steak in the Oven After Searing
The cooking time depends on three main factors. The thickness of the steak, the oven temperature, and your target doneness. Here is a general guide to help you plan.
Timing Chart for Common Steak Thicknesses
Use this as a starting point. Always verify with a meat thermometer because every oven is slightly different.
- 1-inch steak at 375°F: 8 to 10 minutes for medium-rare.
- 1.5-inch steak at 375°F: 10 to 12 minutes for medium-rare.
- 2-inch steak at 350°F: 12 to 15 minutes for medium-rare.
- 1-inch steak at 400°F: 6 to 8 minutes for medium-rare.
- 1.5-inch steak at 400°F: 8 to 10 minutes for medium-rare.
These times are for steak cooked after searing. The searing process adds a few minutes to the total cook time, but it does not significantly affect the internal temperature. The oven time is what matters most for reaching your target doneness.
Factors That Affect Cooking Time
Several things can change how long your steak needs in the oven. The starting temperature of the steak matters. A steak that came straight from the fridge will take longer than one that sat at room temperature for 30 minutes. Your oven might run hot or cool. An oven thermometer can help you know your actual oven temperature. The rack position matters too. The middle rack gives the most even heat distribution.
Resting Your Steak After Cooking
This step is non-negotiable. Resting your steak after it comes out of the oven is just as important as the cooking itself. When you cut into a hot steak right away, the juices run out onto the cutting board. You lose all that flavor and moisture. Nobody wants that.
Place the steak on a warm plate or a cutting board. Tent it loosely with aluminum foil. The foil should not be tight. You want some air circulation so the steam does not make the crust soggy. Let the steak rest for at least 5 minutes for a thin steak and up to 10 minutes for a thick cut.
During resting, the juices redistribute throughout the meat. The fibers relax and absorb the moisture evenly. When you finally cut into that steak, every bite will be juicy and full of flavor. This is what separates a good steak from a great one.
Common Mistakes to Avoid
Even experienced cooks make mistakes when finishing steak in the oven. Here are some common errors and how to avoid them.
Skipping the Thermometer
The biggest mistake is not using a meat thermometer. Guessing the doneness leads to overcooked or undercooked steak. A simple instant-read thermometer takes the guesswork out completely. Get one if you do not already have one. Your steaks will improve dramatically.
Not Letting the Steak Rest
Cutting into the steak immediately after cooking is tempting but wrong. The juices need time to settle. Skipping the rest means you lose flavor and moisture. Be patient. Five to ten minutes makes a huge difference.
Using the Wrong Pan for Searing
A flimsy nonstick pan will not give you a good sear. You need a heavy, heat-retaining pan. Cast iron is ideal. If you use the wrong pan, the steak steams instead of sears. You will not get that beautiful brown crust you are after.
Overcrowding the Pan
If you are cooking more than one steak, do not crowd the pan. Each steak needs room for the heat to circulate. Overcrowding drops the pan temperature and leads to steaming instead of searing. Cook in batches if you need to.
Opening the Oven Too Often
Every time you open the oven door, heat escapes. This slows down cooking and creates uneven results. Check the steak quickly and close the door. Trust the process and let the oven do its work.
Expert Tips for the Perfect Steak
Here are some extra tips from experienced cooks and chefs that will take your steak game to the next level.
- Bring the steak to room temperature before searing. Take it out of the fridge 30 to 45 minutes before cooking. This helps it cook more evenly.
- Pat the steak dry before seasoning. Moisture on the surface creates steam instead of a sear. Dry meat browns better.
- Use a wire rack on the baking sheet. This allows air to circulate around the steak. It prevents the bottom from getting soggy.
- Add butter and garlic in the last minute of searing. Baste the steak with melted butter for extra richness and flavor.
- Let the steak rest on a warm surface. A cold plate will drop the steak temperature too fast. A warm plate keeps the steak at a good temperature during resting.
- Slice against the grain. This makes the steak more tender and easier to chew. Look for the lines in the meat and cut perpendicular to them.
Best Cuts of Steak for Oven Finishing
Not all steaks are created equal when it comes to oven finishing. Some cuts work better than others. Here are the best options.
- Ribeye: Rich, juicy, and full of flavor. The marbling keeps it moist during oven cooking. This is a top choice for many steak lovers.
- Filet Mignon: Tender and lean. It cooks quickly and stays soft. Great for those who prefer a more delicate steak.
- New York Strip: A balanced cut with good flavor and tenderness. It holds up well to oven finishing.
- T-Bone and Porterhouse: These cuts have both the tender filet and the flavorful strip. They are impressive and delicious when cooked properly.
- Flat Iron Steak: An affordable cut that is surprisingly tender. It works well with the sear-and-oven method.
Each of these cuts responds well to the sear-and-oven technique. The key is to match the oven temperature and time to the thickness of the cut. Thicker cuts need lower temperatures and longer times. Thinner cuts need higher temperatures and shorter times.
Final Thoughts
Cooking steak in the oven after searing is one of the easiest ways to get restaurant-quality results at home. The method gives you control, consistency, and great flavor every time. The key is knowing what temperature to cook steak in oven after searing. For most steaks, 375°F is the magic number. It cooks evenly, preserves juiciness, and delivers a perfect finish.
Use a meat thermometer, rest your steak, and do not rush the process. These small steps make a huge difference. With a little practice, you will be cooking steaks that rival any steakhouse. Your family and guests will be impressed. So fire up that oven, grab your cast iron skillet, and get cooking. A perfect steak is waiting for you.
Frequently Asked Questions
Can I use a convection oven to cook steak after searing?
Yes, you can use a convection oven. It circulates hot air for more even cooking. Reduce the temperature by about 25°F from the standard setting. So if the recipe calls for 375°F, set your convection oven to 350°F. Keep an eye on the steak as convection ovens can cook a bit faster.
How do I know if my steak is medium-rare without a thermometer?
The touch test can help but is not as reliable as a thermometer. Press the center of the steak with your finger. It should feel soft and squishy for rare, slightly firm but springy for medium-rare, and firm for well-done. However, we strongly recommend using a meat thermometer for accuracy every time.
Should I sear the steak on the stove before putting it in the oven?
Yes, searing first is the whole point of this method. The sear creates a flavorful crust through the Maillard reaction. It adds texture and depth of flavor that oven cooking alone cannot achieve. Always sear on the stovetop before finishing in the oven.
How long should I let the steak rest after cooking?
Rest your steak for at least 5 minutes for thin cuts and up to 10 minutes for thick cuts. Place it on a warm plate and tent it loosely with foil. This lets the juices redistribute so every bite is moist and flavorful. Do not skip this step.
Can I cook a frozen steak using the sear and oven method?
It is not recommended to cook a frozen steak this way. A frozen steak will not sear properly and will cook unevenly. Always thaw your steak first in the refrigerator for 12 to 24 hours. Pat it dry before seasoning and searing for the best results.
What is the best oil for searing steak?
Avocado oil is the best choice for searing. It has a high smoke point of about 520°F, which means it will not burn in a hot pan. Grapeseed oil and refined vegetable oil also work well. Avoid olive oil for searing because its low smoke point causes it to burn and create off-flavors.