How Hot To Cook Chicken Breast In Oven For Juicy Results
How Hot To Cook Chicken Breast In Oven is an essential topic that provides valuable insights.
Key Takeaways
- 400°F is the ideal temperature: This is the sweet spot for oven baked chicken breast that is juicy, golden, and flavorful.
- Boneless chicken breast cooks in 20-25 minutes: Timing varies with thickness, so always check with a meat thermometer.
- The internal temperature must reach 165°F: This is the food-safe standard for fully cooked chicken breast.
- Let the chicken rest for 5-10 minutes: Resting allows juices to redistribute, keeping the meat moist and tender.
- Dry brining improves texture and flavor: A simple salt rub before cooking makes a noticeable difference in juiciness.
- Avoid overcooking at all costs: Chicken breast dries out quickly past 165°F, so pull it out on time.
- Even thickness ensures even cooking: Pound or butterfly thicker breasts for consistent results throughout.
📑 Table of Contents
- The Ideal Oven Temperature for Chicken Breast
- How Long to Cook Chicken Breast in the Oven
- Step-by-Step Guide to Perfect Chicken Breast
- How to Tell When Chicken Breast Is Done
- Tips for Juicy, Moist Chicken Breast Every Time
- Common Mistakes to Avoid When Cooking Chicken Breast
- Chicken Breast Cooking Variations
- Comparison: Different Cooking Temperatures for Chicken Breast
The Ideal Oven Temperature for Chicken Breast
The answer to how hot to cook chicken breast in oven depends on what results you want. But there is a clear winner that most chefs and home cooks agree on. Let us break down the options.
Why 400°F Is the Sweet Spot
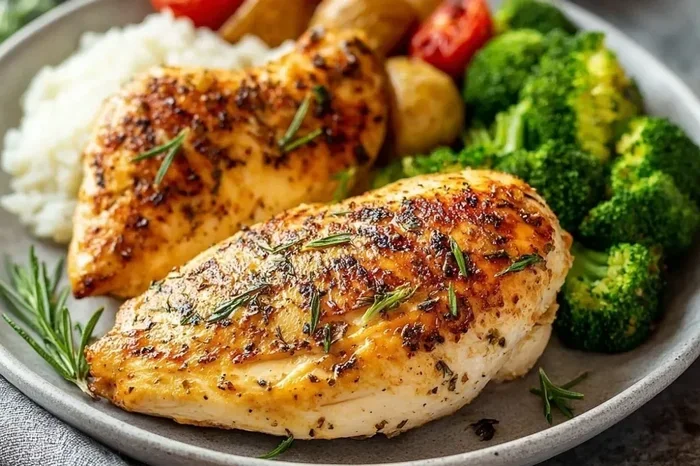
Most cooking experts recommend 400°F (200°C) as the best temperature for oven baked chicken breast. At this heat, the outside of the chicken gets a nice golden color while the inside stays moist and tender. The higher temperature also helps render out any fat and creates a slightly crispy exterior without drying out the meat.
Here is why 400°F works so well:
- Fast cooking time — chicken cooks through quickly at this heat, which reduces the risk of drying out.
- Better browning — the Maillard reaction kicks in at higher temperatures, giving you flavor and color.
- Even cooking — at 400°F, the heat penetrates the chicken breast evenly when the pieces are similar in thickness.
- Juicy results — because the chicken spends less time in the oven, it retains more moisture.
If you are using boneless chicken breast, 400°F is almost always the right choice. The chicken cooks through in about 20 to 25 minutes, which is fast enough to preserve tenderness.
What Happens at Lower Temperatures
Some recipes call for 350°F (175°C) when cooking chicken breast. This lower temperature does work, but it comes with trade-offs. At 350°F, the chicken takes longer to cook, which means more time for moisture to escape. The result can be a less flavorful exterior and a slightly drier interior.
That said, 350°F can be useful in certain situations:
- When you are cooking bone-in chicken breast pieces that need more time to heat through.
- When you are baking chicken breast in a sauce or liquid, which adds moisture back into the meat.
- When you want a very gentle, even cook for thicker pieces.
For most home cooks, however, 400°F is the go-to temperature for the best juicy chicken breast results.
How Long to Cook Chicken Breast in the Oven
Temperature and time go hand in hand. Knowing how long to bake chicken breast at the right heat makes all the difference. Let us look at the specifics.
Timing for Boneless vs Bone-In Chicken Breast
The type of chicken breast you are cooking affects the time significantly. Boneless chicken breast cooks faster because there is no bone slowing down the heat transfer. Here is a general guide:
- Boneless chicken breast at 400°F — 20 to 25 minutes.
- Bone-in chicken breast at 400°F — 30 to 35 minutes.
- Thin chicken breast (less than half an inch) at 400°F — 15 to 18 minutes.
- Thick chicken breast (over one inch) at 400°F — 25 to 30 minutes.
These times are approximate. The real key is using a meat thermometer and checking the chicken breast internal temperature. More on that below.
Thickness Matters More Than You Think
One of the biggest mistakes people make is not paying attention to the thickness of their chicken breast. A thin breast and a thick breast will cook at very different rates, even at the same oven temperature.
If you have thick chicken breasts, consider these options:
- Pound the chicken to an even thickness using a meat mallet or rolling pin. This ensures even cooking throughout.
- Butterfly the breast by slicing it horizontally. This creates a thinner piece that cooks faster and more evenly.
- Add a few extra minutes to the cooking time for thicker pieces, and always check the internal temperature.
Uneven thickness is the number one reason for dry chicken. When parts of the breast are thin and overcooked while other parts are still raw, you lose both texture and flavor.
Step-by-Step Guide to Perfect Chicken Breast
Now that you know the oven temperature for chicken breast and timing, let us walk through the full process. Following these steps will help you get moist chicken breast every time.
Prepping Your Chicken
Before the chicken hits the oven, proper prep sets you up for success. Start by removing the chicken from the refrigerator about 15 to 20 minutes before cooking. Letting it come closer to room temperature helps it cook more evenly. A cold chicken breast placed in a hot oven will cook unevenly, with the outside overcooking before the inside reaches the safe temperature.
Next, pat the chicken dry with paper towels. Moisture on the surface of the chicken creates steam in the oven, which prevents browning and can lead to a softer texture. A dry surface means better browning and a more appealing finish.
If you are working with skinless chicken breast, you can still achieve great results. The lack of skin means less fat rendering, so be extra careful not to overcook. Using a little oil or butter on the surface helps with browning and flavor.
Seasoning and Marinating Tips
Chicken breast seasoning is where you can get creative. A simple blend of salt, pepper, garlic powder, and paprika works beautifully. But if you want to take your baked chicken breast to the next level, try these ideas:
- Dry brining — sprinkle salt on the chicken and let it sit in the fridge for 30 minutes to an hour before cooking. This draws out moisture, which then gets reabsorbed, seasoning the meat deeply.
- Olive oil and herbs — a light coating of olive oil with fresh rosemary, thyme, or oregano adds flavor and helps the skin crisp up.
- Lemon and garlic — a classic combination that works well with oven baked chicken breast. Add lemon slices and minced garlic for a bright, fresh flavor.
- Buttermilk marinade — soaking the chicken in buttermilk for a few hours tenderizes the meat and adds a subtle tang.
Remember, less is more with marinating time. Chicken breast is lean meat, and marinating it for too long can break down the proteins and create a mushy texture. Aim for 30 minutes to 2 hours for best results.
How to Tell When Chicken Breast Is Done
Knowing when your chicken breast doneness is right is crucial. Undercooked chicken is a food safety risk, and overcooked chicken is a texture nightmare. Here is how to get it just right.
Using a Meat Thermometer
The most reliable way to check if your chicken breast is done is with a meat thermometer. Insert the probe into the thickest part of the breast, avoiding the bone if you are cooking bone-in pieces. The chicken breast internal temperature should read 165°F (74°C) when it is fully cooked.
Here are some tips for using a meat thermometer correctly:
- Check multiple spots — chicken breasts can have hot and cold spots, especially if the thickness varies.
- Do not touch the bone — the bone conducts heat differently and can give you a falsely high reading.
- Check near the end of cooking — start checking a few minutes before the estimated time is up so you do not overcook.
- Use an instant-read thermometer — these give you a quick and accurate reading without leaving the probe in the meat.
Some people prefer to pull the chicken out at 160°F and let it rest. During the resting period, the temperature will continue to rise by a few degrees, reaching the safe 165°F. This technique, known as carryover cooking, helps keep the chicken moist.
Visual and Touch Signs
If you do not have a meat thermometer, you can use visual and touch cues. A fully cooked chicken breast will have clear juices when you cut into it. Pink or reddish juices mean the chicken needs more time. The meat should also feel firm but still have some give when you press it with your finger.
However, these methods are less reliable than a thermometer. If you are serious about baking chicken breast perfectly, investing in a good instant-read thermometer is the best decision you can make.
Tips for Juicy, Moist Chicken Breast Every Time
Everyone wants moist chicken breast that is tender and full of flavor. Here are the best tips to make that happen consistently.
The Resting Period
One of the most overlooked steps in cooking chicken breast is the resting period. Once the chicken comes out of the oven, let it rest for at least 5 to 10 minutes before cutting into it. This allows the juices to redistribute throughout the meat. If you cut too early, the juices run out onto the cutting board instead of staying in the chicken.
Think of it like this: the heat causes the juices to move toward the center of the meat. Resting gives them time to spread back out evenly. The result is a juicier, more flavorful bite every time.
Brining and Dry Brining
Brining is a technique that adds moisture to chicken breast before cooking. A wet brine involves soaking the chicken in a saltwater solution for a few hours. The salt helps the muscle fibers retain more water during cooking, which means a juicier result.
Dry brining is a simpler alternative. Just sprinkle kosher salt on the chicken and let it sit uncovered in the refrigerator for a few hours. The salt draws out moisture, which then gets reabsorbed along with the salt, seasoning the meat and improving its texture.
Both methods work well for oven baked chicken breast. If you have time, try both and see which one you prefer. Either way, you will notice a big difference in juiciness.
Using Parchment Paper or a Baking Sheet
The surface you cook your chicken on matters more than you might think. Lining your baking sheet with parchment paper or using a wire rack promotes airflow around the chicken. This helps the bottom cook evenly and prevents steaming, which can make the exterior soggy.
A wire rack is especially useful for skinless chicken breast. It allows heat to circulate underneath, giving you a more even cook and a better texture on all sides.
Common Mistakes to Avoid When Cooking Chicken Breast
Even experienced cooks make mistakes with chicken breast in oven. Here are the most common errors and how to avoid them.
Overcooking the Chicken
Overcooking is the number one enemy of juicy chicken breast. Chicken breast is a lean cut with very little fat, which means it dries out quickly once it passes the right temperature. Even a few extra minutes can turn a tender breast into something tough and chalky.
To avoid overcooking:
- Set a timer and check the chicken a few minutes early.
- Use a meat thermometer — it is the most accurate tool you have.
- Remember that the chicken will continue cooking slightly during the resting period.
- Do not rely solely on cooking time. Thickness, starting temperature, and oven accuracy all play a role.
Skipping the Rest
Cutting into chicken breast immediately after it comes out of the oven is a common mistake. You lose valuable juices that should stay inside the meat. Always give your baked chicken breast at least 5 minutes of rest before slicing.
Not Letting the Chicken Come to Room Temperature
Placing cold chicken straight from the fridge into a hot oven creates uneven cooking. The outside overcooks while the inside is still catching up. Taking the chicken out 15 to 20 minutes before cooking helps it cook more evenly and reduces the overall cooking time.
Ignoring Oven Hot Spots
Most ovens have hot spots where the temperature is higher or lower than the rest. If you have ever noticed one side of your chicken cooking faster than the other, this is why. Rotating the baking sheet halfway through cooking helps ensure even results.
Chicken Breast Cooking Variations
Once you master the basics of how hot to cook chicken breast in oven, you can start experimenting with different variations. These ideas add flavor and keep your meals interesting.
Italian-Style Baked Chicken Breast
Top your chicken with marinara sauce, mozzarella cheese, and fresh basil for an Italian-inspired dish. The sauce adds moisture during cooking, which helps keep the chicken tender. Bake at 400°F for about 25 minutes, then add the cheese in the last 5 minutes for a bubbly, golden finish.
Honey Mustard Chicken Breast
Brush the chicken with a mixture of Dijon mustard, honey, and a little olive oil before baking. The honey caramelizes in the oven, creating a sweet and tangy glaze. This works beautifully at 400°F and adds a delicious flavor dimension to your oven baked chicken breast.
Chicken Breast Meal Prep
Chicken breast meal prep is one of the most popular uses for oven-baked chicken. Cook a batch at the beginning of the week, and you have ready-to-eat protein for salads, wraps, and bowls throughout the week. Cook at 400°F for 20 to 25 minutes, let them cool, and store them in the refrigerator for up to four days.
Meal prepped chicken breast stays moist when stored properly. Reheat gently in the oven or microwave with a damp paper towel over the top to retain moisture.
Comparison: Different Cooking Temperatures for Chicken Breast
Here is a quick comparison of the most common oven temperatures for cooking chicken breast:
- 350°F (175°C): Slower cooking, more moisture loss, good for bone-in or sauce-covered chicken. Best for gentle, even cooking.
- 375°F (190°C): A middle ground that works well for thicker boneless breasts. Good balance of cooking time and moisture retention.
- 400°F (200°C): The recommended temperature for most oven baked chicken breast. Faster cooking, better browning, and juicier results.
- 425°F (220°C): Very fast cooking, great for thin chicken breasts. Higher risk of drying out if left too long.
For the best results with boneless skinless chicken breast, 400°F gives you the ideal balance of speed, flavor, and moisture. It is the temperature most recommended by cooks and food scientists alike.
When you understand how hot to cook chicken breast in oven, you unlock the ability to make restaurant-quality chicken at home. The right temperature, combined with proper timing and a little patience, transforms a simple ingredient into something truly delicious.
Frequently Asked Questions
What is the best temperature to cook chicken breast in the oven?
The best temperature to cook chicken breast in the oven is 400°F (200°C). This high heat cooks the chicken quickly, which helps it stay juicy. It also promotes browning on the outside for better flavor and texture. Always use a meat thermometer to check that the internal temperature reaches 165°F.
How long does it take to bake chicken breast at 400°F?
Boneless chicken breast typically takes 20 to 25 minutes at 400°F. Bone-in pieces may need 30 to 35 minutes. The exact time depends on the thickness of the chicken. Always check the internal temperature rather than relying solely on the clock.
Can you cook chicken breast at 350°F instead of 400°F?
Yes, you can cook chicken breast at 350°F. It will take longer, usually around 25 to 30 minutes for boneless breasts. The lower temperature results in a gentler cook but may produce less browning. For the juiciest results, 400°F is generally recommended.
How do you keep chicken breast moist in the oven?
To keep chicken breast moist, do not overcook it, use a meat thermometer, and let the chicken rest for at least 5 minutes after cooking. Brining or dry brining before cooking also helps retain moisture. Pounding the chicken to an even thickness ensures it cooks uniformly without drying out.
Should you cover chicken breast with foil when baking?
Covering chicken breast with foil is not usually necessary at 400°F. Foil traps steam, which can prevent browning and make the exterior soggy. However, if your chicken is cooking too fast or browning too much, a loose tent of foil for the last few minutes can help.
What is the safe internal temperature for chicken breast?
The safe internal temperature for chicken breast is 165°F (74°C) according to food safety guidelines. Using an instant-read meat thermometer is the most accurate way to check this. Remember that carryover cooking will raise the temperature by a few degrees after you remove the chicken from the oven.
=== CONCLUSION ===
Getting how hot to cook chicken breast in oven right is simpler than most people think. The magic number is 400°F, which gives you the perfect balance of speed, flavor, and moisture. With the right timing, proper prep, and a reliable meat thermometer, you can serve perfectly juicy chicken breast every single time.
Remember the small details that make a big difference. Let the chicken come to room temperature before cooking. Dry the surface for better browning. Season generously and give the chicken time to rest after it comes out of the oven. These small habits separate good chicken from great chicken.
Now that you have all the knowledge you need, it is time to put it into practice. The next time you bake chicken breast, you will know exactly what to do. Your kitchen will smell incredible, and your family will ask for seconds. Enjoy the process and savor every bite of that perfectly cooked oven baked chicken breast.
=== KEY TAKEAWAYS ===
Key Takeaways
- 400°F is the ideal temperature: This is the sweet spot for oven baked chicken breast that is juicy, golden, and flavorful.
- Boneless chicken breast cooks in 20-25 minutes: Timing varies with thickness, so always check with a meat thermometer.
- The internal temperature must reach 165°F: This is the food-safe standard for fully cooked chicken breast.
- Let the chicken rest for 5-10 minutes: Resting allows juices to redistribute, keeping the meat moist and tender.
- Dry brining improves texture and flavor: A simple salt rub before cooking makes a noticeable difference in juiciness.
- Avoid overcooking at all costs: Chicken breast dries out quickly past 165°F, so pull it out on time.
- Even thickness ensures even cooking: Pound or butterfly thicker breasts for consistent results throughout.