How To Seal Oven Bake Clay For A Long Lasting Finish
Sealing oven bake clay is the key step that transforms a good craft project into a lasting masterpiece. Whether you make jewelry, figurines, or home decor, applying the right sealant for polymer clay protects your work from scratches, moisture, and fading. This guide walks you through every method, product, and mistake to avoid so your oven bake clay finish stays vibrant for years.
Key Takeaways
- Choose the right sealant: acrylic sealers, epoxy resin, and polyurethane each offer different levels of shine and protection for your clay projects.
- Prep the surface first: sanding and buffing your baked clay before sealing ensures the finish adheres properly and lasts longer.
- Apply thin, even coats: multiple thin layers always beat one thick coat when it comes to a smooth, professional-looking polymer clay coating.
- Avoid common mistakes: skipping the curing step, using too much sealant, or sealing before the clay is fully cooled are the top errors crafters make.
- Maintain sealed pieces carefully: gentle cleaning and proper storage keep your durable clay finish looking fresh for a long time.
- Match the sealant to your project: jewelry needs a different finish than a decorative bowl, so pick your clay sealing techniques accordingly.
📑 Table of Contents
Why Sealing Oven Bake Clay Matters
When you pull your creation out of the oven, it might look perfect. But here is the thing. Oven bake clay is porous right after baking. That means it can absorb moisture, dust, and oils from your fingers over time. Without a proper polymer clay sealing layer, your piece can dull, crack, or even crumble after a few months.
Sealing does two big jobs. First, it locks in the color so your bright reds, blues, and greens stay vivid. Second, it creates a hard outer shell that resists scratches and daily wear. If you have ever seen a clay figurine lose its shine after a year, the reason was simple. No sealant was applied.
Think of sealing like putting a clear coat on a car. The paint underneath is beautiful, but without protection, it fades and chips fast. Your clay projects deserve the same care. A good oven bake clay finish keeps your art looking fresh and gives it real staying power.
The Science Behind Clay Sealing
Here is a quick look at why this works. When you bake polymer clay, the PVC particles fuse together. But tiny gaps remain between them. A sealant for polymer clay fills those gaps and forms a continuous film on top. This film acts as a barrier against water, UV light, and physical contact.
Different sealants create different types of barriers. Some form a hard shell. Others stay slightly flexible. The best choice depends on what you are making and how you plan to use it. We will cover all the options in the next section.
Best Sealants For Oven Bake Clay
Not all sealants are created equal. Some give a glass-like shine. Others keep a natural, flat look. Choosing the right one depends on your project type and personal style. Below are the most popular options crafters use today.
Acrylic Sealers
Acrylic sealer polymer clay products are the go-to choice for most crafters. They come in spray cans and brush-on bottles. Acrylic sealers dry fast, are easy to apply, and offer a range of finishes from matte to high gloss.
Here are the pros and cons:
- Pros: Affordable, widely available, easy to reapply, low odor.
- Cons: Can yellow slightly over time, may need multiple coats for full coverage.
Brands like Mod Podge, Krylon, and Delta Ceramcoat are popular choices. They work well for clay jewelry sealing and decorative pieces that do not face heavy wear.
Epoxy Resin
If you want a truly professional, museum-quality finish, epoxy resin clay is the way to go. Epoxy creates a thick, crystal-clear layer that is incredibly durable and almost waterproof. It is the top choice for glossy finish clay pieces that need to last.
Epoxy resin comes in two parts that you mix together. Once applied, it self-levels and cures to a hard, glass-like surface. The downside is that it takes longer to apply and requires more care during the mixing process.
Polyurethane Varnish
Polyurethane clay sealer options are great for pieces that will handle frequent touching. Polyurethane is flexible, which means it bends slightly instead of cracking when the clay piece moves. This makes it ideal for functional items like coasters or handles.
You can find water-based polyurethane, which is easier to clean up and has less odor. Oil-based versions offer harder protection but take longer to dry. For most clay crafting tips and home projects, water-based polyurethane is the safer bet.
Wax and Oil Finishes
Some crafters prefer a more natural approach. Beeswax and carnauba wax can be buffed onto baked clay for a soft, subtle sheen. These options are non-toxic and easy to apply, but they offer the least protection compared to acrylics or resin.
Wax finishes work best for pieces that are not handled often, like display figurines. They give a warm, handmade feel that many artists love.
Comparison Table: Sealant Types at a Glance
| Sealant Type | Finish | Durability | Ease of Use | Best For |
|---|---|---|---|---|
| Acrylic Sealer | Matte to Gloss | Good | Very Easy | Jewelry, decor |
| Epoxy Resin | High Gloss | Excellent | Moderate | Showpieces, coasters |
| Polyurethane | Satin to Gloss | Very Good | Easy | Functional items |
| Wax/Oil | Matte, Soft Sheen | Fair | Very Easy | Display pieces |
Step-By-Step Guide To Sealing Oven Bake Clay
Now that you know your options, let us walk through the actual process. Following these steps ensures your clay sealing techniques produce a smooth, lasting result every time.
Step 1: Let the Clay Cool Completely
This is the step most people skip. When you take your clay out of the oven, it is still warm and slightly soft. Let it cool to room temperature before you do anything. Cooling takes about 30 minutes for most pieces. If you seal warm clay, the sealant can soften or bubble, ruining your oven bake clay finish.
Step 2: Sand and Buff the Surface
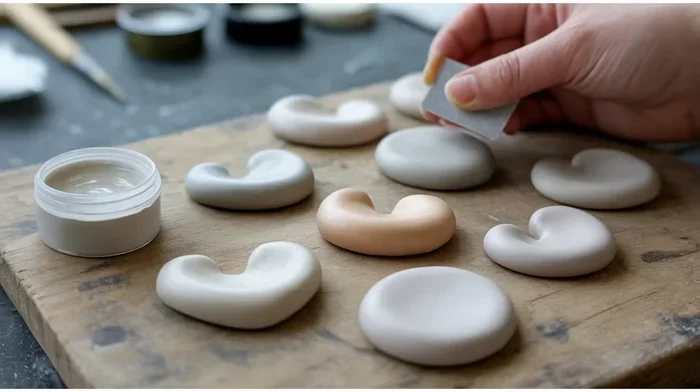
Even if your clay looks smooth out of the oven, there are likely tiny ridges and imperfections. Use fine-grit sandpaper, around 400 to 600 grit, to lightly sand the surface. Wipe off the dust with a damp cloth.
After sanding, use a soft cloth or a buffing pad to buff clay surface areas until they feel smooth. This step is what separates a good finish from a great one. The smoother your base, the better the sealant will look.
Step 3: Choose Your Application Method
Spray sealants are the easiest. Hold the can about 10 inches from the surface and spray in sweeping motions. Brush-on sealants give you more control, which is helpful for detailed pieces like clay jewelry sealing projects.
For epoxy resin, follow the mixing instructions on the package carefully. Pour it onto the center of the piece and spread it gently with a foam brush or heat gun to remove bubbles.
Step 4: Apply Thin, Even Coats
Here is a rule that never changes. Thin coats beat thick coats every time. A thick coat can drip, trap bubbles, or dry unevenly. Apply the first coat lightly and let it dry fully before adding the next.
Most sealants need two to three coats for full protection. Wait the recommended drying time between each layer. Rushing this step is one of the biggest common mistakes people make.
Step 5: Let the Final Coat Cure
Drying and curing are not the same thing. Drying means the surface feels dry to the touch. Curing means the sealant has fully hardened underneath. Most acrylic sealants cure in 24 to 48 hours. Epoxy resin can take up to 72 hours.
During curing, keep your piece in a dust-free area. Even tiny particles that land on wet sealant can ruin the finish. Place your project on a raised surface covered with parchment paper.
Quick Tips for Better Results
- Work in a well-ventilated area, especially with spray sealants and epoxy.
- Use a dust mask when sanding clay surfaces.
- Test your sealant on a small scrap piece first.
- Keep a fan running to help sealant dry evenly.
- Label your finished piece with the sealant type for future reference.
Common Mistakes To Avoid When Sealing Clay
Even experienced crafters sometimes make errors that affect their final result. Knowing what to avoid saves you time, money, and frustration.
Sealing Before the Clay Is Fully Cooled
We mentioned this in the steps, but it deserves its own warning. Warm clay causes sealant to soften and peel. Always wait until your piece reaches room temperature before applying any polymer clay coating.
Using Too Much Sealant at Once
It is tempting to coat the whole piece in one heavy pass. This leads to drips, streaks, and cloudy areas. Patience pays off here. Light, even passes always give the best durable clay finish.
Skipping the Sanding Step
If you skip sanding and buffing, your sealant may not adhere well. It can peel off after a few weeks. Taking five extra minutes to prep the surface makes a huge difference in how long your finish lasts.
Choosing the Wrong Sealant for the Project
A glossy epoxy resin looks amazing on a display piece. But if you use it on a bracelet that gets daily wear, it can scratch and show wear fast. Always match your clay sealing techniques to how the piece will be used.
Not Letting the Sealant Fully Cure
Using your piece before the sealant has fully cured is a common mistake. The finish can stick to surfaces, collect dust, or develop fingerprints. Give your project the full curing time recommended by the manufacturer.
Expert Insight: What Professional Clay Artists Do Differently
Many professional polymer artists apply a thin layer of liquid clay as a base before sealing. This creates a bonding layer that helps the sealant grip the surface more effectively. It is a small extra step that dramatically improves adhesion and longevity.
Others recommend sealing both the front and back of flat pieces. Moisture can get trapped between layers and cause warping or mold. A sealant on both sides acts as a waterproof clay finish barrier that protects from all angles.
Tips For A Professional-Looking Finish
Want your clay projects to look like they came straight from a craft store shelf? These tips will help you achieve that polished, professional look.
Build Up Your Layers Gradually
Instead of one heavy application, build up your finish with multiple thin layers. Each layer adds a little more protection and a little more shine. By the third coat, you will notice a big difference in how the piece looks and feels.
Use a Heat Gun to Remove Bubbles
When working with resin or thick sealants, small bubbles often form on the surface. A heat gun held a few inches away will pop these bubbles quickly. Move the gun constantly so you do not overheat one spot.
Add a Final Buff After Drying
Once your sealant has fully cured, give the entire piece a gentle buff with a soft microfiber cloth. This removes any tiny dust particles that settled on the surface and brings out the full shine of your oven bake clay finish.
Experiment With Mixed Finishes
You do not have to stick with one finish. Try a matte sealant on the base and a glossy sealant on raised details. This creates depth and dimension that makes your piece stand out. Many professional clay preservation methods use this layered approach for stunning results.
How To Maintain Sealed Clay Pieces
Sealing is not a one-and-done job if you want your pieces to last for years. Proper maintenance keeps the finish looking great and extends the life of your creations.
Cleaning Sealed Clay
Use a soft, damp cloth to wipe down sealed pieces. Avoid harsh chemicals or abrasive cleaners, which can strip the sealant over time. For stubborn spots, a mild soap solution works well. Dry the piece thoroughly after cleaning to prevent moisture from seeping into the clay.
Storing Sealed Clay Items
Store your sealed pieces away from direct sunlight. UV rays can fade colors and break down certain sealants over time. A cool, dry place with indirect light is ideal. For jewelry, a fabric-lined box prevents scratches that could damage the polymer clay coating.
Re-Sealing When Needed
Even the best sealant will wear down over time, especially on pieces that get handled often. Check your items every six to twelve months. If you notice the finish looking dull or feeling rough, apply a fresh light coat of sealant. This simple step keeps your clay durability tips paying off for years.
Dealing With Scratches and Chips
Small scratches can often be buffed out with a microfiber cloth. For deeper chips, lightly sand the damaged area with 800-grit sandpaper, clean it, and apply a new thin coat of sealant. This touch-up method works well for both acrylic and polyurethane finishes.
Conclusion
How to seal oven bake clay is one of the most important skills you can learn as a crafter. The right sealant protects your hard work, preserves vibrant colors, and gives your pieces a professional finish that lasts. Whether you choose an acrylic spray for quick projects, epoxy resin for showpiece quality, or polyurethane for everyday items, the key is proper preparation and patient application.
Remember to cool your clay fully, sand and buff the surface, apply thin coats, and let everything cure completely. Avoid the common mistakes that cause peeling, bubbling, and dull finishes. With these clay sealing techniques in your toolkit, your creations will look beautiful for a very long time.
Start with a simple project if you are new to sealing. Practice on scrap pieces until you feel confident. Then apply what you have learned to your favorite designs. The difference a good sealant makes will amaze you. Your clay art deserves to last, and now you have everything you need to make it happen.
Frequently Asked Questions
Can I seal oven bake clay before it is fully cooled?
No, you should always wait until your clay piece reaches room temperature before applying any sealant. Sealing warm clay can cause the finish to bubble, peel, or crack. Cooling usually takes about 30 minutes, depending on the size of your piece.
How many coats of sealant do I need for oven bake clay?
Most sealants work best with two to three thin coats. The first coat acts as a base layer, the second provides the main protection, and the third adds extra durability and shine. Always let each coat dry fully before applying the next one.
Is epoxy resin safe to use on clay pieces that hold food?
Yes, once fully cured, food-safe epoxy resin is non-toxic and safe for items like coasters or trays. Make sure to choose a resin specifically labeled as food-safe and follow the curing instructions carefully. Never use uncured resin on surfaces that touch food.
Can I use a hairdryer instead of a heat gun to remove bubbles?
A hairdryer can work in a pinch, but a heat gun is more effective because it gets hotter and dries faster. If you use a hairdryer, keep it on a low setting and move it constantly to avoid overheating one spot on your clay piece.
What is the best sealant for polymer clay jewelry?
Acrylic sealers are the most popular choice for clay jewelry sealing because they are easy to apply, dry quickly, and come in both matte and glossy finishes. For pieces that get a lot of wear, a water-based polyurethane offers extra durability and scratch resistance.
Does sealing make oven bake clay waterproof?
A good sealant like epoxy resin or polyurethane can make your clay piece highly water-resistant, but no sealant makes it completely waterproof forever. Over time, exposure to water and wear will break down the protective layer. Re-sealing periodically helps maintain the waterproof clay finish effect.