How Long To Cook Individual Ribs In The Oven Perfectly
Learning how long to cook individual ribs in the oven is the key to juicy, tender barbecue ribs every single time. Whether you are using baby back ribs or spare ribs, the right oven temperature and timing make all the difference. This guide covers everything from prep to plating so you can cook ribs like a pro.
There is nothing quite like pulling a rack of ribs out of the oven and watching the meat pull away from the bone on its own. If you have ever wondered how long to cook individual ribs in the oven, you are in the right place. This guide walks you through every step, from choosing your ribs to slicing into perfectly cooked meat.
Cooking ribs in the oven might sound simple, but there is a real science behind getting them right. Too hot and the meat dries out. Too short and the ribs stay tough. Too long and they fall apart into mush. The sweet spot is right in the middle, and once you find it, you will never go back to overcooked ribs again.
Whether you are a beginner in the kitchen or a seasoned home cook looking to refine your technique, this article covers everything you need. We will talk about oven temperature, rib types, timing, wrapping methods, and the telltale signs that your ribs are ready. By the end, you will feel confident enough to make ribs that rival your favorite barbecue restaurant.
Key Takeaways
- Low and slow is the way: Cooking ribs at 275 to 325 degrees Fahrenheit gives you the best tenderness and flavor.
- Plan for 2.5 to 4 hours: Individual ribs typically need between 2.5 and 4 hours depending on the type and size.
- Use a meat thermometer: The internal temperature of 195 to 203 degrees Fahrenheit signals perfectly done ribs.
- Wrap in foil for moisture: The foil wrapping method keeps ribs juicy during the longer cooking process.
- Rest your ribs: Letting ribs rest for 10 to 15 minutes before cutting locks in the juices.
- Dry rub vs. sauce: Applying a dry rub early and sauce late creates the best flavor and texture.
- Bone-in or boneless both work: Each option has slightly different timing and cooking needs.
📑 Table of Contents
- Understanding Your Ribs Before You Cook
- How Long To Cook Individual Ribs In The Oven
- Step By Step Instructions For Perfect Oven Ribs
- How To Know When Your Ribs Are Done
- Common Mistakes To Avoid When Cooking Ribs
- Expert Tips For Restaurant Quality Ribs At Home
- Quick Tips For Perfect Ribs Every Time
- Frequently Asked Questions
- Final Thoughts
Understanding Your Ribs Before You Cook
Not all ribs are the same. Before you set a timer, it helps to understand what kind of ribs you are working with. Different cuts cook at different speeds and respond differently to heat. Knowing your ribs is the first step toward perfect results.
Baby Back Ribs vs Spare Ribs
Baby back ribs come from the top of the pig rib cage, near the backbone. They are smaller, leaner, and cook faster than other cuts. Most baby back ribs take about 2.5 to 3.5 hours in the oven at 275 degrees Fahrenheit.
Spare ribs come from the belly area. They are larger, fattier, and have more connective tissue. This means they need more time, usually around 3.5 to 4.5 hours at the same temperature. The extra fat renders down slowly, which is what gives spare ribs that rich, deep flavor.
St. Louis style ribs are actually spare ribs that have been trimmed for a uniform shape. They cook similarly to regular spare ribs but may finish a bit faster because of the trimmed fat cap.
Bone In vs Boneless Ribs
Bone-in ribs are the most common and they hold moisture better during cooking. The bone acts as an insulator, which means the meat around it stays juicier longer. Bone-in individual ribs typically need the standard cooking times we will cover below.
Boneless ribs cook faster because there is no bone slowing down the heat transfer. You can expect boneless ribs to finish about 30 minutes earlier than bone-in cuts. However, they can dry out more easily, so keep a close eye on them.
How Long To Cook Individual Ribs In The Oven
The short answer is that most individual ribs need between 2.5 and 4 hours in the oven. But the real answer depends on several factors. Let us break it all down so you know exactly what to expect.
The Low and Slow Method
The best way to cook ribs in the oven is low and slow. This means setting your oven to 275 degrees Fahrenheit and letting the ribs cook for an extended period. At this temperature, the collagen in the connective tissue breaks down gradually. This is what transforms tough ribs into tender, melt-in-your-mouth bites.
Here is a general time guide for the low and slow method:
- Baby back ribs: 2.5 to 3.5 hours at 275 degrees Fahrenheit
- Spare ribs: 3.5 to 4.5 hours at 275 degrees Fahrenheit
- St. Louis style ribs: 3 to 4 hours at 275 degrees Fahrenheit
- Boneless ribs: 2 to 3 hours at 275 degrees Fahrenheit
The Faster Method At Higher Temperatures
If you are short on time, you can cook ribs at a higher temperature. Setting your oven to 325 or even 350 degrees Fahrenheit cuts the cooking time significantly. However, you need to be more careful because the higher heat can dry out the meat.
At 325 degrees Fahrenheit, baby back ribs usually take about 2 to 2.5 hours. Spare ribs need around 2.5 to 3 hours. The key difference is that you should wrap the ribs in foil partway through to retain moisture. This is sometimes called the Texas crutch method, and it works wonders for speeding up the process without sacrificing tenderness.
Comparison Table: Rib Types And Cooking Times
| Rib Type | Oven Temp | Cooking Time | Best For |
|---|---|---|---|
| Baby Back Ribs | 275 F | 2.5 – 3.5 hours | Lean, tender results |
| Spare Ribs | 275 F | 3.5 – 4.5 hours | Rich, flavorful ribs |
| St. Louis Style | 275 F | 3 – 4 hours | Uniform shape and even cook |
| Baby Back (325 F) | 325 F | 2 – 2.5 hours | Faster cooking time |
| Spare Ribs (325 F) | 325 F | 2.5 – 3 hours | Quick spare rib prep |
These times are guidelines, not rigid rules. Every oven runs a little differently, and the thickness of your ribs varies. Always use a meat thermometer to check for doneness rather than relying solely on the clock.
Step By Step Instructions For Perfect Oven Ribs
Now that you know the timing, let us walk through the actual process. Follow these steps and your ribs will turn out beautifully every time.
Step One: Prep Your Ribs
Start by removing the membrane from the back of the ribs. This thin, translucent layer can be tough and chewy even after cooking. Use a butter knife to loosen one corner, then grip it with a paper towel and pull it off in one smooth motion.
Next, pat the ribs dry with paper towels. This helps the dry rub stick better and creates a better bark during cooking. Apply your favorite rib rub generously on all sides. Let the seasoned ribs sit at room temperature for about 30 minutes before they go into the oven.
Step Two: Wrap In Foil
Place the ribs on a large sheet of heavy-duty aluminum foil. You can also use a rib rack to keep them upright and allow heat to circulate evenly. Wrap the ribs tightly, leaving a small opening at the top to vent steam.
The foil trap creates a moist environment that braises the meat. This is especially important for spare ribs and thicker cuts that need more time to become tender.
Step Three: Cook Low And Slow
Place the wrapped ribs on a baking sheet and put them in the oven at 275 degrees Fahrenheit. Set your timer based on the rib type and thickness we discussed earlier. Resist the urge to open the foil or check on them too often. Every time you open the foil, you release steam and slow down the cooking process.
Step Four: The Unwrap And Glaze Phase
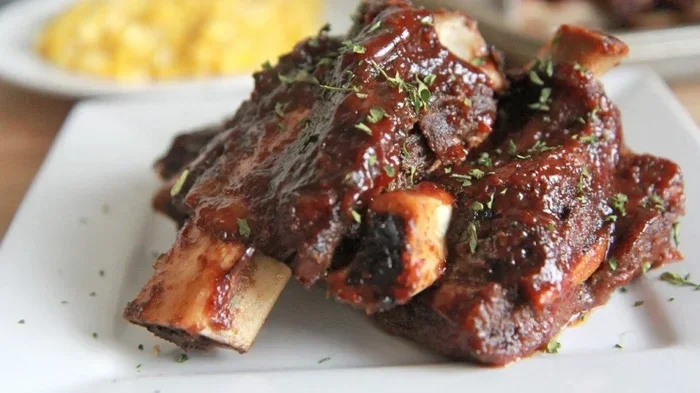
About 30 minutes before the ribs are done, remove them from the oven and carefully unwrap the foil. Brush your favorite barbecue sauce on all sides. Return the ribs to the oven unwrapped for the final 20 to 30 minutes. This is when the sauce caramelizes and forms that sticky, glossy finish everyone loves.
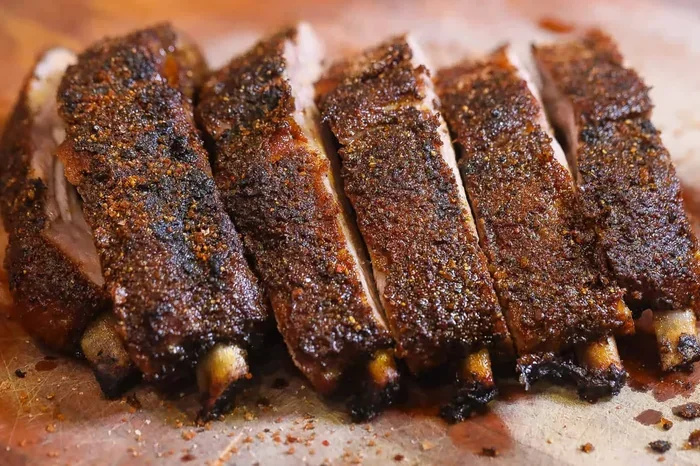
If you prefer a drier bark, you can skip the sauce and just let the ribs finish uncovered. This gives you a more intense smoky flavor and a chewier exterior.
Step Five: Rest And Serve
Once the ribs are done, take them out of the oven and let them rest for 10 to 15 minutes. This resting period allows the juices to redistribute throughout the meat. If you cut into them too soon, the juices run out and the ribs dry out quickly.
After resting, slice between the bones and serve. Your perfectly cooked individual ribs are ready to enjoy.
How To Know When Your Ribs Are Done
Timing is important, but it is not the only indicator of doneness. There are several reliable ways to tell when your ribs are ready to come out of the oven.
Use A Meat Thermometer
The most accurate method is to insert a meat thermometer into the thickest part of the meat, avoiding the bone. The internal temperature should read between 195 and 203 degrees Fahrenheit. At this range, the collagen has fully broken down and the meat is incredibly tender.
If your thermometer reads below 190 degrees, the ribs need more time. Above 205 degrees and you risk drying them out.
The Bend Test
Pick up the rack of ribs from one end using tongs or oven mitts. If the ribs bend and cracks form on the surface, they are done. If they bend but do not crack, they need a few more minutes. If they do not bend at all, they need significantly more cooking time.
The Toothpick Test
Insert a toothpick or skewer into the thickest part of the meat. If it goes in with almost no resistance, the ribs are tender and ready. If you feel any pushback, give them more time in the oven.
Common Mistakes To Avoid When Cooking Ribs
Even experienced cooks make mistakes with oven ribs. Here are the most common pitfalls and how to avoid them.
- Cooking at too high a temperature: This is the number one mistake people make. High heat sears the outside before the inside has time to become tender. Stick with 275 degrees for the best results.
- Skipping the foil wrap: Some people skip this step to get a crispier bark, but for tender ribs, the foil wrap is essential during the main cooking phase.
- Adding sauce too early: Barbecue sauce contains sugar that burns easily. Adding it too early creates a bitter, charred exterior. Always add sauce in the last 20 to 30 minutes.
- Not letting ribs rest: Cutting into hot ribs immediately releases all the juices onto the cutting board instead of staying in the meat.
- Using the wrong rack position: Place ribs on the middle rack for even heat distribution. The top rack browns too fast and the bottom rack gets too much direct heat.
- Over-seasoning with salt: Too much salt in your dry rub draws out moisture and creates a dry surface. Use a balanced rub and adjust salt levels carefully.
Expert Tips For Restaurant Quality Ribs At Home
Want to take your ribs to the next level? These expert tips make a huge difference.
Dry brine overnight. Apply your rub the night before and let the ribs sit uncovered in the refrigerator. This draws out moisture initially, then the meat reabsorbs it along with the seasoning. The result is deeper flavor and a better bark.
Add wood chips for smoke flavor. You can add soaked wood chips to a foil packet in the oven to simulate a smoky barbecue flavor. Hickory and apple wood chips work especially well with pork ribs.
Use apple cider vinegar in your wrap. A splash of apple cider vinegar in the foil adds a subtle tanginess that cuts through the richness of the pork. It also helps tenderize the meat during the cooking process.
Double wrap for extra moisture. If you are cooking spare ribs and want to be absolutely sure they stay juicy, use a double layer of foil. This traps even more steam and creates a braising effect.
Finish on a hot grill or under the broiler. For a crispy, caramelized exterior, finish your oven ribs under the broiler for 2 to 3 minutes. Watch them closely because they can burn quickly. This adds a beautiful charred finish that looks and tastes amazing.
Quick Tips For Perfect Ribs Every Time
- Always remove the membrane from the back of the ribs before cooking.
- Let ribs come to room temperature for 30 minutes before they go in the oven.
- Use heavy-duty foil to prevent tears during cooking.
- Place a baking sheet under the foil to catch any drips and make cleanup easier.
- Rotate the baking sheet halfway through for even cooking.
- Invest in a good instant-read meat thermometer for accurate results.
- Keep a spray bottle of apple juice handy to spritz the ribs if they look dry.
- Save your drippings from the baking sheet to make a quick pan sauce.
Frequently Asked Questions
Can I cook individual ribs at 350 degrees Fahrenheit?
Yes, you can cook ribs at 350 degrees Fahrenheit, but the cooking time will be shorter, around 1.5 to 2.5 hours depending on the rib type. The higher temperature increases the risk of drying out, so wrap the ribs in foil and check them frequently with a meat thermometer.
Should I boil ribs before putting them in the oven?
Boiling ribs before oven cooking is a technique some people use to speed up the process. However, it can leach out flavor and make the meat mushy. For the best results, skip the boiling step and rely on low oven heat to break down the connective tissue naturally.
How do I reheat leftover ribs without drying them out?
The best way to reheat ribs is to wrap them in foil with a splash of apple juice or broth. Heat them at 250 degrees Fahrenheit for about 15 to 20 minutes. The foil traps moisture and gently warms the meat without drying it out. Remove the foil for the last 5 minutes to refresh the bark.
Can I use frozen ribs for oven cooking?
It is best to thaw ribs before cooking them in the oven. Frozen ribs will cook unevenly because the frozen center takes much longer to reach the proper internal temperature. Thaw them in the refrigerator overnight for the safest and most even results.
What is the best barbecue sauce for oven ribs?
The best sauce depends on your personal preference. Kansas City style sauces are thick and sweet, Carolina vinegar-based sauces are tangy and thin, and Texas mop sauces are thin and peppery. Apply your chosen sauce during the last 20 to 30 minutes of cooking to prevent burning.
How do I know if my oven temperature is accurate?
Oven thermometers are inexpensive and incredibly helpful. Place one inside your oven to verify that the actual temperature matches the dial setting. Many ovens run 10 to 25 degrees hotter or cooler than what is displayed, which can significantly affect your cooking time.
Final Thoughts
Cooking individual ribs in the oven does not have to be intimidating. Once you understand the timing, temperature, and technique, it becomes second nature. The most important thing to remember is to be patient. Low and slow wins the race every time when it comes to ribs.
Now that you know how long to cook individual ribs in the oven, you have all the tools you need to create restaurant-quality barbecue ribs in your own kitchen. Start with a simple dry rub, wrap them in foil, and let the oven do the hard work. The aroma alone will be worth the wait.
Practice makes perfect, so do not be discouraged if your first attempt is not flawless. Every batch teaches you something new about your oven, your ribs, and your personal taste preferences. Before long, you will be able to adjust times and temperatures on instinct and produce incredible ribs with minimal effort.
Grab your favorite rack of ribs, preheat that oven, and get ready to enjoy some of the best barbecue you have ever made at home. Happy cooking!