How Long To Cook Stew In A Dutch Oven For Best Results
Learning how long to cook stew in a Dutch oven is the key to perfect results every time. A Dutch oven traps heat and moisture, creating tender meat and rich broth through low and slow cooking. Whether you make beef, chicken, or vegetarian stew, the right cooking time and temperature make all the difference.
There is nothing quite like a warm bowl of stew on a cold day. And when you make it in a Dutch oven, the results are even better. A Dutch oven traps heat and moisture perfectly. This means your stew comes out tender and full of flavor every single time.
But one question keeps coming up again and again: how long to cook stew in a Dutch oven? The answer depends on a few things. The type of meat you use matters a lot. The temperature you cook at also plays a big role. And whether you are using a stovetop or an oven changes things too.
In this guide, we will walk you through everything you need to know. You will learn the exact cooking time for different types of stew. We will share tips for getting the best results. And we will cover common mistakes to avoid. By the end, you will feel confident making Dutch oven stew at home.
Key Takeaways
- Beef stew takes 2 to 3 hours: Bone-in cuts need the full 3 hours for the best tender meat and rich broth.
- Chicken stew cooks faster: Plan for 1 to 1.5 hours when using bone-in chicken pieces like thighs and drumsticks.
- Vegetarian stew is quick: Root vegetables and beans need only 45 minutes to 1 hour in a Dutch oven.
- Searing is essential: Always brown your meat first to build deep flavor through the Maillard reaction.
- Low and slow is the rule: Cook at 300°F to 325°F in the oven or on a gentle simmer on the stovetop for the best results.
- Avoid common mistakes: Do not overcrowd the pot, skip searing, or lift the lid too often during cooking.
- Stew tastes better the next day: Let it rest after cooking, and the flavors will continue to develop overnight.
📑 Table of Contents
Why a Dutch Oven Is the Best Pot for Stew
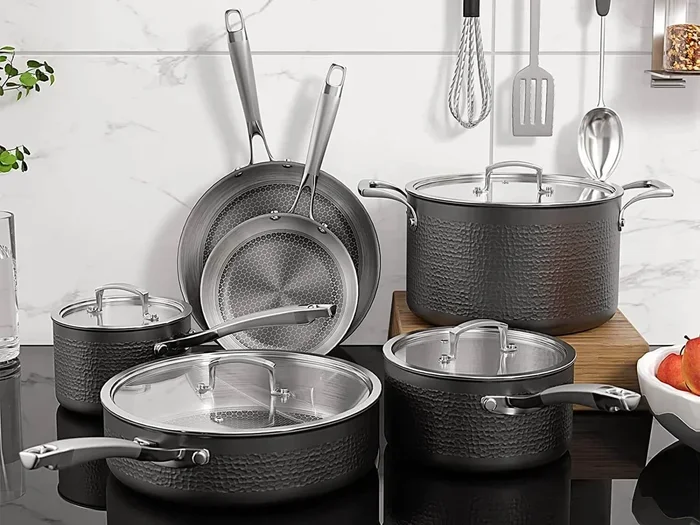
A Dutch oven is a heavy cooking pot with a tight-fitting lid. It is usually made of cast iron or enameled steel. These pots are built to last a lifetime. They distribute heat evenly across the bottom and sides. This is called heat distribution, and it matters a lot for stew.
When you make a stew recipe in a Dutch oven, the heavy lid keeps moisture locked in. The steam circulates inside the pot. This creates a self-basting effect. Your meat stays juicy, and your vegetables cook evenly. You get flavor development that you cannot get from a regular pot.
A Dutch oven also works on the stovetop and in the oven. This gives you more flexibility. You can sear your meat first on the stove. Then move the whole pot into the oven for slow cooking. This two-step process is key to great braising and makes an excellent oven-braised stew.
Many people call a Dutch oven a kitchen staple. It is one of those tools you reach for again and again. Once you learn how to use it for stew, you will wonder how you ever cooked without one. The heavy construction and snug lid make it ideal for simmering and long, slow cooking sessions.
How Long To Cook Stew In A Dutch Oven
The cooking time for stew in a Dutch oven varies. It depends on the meat, the temperature, and the recipe. Here is a general breakdown of what to expect.
Cooking Time for Beef Stew
Beef stew is the most popular type of Dutch oven stew. For beef stew, you will need about 2 to 3 hours of cooking time. The exact time depends on the cut of beef you choose.
If you use bone-in meat, plan for closer to 3 hours. The bones need more time to break down. This releases collagen into the broth. The result is a rich, silky texture that is hard to beat.
If you use stew meat that is already cut small, 2 hours may be enough. The pieces cook faster when they are smaller. But do not rush it. Low and slow is the way to go for the best tender meat. The collagen in the connective tissue needs time to dissolve into gelatin. This is what gives stew its signature silky mouthfeel.
The ideal temperature for beef stew is 300°F to 325°F in the oven. On the stovetop, you want a gentle simmer, not a rolling boil. Never let it boil hard. Boiling makes the meat tough instead of tender. The low and slow method is what transforms a tough cut into something melt-in-your-mouth.
Cooking Time for Chicken Stew
Chicken stew cooks faster than beef stew. You can expect a cooking time of about 1 to 1.5 hours. Chicken is much more delicate than beef. It does not need as long to become tender.
Use bone-in chicken pieces for the best flavor. Thighs and drumsticks work great. They have more fat and connective tissue. This means more flavor in your stew. The bones also help thicken the broth naturally as they cook.
If you use boneless chicken breast, the cooking time drops even further. About 45 minutes to 1 hour should do it. But be careful not to overcook. Chicken breast can dry out quickly. The tender meat you want from chicken stew can turn stringy if you cook it too long.
For the best results, start the chicken in the Dutch oven on the stovetop. Sear it lightly, then add your vegetables and liquid. Move the pot to a 325°F oven and let it do its work. The enclosed environment of the Dutch oven keeps the chicken moist throughout the entire cooking time.
Cooking Time for Vegetarian Stew
Vegetarian Dutch oven stew is a wonderful option. It also cooks faster than meat-based stew. Expect about 45 minutes to 1 hour of cooking time.
The key is to cut your root vegetables into similar-sized pieces. Potatoes, carrots, parsnips, and turnips all work well. They need enough time to soften but not turn to mush. Uneven pieces mean some vegetables are done while others are still hard.
You can also add beans or lentils. These add protein and make the stew more filling. Just keep in mind that dried beans may need extra cooking time. Soak them overnight if you can. This reduces the overall cooking time and ensures even tenderness.
For the best flavor development, sauté your vegetables before adding the liquid. This step makes a big difference. It caramelizes the natural sugars in the vegetables. The result is a deeper, richer taste that rivals any meat-based stew.
Slow Cooker vs Dutch Oven: Which Is Better for Stew
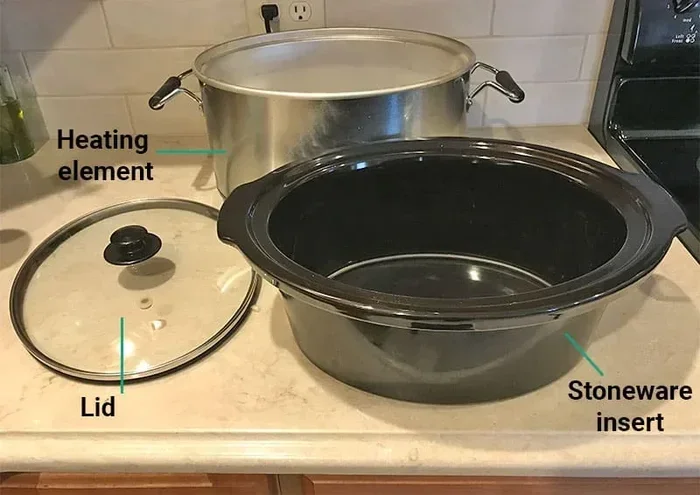
Many people wonder if a slow cooker is better than a Dutch oven for stew. Both have their advantages. A slow cooker is convenient. You can set it and forget it. But a Dutch oven gives you more control over the process.
With a Dutch oven, you can sear your meat first. This adds a layer of flavor that a slow cooker cannot match. The high heat of searing creates Maillard reactions. These reactions are what give stew its deep, complex taste. A slow cooker simply cannot reach the temperatures needed for proper searing.
A Dutch oven also heats up faster than a slow cooker. You can start your stew in less time. And cleanup is usually easier. A Dutch oven is one one-pot meal solution that does it all. It sears, simmers, and even goes from stovetop to table.
That said, a slow cooker is great for busy days. If you are at work all day, a slow cooker might be the better choice. But for the best flavor and texture, many cooks prefer the Dutch oven method. The ability to control heat precisely makes a real difference in the final dish.
Step-by-Step Guide to Cooking Stew in a Dutch Oven
Now that you know the cooking time, let us walk through the process. Making stew in a Dutch oven is simple. But a few key steps make all the difference.
Step 1: Prep Your Ingredients
Start by cutting your meat into bite-sized pieces. Pat the meat dry with a paper towel. This helps with searing. Dry meat gets a better brown crust than wet meat. The surface moisture creates steam, which prevents browning.
Cut your vegetables into even chunks. This ensures they cook at the same rate. Dice your onions, mince your garlic, and prepare any herbs you plan to use. Having everything ready before you start cooking is called mise en place. It makes the whole process smoother and less stressful.
Step 2: Sear the Meat
Place your Dutch oven on the stovetop over medium-high heat. Add a bit of oil. Once the oil is hot, add the meat in batches. Do not crowd the pot. Crowding lowers the temperature and causes steaming instead of searing.
Let each batch get a nice brown crust. This usually takes about 2 to 3 minutes per side. The brown bits on the bottom of the pot are pure flavor. Do not skip this step. Those browned bits are called fond, and they are the foundation of a great stew.
Step 3: Sauté the Vegetables
Remove the meat and set it aside. In the same pot, add your onions and garlic. Cook them until they are soft and fragrant. This takes about 3 to 5 minutes.
Add your harder vegetables next. Carrots and potatoes are good choices. Cook them for another 2 to 3 minutes. This step starts the flavor development process. The vegetables absorb the fond and any remaining meat juices. This builds a complex flavor base for the entire dish.
Step 4: Add Liquid and Return Meat
Pour in your broth or wine. Scrape the bottom of the pot with a wooden spoon. This lifts all those flavorful brown bits. They dissolve into the liquid and add richness to every bite.
Return the meat to the pot. Add any herbs like thyme, bay leaves, or rosemary. The liquid should cover about two-thirds of the meat. You can always add more later. A good rule of thumb is to add enough liquid that about half of each meat piece is submerged.
Step 5: Cover and Cook
Place the lid on the Dutch oven. If you are using the oven, preheat it to 300°F to 325°F. Then put the pot inside. If you are using the stovetop, bring the stew to a gentle simmer. Then lower the heat to the lowest setting.
Now comes the hardest part: waiting. The low and slow method is what makes Dutch oven stew so special. Resist the urge to lift the lid too often. Every time you lift the lid, you lose heat and steam. This slows down the cooking process and extends the total cooking time.
Check the stew after the recommended time. The meat should be fork-tender. It should fall apart easily. The vegetables should be soft but not mushy. Taste the broth and adjust the seasoning if needed. A splash of salt or a pinch of pepper can make a big difference at this stage.
Best Ingredients for Dutch Oven Stew
The ingredients you choose make or break your stew. A great stew recipe starts with quality ingredients. Here are the best options for your Dutch oven.
The Best Cuts of Meat
For beef stew, look for chuck roast. It has the right amount of fat and connective tissue. When cooked low and slow, it becomes incredibly tender. Brisket is another excellent choice. It has rich flavor and breaks down beautifully over time.
Short ribs are a premium option. They are fattier and more flavorful. But they also cost more. If you are on a budget, chuck roast is your best bet. It gives you great results without breaking the bank. The fat content in chuck roast melts during cooking, creating a luscious, silky broth.
For chicken, bone-in thighs are ideal. They stay moist during long cooking. Drumsticks work well too. Avoid chicken breast for stew. It tends to dry out over time. The bones and skin on thighs and drumsticks contribute gelatin and fat that enrich the entire dish.
Choosing Your Vegetables
Root vegetables are the classic choice for stew. Potatoes, carrots, parsnips, and turnips all hold up well. They absorb the flavors of the broth as they cook. Their natural starches also help thicken the liquid slightly.
Onions and garlic form the flavor base. Do not skip them. Celery adds a subtle depth that rounds out the taste. Mushrooms are also a great addition. They bring an earthy flavor that complements the meat beautifully. Fresh herbs like thyme and rosemary add aromatic complexity.
The Right Liquid
Beef broth is the most common base for stew. It provides a rich, savory foundation. You can also use a mix of broth and red wine. The wine adds acidity and complexity. Just make sure to cook off the alcohol first. This usually takes a few minutes of simmering with the lid off.
For chicken stew, chicken broth works best. Vegetable broth is the go-to for vegetarian versions. No matter which liquid you choose, make sure it covers the ingredients. The liquid reduces as it cooks. So start with enough. A good starting point is about 3 to 4 cups of liquid for a standard batch of stew.
Tips for Perfect Dutch Oven Stew Every Time
Even experienced cooks can improve their stew-making skills. Here are some tips that will help you get the best results every time you make Dutch oven stew.
Preheat Your Dutch Oven
One of the best tips for stew is to preheat the pot. Place your empty Dutch oven in the oven while it heats up. A hot pot starts searing immediately. This creates a better crust on the meat and locks in juices.
Be careful when handling a hot pot. Use oven mitts. A preheated Dutch oven is heavy and very hot. But the results are worth the extra care. Preheating also ensures even heat from the very start of cooking. This is especially important for achieving consistent tender meat throughout the pot.
Do Not Skip the Searing Step
Searing is not just about looks. It is about flavor. The Maillard reaction that happens during searing creates hundreds of new flavor compounds. These compounds give your stew its deep, complex taste. Without searing, your stew will taste flat and one-dimensional.
Make sure your pot and oil are hot before adding the meat. If the oil starts to shimmer and ripple, you are ready. Place the meat in the pot and leave it alone. Let it brown before flipping. This builds a flavorful crust that adds richness to the entire dish.
Use the Heavy Lid to Your Advantage
The heavy lid on a Dutch oven is one of its best features. It traps moisture and creates a self-basting environment. This is what makes braising so effective. The steam condenses on the lid and drips back down onto the food. This constant cycle of moisture keeps everything tender.
If your lid does not fit tightly, you can seal it with aluminum foil. Place a sheet of foil over the pot before putting the lid on. This creates an even tighter seal. More moisture stays inside, and your stew stays juicy. This trick is especially useful for long cooking sessions where moisture loss can become a problem.
Let the Stew Rest After Cooking
Once the cooking time is up, let the stew rest for 15 to 20 minutes. This allows the flavors to meld together. The broth thickens slightly as it cools. The meat absorbs some of the liquid and becomes even more tender.
Stew often tastes even better the next day. The flavors continue to develop as the stew sits in the fridge. If you are making stew meat ahead of time, this is great news. It means your one-pot meal can be even better on day two. The overnight rest gives the spices and herbs time to fully infuse the broth.
Common Mistakes That Ruin Dutch Oven Stew
Even with the best ingredients, some mistakes can ruin your stew. Here are the most common ones and how to avoid them.
Cooking at Too High a Temperature
This is the number one mistake people make. High heat makes the meat tough and chewy. It causes the outside to cook too fast while the inside stays raw. The proteins seize up and squeeze out moisture, leaving you with dry, rubbery chunks.
Always cook stew at a low temperature. In the oven, keep it between 300°F and 325°F. On the stovetop, maintain a gentle simmer. The goal is to slowly break down the connective tissue in the meat. This takes time. Patience is the key ingredient. Rushing the process with high heat will give you the opposite of the tender, fall-apart texture you want.
Using the Wrong Cut of Meat
Not all cuts of beef are good for stew. Lean cuts like sirloin or filet mignon will become dry and tough. They do not have enough fat or connective tissue to break down during cooking. These premium cuts are better suited for quick, high-heat cooking methods.
Stick to well-marbled cuts like chuck roast or brisket. These cuts have the fat and collagen needed for a tender, flavorful stew. The extra fat also adds richness to the broth. If you are unsure which cut to buy, ask your butcher for a recommendation. They will point you toward the best option for slow cooking.
Overcrowding the Pot
It can be tempting to fit everything into the pot at once. But overcrowding causes problems. The temperature drops too low. The meat steams instead of searing. You end up with gray, bland stew meat instead of beautifully browned pieces.
Cook in batches if you need to. It takes a little longer, but the results are much better. The same goes for vegetables. Give them room to cook evenly. A properly seared piece of meat adds depth and color that you simply cannot achieve through steaming.
Lifting the Lid Too Often
Every time you lift the lid, you lose heat and moisture. This extends the cooking time and can dry out your stew. The self-basting cycle gets interrupted. The temperature drop each time you lift the lid can add 15 to 20 minutes to your total cooking time.
Resist the urge to peek. Trust the process. Your Dutch oven is designed to cook with the lid on. If you need to check on things, do it quickly and put the lid back on right away. The heavy lid is doing important work trapping heat and moisture. Let it do its job.
Adding Vegetables Too Early
Some vegetables break down quickly. Potatoes and carrots can turn to mush if they cook for too long. This is especially true if you cut them into small pieces. Overcooked vegetables make your stew look unappetizing and feel mushy on the palate.
Add firmer vegetables earlier. Softer vegetables like zucchini or peas should go in during the last 30 minutes of cooking. This way, everything is done at the same time. And your vegetables keep their shape and texture. A good rule of thumb is to add vegetables based on how long they take to cook. Harder vegetables go in first, softer ones go in last.
Conclusion
Making stew in a Dutch oven is one of the most rewarding things you can do in the kitchen. The cooking time may seem long, but it is time well spent. The low and slow process transforms tough cuts of meat into tender, melt-in-your-mouth bites.
Whether you are making beef stew, chicken stew, or a vegetarian version, a Dutch oven delivers incredible results. The even heat distribution and moisture retention create flavors that are hard to match. Your stew will be richer, more tender, and more flavorful than anything from a regular pot. The braising technique works wonders, and the heavy lid ensures nothing dries out.
Remember the key points: sear your meat, use the right temperature, and be patient. Avoid the common mistakes we discussed. And most importantly, enjoy the process. Stew-making is slow, but it is also deeply satisfying. The aroma that fills your kitchen is its own reward.
Now that you know exactly how long to cook stew in a Dutch oven, it is time to put that knowledge to work. Grab your pot, pick a recipe, and get cooking. Your kitchen will smell amazing, and your family will love every bite. A perfect bowl of Dutch oven stew is always worth the wait.
Frequently Asked Questions
Can I cook stew in a Dutch oven on the stovetop?
Yes, you absolutely can. A Dutch oven works great on the stovetop for searing and simmering. Just keep the heat low to maintain a gentle simmer. The even heat of a Dutch oven makes it perfect for stovetop stew as well as oven-braised stew.
How do I know when stew is done?
The meat should be fork-tender and fall apart easily. The vegetables should be soft but not mushy. Taste the broth and check the seasoning. If the meat shreds gently with a fork, your stew is ready.
Can I leave stew in the Dutch oven overnight?
You can let it cool and leave it with the lid on for a few hours at room temperature. But for safety, refrigerate it within two hours. Stew often tastes even better the next day as the flavors continue to develop overnight in the fridge.
What temperature should I cook stew at in a Dutch oven?
For oven cooking, keep the temperature between 300°F and 325°F. On the stovetop, maintain a gentle simmer. The low and slow approach is what makes the meat tender and develops deep flavor in the broth.
Can I freeze Dutch oven stew?
Yes, Dutch oven stew freezes beautifully. Let it cool completely first. Store it in airtight containers or freezer bags. It will keep for up to three months. Reheat gently on the stovetop or in the microwave until warmed through.
Do I need to preheat the Dutch oven before cooking stew?
Preheating is optional but highly recommended. A hot pot creates a better sear on the meat right away. It also ensures even heat distribution from the start. Just be careful when handling the hot pot and use oven mitts.