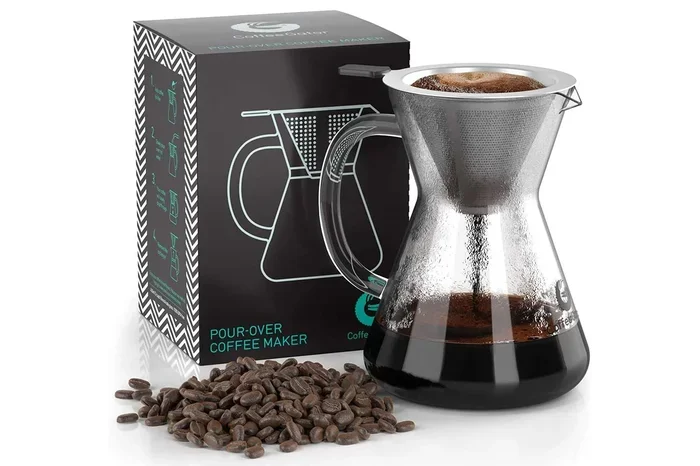
How To Clean Pour Over Coffee Maker And Keep It Perfect
Keeping your pour over coffee maker clean ensures every cup tastes fresh and flavorful. This guide covers everything from daily rinsing to deep descaling with vinegar and baking soda. You will learn simple maintenance routines that extend your brewer’s life and improve coffee taste.
A pour over coffee maker is one of the simplest and most rewarding ways to brew coffee at home. But here is the thing most people overlook. A clean brewer makes a dramatically better cup of coffee than a dirty one.
Over time, coffee oils, mineral deposits, and fine grounds build up inside your dripper. This affects the taste, slows down the flow, and can even introduce off flavors into your morning brew. The good news is that cleaning a pour over coffee maker takes just minutes and requires almost no special tools.
In this guide, we walk you through every step of keeping your pour over coffee maker spotless and functioning at its best. Whether you use a stainless steel dripper, a glass carafe, or a ceramic cone, these tips apply to all types. You will learn daily habits, deep cleaning methods, and simple maintenance routines that save you time and money.
If you also enjoy experimenting with different brewing methods, you might be interested in how to make coffee in a microwave oven as a quick alternative when you are short on time. But for the real coffee lover, a well-maintained pour over setup is unbeatable.
Key Takeaways
- Daily rinsing prevents buildup: A quick rinse after each brew keeps your pour over coffee maker in top shape.
- Vinegar and baking soda are your best friends: These natural cleaners remove mineral deposits and coffee residue effectively.
- Deep clean monthly: A thorough monthly cleaning session prevents clogs and keeps your brew tasting great.
- Replace filters regularly: Fresh filters mean better flow and cleaner coffee flavor.
- Dry after every wash: Proper drying prevents mold and keeps your equipment fresh.
- Use filtered water: It reduces mineral buildup and makes cleaning easier.
📑 Table of Contents
- Why Cleaning Your Pour Over Coffee Maker Matters
- What You Need to Clean a Pour Over Coffee Maker
- Daily Cleaning Routine for Your Pour Over Coffee Maker
- Deep Cleaning Your Pour Over Coffee Maker
- How Often Should You Clean Each Part?
- Common Mistakes People Make When Cleaning Pour Over Coffee Makers
- Expert Tips to Keep Your Pour Over Coffee Maker in Perfect Condition
- How Clean Coffee Equipment Improves Your Morning Cup
- Conclusion
Why Cleaning Your Pour Over Coffee Maker Matters
Many coffee drinkers focus on beans, water temperature, and grind size. All of those things matter. But a dirty brewer can undo all your hard work. Here is why regular cleaning is so important.
Coffee oils stick to the walls of your dripper and carafe. These oils go rancid over time, creating a bitter, stale taste that no amount of fresh beans can fix. Mineral deposits from tap water build up in the filter basket and drainage holes. This slows the flow rate and changes how water interacts with your grounds.
A clean pour over coffee maker also lasts much longer. Stainless steel and ceramic are durable materials, but they need proper care. Regular cleaning prevents staining, odor buildup, and permanent residue that becomes nearly impossible to remove.
Finally, think about hygiene. Coffee maker parts trap moisture and organic matter. Without regular cleaning, mold and bacteria can grow in hidden spots. A thorough cleaning routine keeps your daily coffee ritual safe and healthy.
What You Need to Clean a Pour Over Coffee Maker
Good news. You do not need expensive cleaning products. Most of what you need is already in your kitchen. Here is a simple list of supplies for your coffee maker maintenance routine.
Essential Cleaning Supplies
- White distilled vinegar: The best natural descaler for removing mineral deposits.
- Baking soda: A gentle abrasive that tackles stubborn coffee residue.
- Warm water: The foundation of every cleaning step.
- Soft sponge or cloth: Avoid abrasive scrubbers that can scratch surfaces.
- Dish soap: A small amount for cutting through coffee oils.
- Old toothbrush: Perfect for reaching tight corners and drainage holes.
Optional but Helpful Tools
- Coffee brush: A specialized brush designed for cleaning brew baskets and drippers.
- Microfiber cloth: Great for drying without leaving lint behind.
- Descaling solution: Store-bought options work well if you prefer a commercial product.
Once you have these supplies ready, you are set for any cleaning task. The key is consistency. A few minutes of care after each brew session makes a huge difference over time.
Daily Cleaning Routine for Your Pour Over Coffee Maker
The best way to keep your pour over coffee maker clean is to make it a habit. A quick daily routine takes less than two minutes and prevents most buildup problems.
Step 1: Remove and Discard the Filter and Grounds
After your coffee is done brewing, remove the paper or reusable filter. Throw away the used coffee grounds. Do not let grounds sit in the dripper. They harden quickly and become much harder to clean later.
Step 2: Rinse All Parts with Warm Water
Run warm water through the dripper, filter basket, and carafe or mug. This removes fresh coffee residue and oils before they have a chance to stick. A quick rinse is all you need on days when you brew your regular cup.
Step 3: Wash with Mild Dish Soap
Once or twice a week, wash the removable parts with a few drops of dish soap and warm water. Use a soft sponge to gently clean all surfaces. Rinse thoroughly to remove any soap residue.
Step 4: Dry Completely
This step is often overlooked but extremely important. Shake off excess water and let all parts air dry on a clean towel. Moisture trapped in the dripper creates the perfect environment for mold and bacteria. A completely dry pour over coffee maker stays fresh between uses.
Quick tip: Never stack wet parts together. Let them dry separately so air can circulate around every surface.
Deep Cleaning Your Pour Over Coffee Maker
Even with a solid daily routine, a deeper clean is necessary every few weeks. Deep cleaning removes mineral deposits, stubborn oils, and hidden buildup that a quick rinse cannot touch.
How to Descale with Vinegar
Mineral deposits from hard water are the number one enemy of any coffee equipment. Descaling your pour over coffee maker with white vinegar is simple and effective.
- Mix equal parts white vinegar and warm water.
- Pour the solution through the dripper as if you were brewing coffee.
- Let it sit for 15 to 30 minutes in the carafe or mug.
- Rinse thoroughly with clean water at least two to three times.
- Run a plain water cycle to remove any remaining vinegar taste.
The vinegar smell fades quickly, and the result is a sparkling clean brewer. Descale your pour over coffee maker once a month if you use tap water. If you use filtered water, every two months is usually sufficient.
How to Remove Stubborn Coffee Residue with Baking Soda
For tough stains and residue that vinegar cannot fully address, baking soda is your next best tool. Make a paste with baking soda and a small amount of water. Apply it to the stained areas inside the dripper and carafe. Let it sit for 10 to 15 minutes, then scrub gently with a soft sponge or old toothbrush.
Rinse thoroughly with warm water. The mild abrasion of baking soda lifts stains without scratching stainless steel or ceramic surfaces. This method works wonders on glass carafes that have developed coffee staining over time.
Cleaning the Filter Basket and Drainage Holes
The filter basket and small drainage holes are where buildup tends to hide. Use an old toothbrush to gently scrub these areas. Pay special attention to the small holes at the bottom of the dripper where coffee grounds and oils accumulate.
If you use a reusable metal filter, remove it and soak it in warm soapy water for 10 minutes before scrubbing. Reusable filters need more frequent deep cleaning because they trap more oils than paper filters.
Cleaning the Carafe or Mug
If you brew directly into a glass mug, it will develop coffee stains over time. Fill the mug with warm water and add a tablespoon of baking soda. Let it soak for 30 minutes, then scrub gently. For glass carafes, the same method works beautifully.
For really stubborn stains, fill the carafe with warm water and a splash of vinegar. Let it sit overnight. The stains will loosen significantly by morning, making them easy to wipe away.
How Often Should You Clean Each Part?
Different parts of your pour over coffee maker need attention at different frequencies. Here is a simple schedule to follow.
| Part | Cleaning Frequency | Method |
|---|---|---|
| Dripper cone | Rinse daily, deep clean weekly | Warm water rinse, vinegar soak monthly |
| Filter basket | Rinse after each use | Soap wash weekly, toothbrush scrub monthly |
| Carafe or mug | Wash after each use | Dish soap and sponge, baking soda for stains |
| Reusable filter | Rinse after each use | Deep soak weekly, replace every 6 months |
| Drainage holes | Check weekly | Toothbrush scrub, vinegar flush monthly |
Sticking to this schedule keeps your coffee tasting fresh and your equipment in excellent condition. Think of it as a small investment that pays off in better coffee every single morning.
Common Mistakes People Make When Cleaning Pour Over Coffee Makers
Even well-meaning coffee lovers sometimes make mistakes that damage their equipment or reduce cleaning effectiveness. Here are the most common ones to avoid.
Using Abrasive Cleaners or Scrubbers
Steel wool pads and harsh scrubbers can scratch stainless steel and ceramic surfaces. Scratches create tiny grooves where coffee oils and bacteria hide. Stick to soft sponges and cloths for all your coffee maker maintenance.
Skipping the Rinse After Descaling
Vinegar is excellent for descaling, but leaving vinegar residue behind affects the taste of your next brew. Always rinse thoroughly with clean water after any vinegar treatment. Run at least two full water cycles through the dripper to be safe.
Putting All Parts in the Dishwasher
While some manufacturers say their parts are dishwasher safe, hand washing is always gentler. The high heat and harsh detergents in dishwashers can degrade rubber seals, discolor glass, and damage ceramic coatings over time.
Ignoring Hard Water Issues
If you live in an area with hard water, your pour over coffee maker will need more frequent cleaning. Mineral buildup accelerates quickly in hard water conditions. Consider using filtered water to reduce deposits and make your cleaning routine easier.
Letting Parts Stay Wet
Leaving your dripper or carafe wet after washing invites mold and mildew. Always dry all parts completely before reassembling or storing them. A quick shake and a few minutes on a drying rack makes a big difference.
Expert Tips to Keep Your Pour Over Coffee Maker in Perfect Condition
Beyond the basics, there are a few expert-level tips that take your coffee equipment care to the next level.
Use filtered water. This is the single easiest way to reduce mineral buildup. Filtered water contains fewer minerals that form deposits inside your dripper. Your cleaning routine becomes simpler and your coffee tastes cleaner.
Clean immediately after brewing. Do not let coffee grounds sit in the dripper for hours. The longer they stay, the harder they are to remove. A quick rinse right after your last sip takes seconds and saves you work later.
Inspect rubber seals and gaskets regularly. If your pour over coffee maker has silicone seals or gaskets, check them for cracks or wear. Damaged seals can cause leaks and harbor bacteria. Replace them as needed to keep your brewer performing at its best.
Store your dripper in a dry, open space. Moisture trapped in closed cabinets encourages mold growth. Store your cleaned and dried pour over coffee maker in an open area where air can circulate freely.
Consider the same care you give other kitchen tools. Just as you would take care when warming up cold pizza in oven to preserve the crust and texture, treat your coffee equipment with the same respect. Proper care preserves quality and extends life.
Replace paper filters after every use. Never reuse paper filters. They tear easily and leave paper fibers in your coffee. For reusable metal filters, replace them every six months or sooner if you notice warping or damage.
How Clean Coffee Equipment Improves Your Morning Cup
Here is something that surprises many people. A clean pour over coffee maker actually changes the flavor of your coffee. Freshly cleaned equipment allows water to flow evenly through the grounds. This means better extraction and a more balanced cup.
When oils go rancid or mineral deposits build up, they introduce bitter, metallic, or stale flavors. These off tastes mask the natural complexity of your coffee beans. A clean brewer lets you taste the true character of your favorite roast.
Think about it this way. You would not cook a meal in a dirty pan and expect great results. The same principle applies to your daily coffee. Clean equipment is the foundation of great coffee.
If you are curious about other kitchen cleaning methods, you might also enjoy learning how to reheat something in the oven properly. The same attention to care and maintenance applies across all your kitchen tools and appliances.
Conclusion
Cleaning your pour over coffee maker does not have to be complicated or time-consuming. A few simple habits, done consistently, keep your brewer in perfect condition and your coffee tasting its best. Daily rinsing, weekly soap washing, and monthly deep descaling form the foundation of an effective cleaning routine.
Use natural cleaners like vinegar and baking soda to avoid harsh chemicals. Dry all parts thoroughly after every wash. Replace filters on schedule and inspect seals regularly. These small efforts add up to years of reliable, great-tasting coffee.
The next time you enjoy a perfect cup of pour over coffee, remember that the clean equipment behind it matters just as much as the beans and the technique. Treat your pour over coffee maker well, and it will reward you with exceptional flavor every single morning.
Frequently Asked Questions
Can I use lemon juice instead of vinegar to clean my pour over coffee maker?
Yes, lemon juice works as a natural alternative to vinegar for descaling. It has similar acidic properties that break down mineral deposits. However, vinegar is slightly stronger and more commonly recommended for coffee equipment cleaning.
How do I know when my pour over coffee maker needs descaling?
Signs include slower water flow, a white chalky buildup inside the dripper, or a change in coffee taste. If your coffee tastes slightly metallic or bitter despite using fresh beans, mineral deposits are likely the cause.
Is it safe to use bleach to clean my pour over coffee maker?
No, bleach is too harsh for coffee equipment. It can leave behind chemical residues that affect the taste of your coffee and may damage the materials of your dripper and carafe. Stick to vinegar, baking soda, and mild dish soap.
How often should I replace my reusable metal filter?
Replace your reusable metal filter every six months or sooner if you notice warping, tearing, or permanent staining. A worn filter does not strain coffee grounds as effectively, which can affect the clarity and taste of your brew.
Can I put my pour over coffee maker parts in the dishwasher?
While some parts may be labeled dishwasher safe, hand washing is always the gentler option. Dishwashers use high heat and strong detergents that can degrade seals, discolor glass, and shorten the lifespan of your equipment.
What is the best water to use in my pour over coffee maker to reduce cleaning?
Filtered or bottled water reduces mineral buildup significantly compared to tap water. Using filtered water means less calcium and magnesium deposits inside your dripper, which translates to less frequent deep cleaning sessions.