How To Make Coffee Cups With Cricut In Just Minutes
Discover how to make coffee cups with Cricut using simple tools and creative designs. This guide walks you through everything from choosing materials to pressing your final design, so you can create stunning custom coffee cups in minutes. Whether you are a beginner or a seasoned crafter, you will find practical tips and easy-to-follow steps to get professional-looking results every time.
There is something truly special about sipping your morning coffee from a cup you made yourself. If you have been searching for a fun and creative project, how to make coffee cups with Cricut is one of the most rewarding crafts you can try. With just a few simple tools and a bit of imagination, you can turn plain coffee cups into stunning works of art. This guide will show you exactly how to do it, step by step, so you can start creating beautiful custom cups right away.
The beauty of using a Cricut machine for coffee cup projects is the speed and precision it offers. You do not need to be an artist or have years of crafting experience. The machine does the hard work for you, cutting designs with incredible accuracy every single time. In just a few minutes, you can have a personalized coffee cup that looks like it came from a fancy boutique. Let us dive into everything you need to know.
Key Takeaways
- Easy Process: Making coffee cups with Cricut is simple and fast, even for beginners.
- Affordable Materials: You only need a few key supplies like vinyl, sublimation paper, or heat transfer materials.
- Endless Designs: Cricut lets you create unlimited custom coffee cup designs from your own artwork or templates.
- Durable Results: Properly applied designs last through many washes and uses.
- Great for Gifts: Custom coffee cups make thoughtful and personalized gifts for any occasion.
- Quick Turnaround: You can complete a full project in under 30 minutes.
📑 Table of Contents
What You Need To Make Coffee Cups With Cricut
Before you start, it helps to gather everything you need. Having all your materials ready makes the process smooth and enjoyable. Here is a simple list of what you will need for your Cricut coffee mug project.
Essential Supplies
- Cricut cutting machine – Any model works, including Cricut Explore or Cricut Maker.
- Blank coffee cups – Ceramic mugs or stainless steel tumblers work great.
- Heat transfer vinyl (HTV) – This is the most popular material for DIY coffee cups.
- Sublimation paper – Use this if you want full-color designs on your cups.
- Sublimation ink – Required for printing designs onto sublimation paper.
- Cricut Easy Press or heat press – This applies heat to transfer your design.
- Weeding tool – Helps you remove excess vinyl from your design.
- Transfer tape – Used to move vinyl designs onto the cup surface.
- Scissors or craft knife – For trimming and detailing.
Optional But Helpful Tools
- Design Space software – Cricut’s free design platform for creating and editing your graphics.
- Teflon sheet – Protects your design during the pressing process.
- Measuring tape – Ensures your design fits the cup properly.
- Lint roller – Keeps the cup surface clean before pressing.
You do not need to buy everything at once. Start with the basics and expand your supply collection as you grow more confident in your custom coffee cup making skills. Many crafters find that a basic Cricut starter kit covers most of what you need.
Step-By-Step Guide To Creating Coffee Cups With Cricut
Now comes the fun part. Follow these simple steps to create your very own DIY coffee cups with Cricut. Each step is designed to be easy to follow, so do not worry if you have never done this before.
Step 1: Design Your Coffee Cup Artwork
Open Cricut Design Space and create a new project. You can choose from thousands of free templates or upload your own artwork. Think about the style you want for your coffee cup design ideas. Some popular themes include:
- Funny quotes and sayings
- Floral and botanical patterns
- Geometric and minimalist designs
- Seasonal themes like holidays or birthdays
- Personalized names and monograms
Make sure your design fits the surface area of your cup. Most standard coffee cups have a printable area of about 8 to 9 inches around the circumference. Use the measuring tool in Design Space to size your artwork correctly. Keep your design simple for the best results, especially when you are just starting out.
Step 2: Cut Your Material
If you are using heat transfer vinyl, load it into your Cricut machine with the shiny side down. Choose the appropriate blade setting for vinyl in your machine settings. Press the flashing light button and let Cricut cut your design with precision. The machine will follow your design exactly, giving you clean and sharp edges every time.
For sublimation projects, print your design onto sublimation paper using a sublimation printer. Make sure to mirror your design before printing so it transfers correctly onto the cup. This is a crucial step that many beginners overlook when learning how to make coffee cups with Cricut.
Step 3: Weed Your Design
Weeding means removing the excess vinyl from around your design. Use your weeding tool to carefully peel away the unwanted areas. Take your time with this step because it directly affects the final look of your personalized coffee cup. A clean weeded design ensures sharp edges and a professional finish.
If you are working with small details or fine lines, use a hook weeding tool. These are especially helpful for intricate designs. Place your weeded design on a flat surface so it is easy to work with in the next step.
Step 4: Apply Transfer Tape
Cut a piece of transfer tape slightly larger than your design. Place it over the weeded vinyl and use a scraper tool to press it down firmly. This ensures the vinyl sticks to the tape properly. Next, carefully peel off the backing paper, leaving your design stuck to the transfer tape.
If any small pieces of vinyl lift off with the backing, simply press them back down with your scraper tool. This is a normal part of the process and happens to everyone, even experienced crafters.
Step 5: Position and Press Your Design
Place your coffee cup on a flat, heat-resistant surface. Position your design on the cup where you want it. Use a measuring tape or ruler to center the design properly. Once you are happy with the placement, carefully remove the transfer tape, leaving the vinyl design on the cup.
Now it is time to press. If you are using HTV, set your Cricut Easy Press to the recommended temperature for vinyl, usually around 305°F. Press for 15 to 30 seconds with firm, even pressure. For sublimation, you will need higher temperatures around 400°F and a pressing time of about 3 to 4 minutes.
Step 6: Cool and Reveal Your Creation
Let your coffee cup cool completely before handling it. This allows the design to set properly and bond with the cup surface. Once cooled, carefully peel off any transfer tape or protective sheets. Your beautiful custom Cricut coffee mug is now ready to use!
For the best durability, hand wash your custom cup or place it on the top rack of a dishwasher. Avoid using abrasive scrubbers directly on the design area. With proper care, your personalized cup will look great for a very long time.
Best Materials For Custom Coffee Cups
Choosing the right materials makes a huge difference in the final result. Not all materials work equally well for sublimation coffee cups or vinyl-decorated cups. Here is a closer look at the best options.
Heat Transfer Vinyl (HTV)
HTV is the most popular choice for beginners. It is affordable, easy to use, and comes in a wide variety of colors and finishes. You can find HTV in matte, glossy, metallic, and even glitter finishes. This material works best on plain ceramic mugs and gives you a raised, textured feel on the cup surface.
The main advantage of HTV is that you do not need a sublimation printer. You simply cut your design with Cricut and press it onto the cup. This makes it the fastest and most accessible option for anyone wondering how to make coffee cups with Cricut on a budget.
Sublimation Paper and Ink
Sublimation gives you full-color, photographic-quality designs that wrap all the way around the cup. The ink actually bonds with the coating on the cup, creating a smooth finish that feels like part of the cup itself. This method produces incredibly vibrant and durable results.
However, sublimation requires a sublimation printer and special sublimation paper. The cups also need to have a poly-coating for the ink to bond properly. While the upfront cost is higher, the results are worth it if you want professional-quality custom coffee cups with complex, colorful designs.
Infusible Ink Sheets
Cricut also offers Infusible Ink sheets, which are a great middle-ground option. These pre-printed sheets work with Cricut Easy Press and do not require a separate printer. You simply cut and press, similar to HTV. The results are vibrant and durable, making Infusible Ink a convenient choice for many crafters.
| Material | Ease of Use | Durability | Color Range | Cost |
|---|---|---|---|---|
| Heat Transfer Vinyl | Very Easy | High | Limited by vinyl colors | $5-$15 per sheet |
| Sublimation Paper | Moderate | Very High | Full color unlimited | $15-$25 per sheet |
| Infusible Ink Sheets | Easy | High | Full color unlimited | $10-$20 per sheet |
Design Ideas For Your Cricut Coffee Cups
Coming up with ideas for your coffee cup design ideas can be the most fun part of the whole process. The possibilities are truly endless when you have a Cricut machine at your disposal. Here are some popular themes that always turn heads.
Seasonal and Holiday Designs
Create festive cups for every season. Think pumpkin spice designs for fall, snowflakes for winter, flowers for spring, and sunshine for summer. These make wonderful gifts and sell well at craft fairs too. You can find thousands of free seasonal templates in Cricut Design Space to get started quickly.
Personalized Name Cups
Adding someone’s name to a coffee cup is a simple yet meaningful gesture. Use Cricut fonts to create elegant or playful name designs. These cups are perfect for birthdays, holidays, teacher gifts, or just because. The personal touch makes them feel extra special and shows you put thought into the gift.
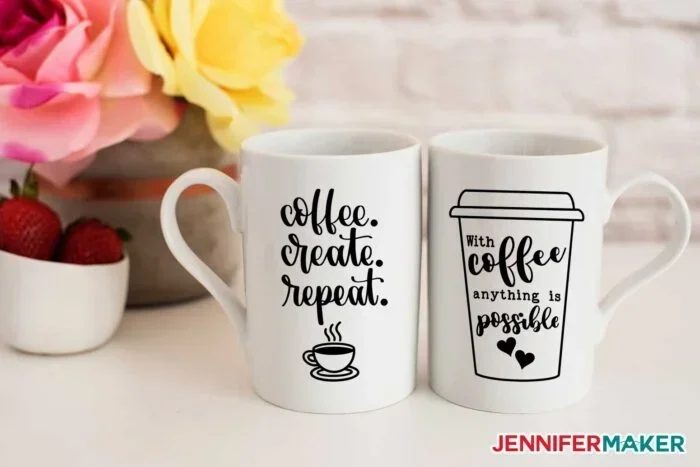
Inspirational Quote Cups
Motivational quotes on coffee cups are incredibly popular. Choose an inspiring phrase and pair it with a simple design element like a line, dot, or small graphic. These cups make great daily reminders of positivity and are perfect for starting your morning on the right note.
You can also create matching sets for couples, families, or friend groups. Imagine everyone in your family having their own custom mug with their name and a matching design. It adds a personal touch to your morning coffee routine that makes the experience feel extra special.
Tips For Making Perfect Coffee Cups Every Time
Even with a straightforward process, a few pro tips can elevate your results from good to great. These tips come from experienced crafters who have perfected their coffee cup crafting skills over time.
Always Prep Your Surface
Before pressing any design, make sure your coffee cup is clean and free of dust or oils. Use a lint roller to wipe down the surface. Any dirt or residue can prevent the design from adhering properly and may cause peeling over time. This small step makes a big difference in the longevity of your vinyl decal coffee cup.
Use a Teflon Sheet
Placing a Teflon sheet between your press and the cup protects your design from direct heat contact. It also helps distribute heat evenly across the entire surface. This simple trick prevents shiny marks or scorch lines on your finished cup. Most Cricut Easy Press kits come with a Teflon sheet included.
Test Your Settings First
Before pressing your final design, do a test run on a spare cup or scrap material. This lets you fine-tune your temperature, pressure, and timing settings. Every Cricut machine and heat press is slightly different, so a quick test ensures perfect results on your actual project. This is especially important when working with new materials or cup types.
Let It Cool Completely
Resist the urge to touch your design right after pressing. Allowing the cup to cool completely lets the material set properly. Rushing this step can cause designs to peel or crack. A good rule of thumb is to wait at least 5 to 10 minutes before handling your freshly pressed cup.
Store Your Supplies Properly
Keep your vinyl and sublimation materials stored in a cool, dry place away from direct sunlight. Heat and moisture can damage these materials and affect their performance. Proper storage extends the life of your supplies and ensures consistent results every time you create a new batch of personalized coffee cups.
Common Mistakes To Avoid
Learning from other people’s mistakes can save you time and frustration. Here are the most common errors crafters make when creating coffee cup design ideas with Cricut, and how to avoid them.
Skipping the measuring step. Always measure your cup before designing. A design that is too small or too large will not look right and may not transfer properly. Use the measuring tape to get accurate dimensions of the printable area on your cup.
Forgetting to mirror your design. When working with HTV, you must mirror your design before cutting. If you forget this step, your design will transfer in reverse. This mistake is easy to avoid but can ruin an entire project if not caught in time.
Using the wrong temperature or time. Every material has specific heat pressing requirements. Using too much heat or pressing for too long can damage both the cup and your design. Always check the manufacturer’s recommendations for your specific vinyl or sublimation materials.
Not weeding carefully enough. Rushing through the weeding process leaves behind small pieces of excess vinyl that can ruin the look of your finished cup. Take your time and use proper lighting to see all the small details clearly.
Ignoring cup compatibility. Not all cups work well with all methods. Some cups have coatings that prevent sublimation ink from bonding properly. Always check that your cup is compatible with the material you plan to use. If you are unsure, test on a small area first.
Final Thoughts
How to make coffee cups with Cricut is one of the most satisfying and enjoyable crafting projects you can try. The process is straightforward, the results are impressive, and the possibilities for creativity are truly unlimited. Whether you are making cups for yourself, your family, or as gifts for friends, each cup carries a personal touch that store-bought mugs simply cannot match.
Start with a simple design and a basic HTV project to build your confidence. As you become more comfortable, you can explore sublimation and more advanced techniques. The crafting community is full of inspiration, and Cricut Design Space offers endless resources to help you grow your skills. So grab your materials, fire up your Cricut machine, and start creating beautiful coffee cup design ideas today. Your perfect custom mug is just a few minutes away.
Once you finish your first cup, you will understand why so many crafters are obsessed with this project. There is something deeply satisfying about holding a cup you made with your own hands. The process is meditative, the results are beautiful, and the joy of gifting or using your creation makes every minute worthwhile. So what are you waiting for? Your next masterpiece is waiting to be made.
And if you enjoy making coffee cups, you might also enjoy learning how to make coffee in the microwave oven to pair with your handmade creation. There is something perfect about sipping a freshly made cup of coffee from a mug you crafted yourself.
Remember, crafting is all about having fun and expressing your creativity. Do not worry about perfection. Every cup you make will be unique, and that is what makes the process so special. Share your creations with friends and family, and inspire others to start their own DIY coffee cups journey. Happy crafting!
Also, if you are looking for more kitchen inspiration, check out how to warm up cold pizza in the oven for other great kitchen tips and tricks that complement your crafting hobby. And for those who love sweet treats alongside their coffee, learn how to heat a Cinnabon in the oven for the perfect coffee pairing experience at home.
Frequently Asked Questions
Can I use any Cricut machine to make coffee cups?
Yes, any Cricut machine model works for coffee cup projects. The Cricut Explore and Cricut Maker are the most popular choices, but even the Cricut Joy can handle basic designs. The key is to make sure you have the right materials and attachments for your specific machine model.
How long do Cricut coffee cup designs last?
With proper care, Cricut coffee cup designs can last for many years. HTV designs typically withstand 50 or more washes before showing signs of wear. Sublimation designs tend to be even more durable because the ink bonds directly with the cup coating rather than sitting on top of it.
Can I make coffee cups without a heat press?
Yes, you can use a Cricut Easy Press or even a household iron in a pinch. The Easy Press is recommended because it provides even heat distribution and consistent pressure. If using an iron, set it to the cotton setting and apply firm, steady pressure for the recommended time.
What type of coffee cup works best for Cricut projects?
Plain ceramic mugs work best for HTV projects because they provide a smooth, even surface. For sublimation, you need cups with a poly-coating that allows the ink to bond properly. Stainless steel tumblers also work well but require specific sublimation-compatible coatings.
Is it safe to put custom Cricut coffee cups in the dishwasher?
It is generally safe but hand washing is recommended for the longest-lasting results. If you do use a dishwasher, place the cup on the top rack and avoid high heat drying cycles. The harsh detergents and high temperatures in dishwashers can gradually fade designs over time.
Can children help make coffee cups with Cricut?
Children can help with simple parts of the process like choosing designs and picking colors. However, the cutting machine and heat press should only be operated by adults. Supervised kids can participate in the weeding and decorating steps safely with proper guidance.
=== CONCLUSION ===
How to make coffee cups with Cricut is a fun, creative, and rewarding project that anyone can enjoy. With the right materials, a little patience, and the steps outlined in this guide, you can create beautiful custom coffee cups in just minutes. Start simple, experiment with different designs, and soon you will be making cups for every occasion and season. The joy of holding a cup you made yourself is unmatched, and the skills you build will open the door to even more exciting Cricut projects. So gather your supplies, let your creativity flow, and start crafting your perfect coffee cup today.