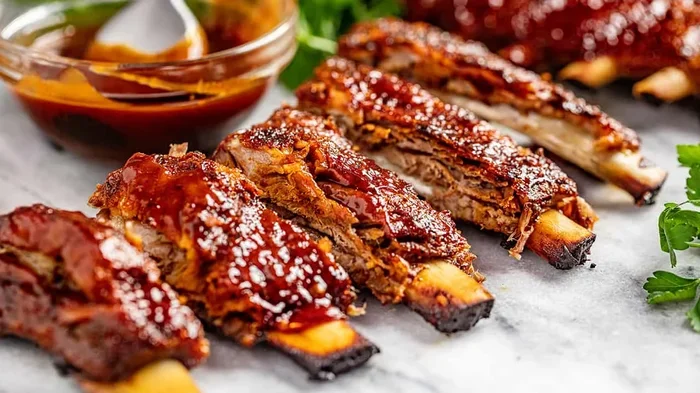
How To Cook Ribs In The Oven At 300 Like A Real Pro
Cooking ribs in the oven at 300°F is the best way to get tender, juicy, and flavorful ribs right in your kitchen. This guide walks you through every step of how to cook ribs in the oven at 300 like a real pitmaster. You will learn about picking the right ribs, preparing your rub, wrapping techniques, and timing so your ribs turn out perfect every time.
There is something magical about how to cook ribs in the oven at 300. You do not need a smoker. You do not need a backyard. All you need is a good rack of ribs, a simple rub, and a little patience. Your oven becomes your best tool for making restaurant-quality ribs right at home.
Many people think ribs are only for the grill or smoker. But oven cooking has some big advantages. You get more control over the heat. You do not worry about wind or rain. And the results are consistently amazing. Oven-baked ribs can be just as tender and flavorful as any barbecue pit masterpiece.
In this guide, I will walk you through every single step. From choosing the right rack to slicing and serving, you will know exactly what to do. Whether you are a beginner or a seasoned cook, this method will change how you make ribs at home. Let us get into it.
Key Takeaways
- Low and slow is the way to go: Cooking ribs at 300°F ensures tender, juicy meat that falls right off the bone.
- Remove the membrane first: Peeling off the thin membrane on the back of the rack makes ribs much more tender and flavorful.
- Use a two-stage method: Wrap ribs in foil partway through cooking for the best combination of smoke flavor and tender texture.
- A meat thermometer is essential: Internal temperature of 195°F to 203°F means your ribs are done and ready to eat.
- Rest your ribs before slicing: Letting ribs rest for 15 to 20 minutes keeps all the juices locked in.
- Bone-in ribs work best: They are easier to handle and give you a better texture compared to boneless cuts.
- Apple cider vinegar boosts flavor: A light spritz or mop adds moisture and a tangy kick to your ribs.
📑 Table of Contents
Why Cook Ribs In The Oven At 300 Degrees?
You might wonder why 300°F is the magic number. The answer is simple. This temperature hits the sweet spot between cooking too fast and cooking too slow. At 300°F, your low and slow cooking process breaks down the collagen in the meat. This makes the ribs tender without drying them out.
Here are some key reasons why this method works so well:
- Even heat distribution: Your oven surrounds the ribs with consistent warmth from all sides. This means no hot spots or uneven cooking.
- Better moisture retention: The enclosed oven space traps steam. This keeps your ribs juicy throughout the entire cook.
- Easier to manage: Unlike a grill where flames can flare up, an oven gives you a stable environment. You just set it and forget it.
- Great for any season: Rain or shine, hot or cold, your oven works the same every time. You can make ribs in the middle of winter just as easily as in summer.
- Less smoke and mess: No charcoal, no lighter fluid, no grease flare-ups. Your kitchen stays clean and your ribs stay delicious.
What Kind of Ribs Work Best?
Not all ribs are created equal. For oven cooking at 300°F, you have a few great options. Pork spare ribs are the classic choice. They have a good amount of fat and connective tissue that breaks down beautifully during the cook. Baby back ribs are leaner and cook a bit faster. They are also very tender and popular for a reason.
If you want something bigger and more beefy, bone-in ribs like beef short ribs also work well at this temperature. But for most home cooks, pork ribs are the go-to option. Here is a quick look at the main types:
Pork Spare Ribs vs Baby Back Ribs
Pork spare ribs come from the belly area. They are larger, fattier, and have more bone. They take a bit longer to cook but reward you with rich, deep flavor. Baby back ribs come from the top of the rib cage near the spine. They are smaller, leaner, and cook faster. Both types work great at 300°F.
For beginners, baby back ribs are a great starting point. They are more forgiving and cook in a shorter time. For experienced cooks who want bold flavor, spare ribs are hard to beat.
How To Prep Your Ribs Before Cooking
Preparation is where the magic really starts. Taking the time to prep your ribs properly makes a huge difference in the final result. This is the step many people skip, and it is why their ribs never turn out as good as they should.
Remove the Membrane
The membrane on the back of the rack is thin and papery. It does not soften during cooking. It can make your ribs chewy and tough. Removing it is one of the easiest ways to improve your ribs dramatically.
Here is how to do it:
- Flip the rack so the bone side is facing up.
- Find the thin membrane on the back of the bones.
- Slide a butter knife under the edge to loosen it.
- Grab the membrane with a paper towel for grip.
- Pull it off slowly and steadily. It should come off in one piece.
This takes about two minutes. Do not skip it. Your ribs will thank you later.
Apply Your Rib Rub
A good rib rub is the foundation of great flavor. You can buy a pre-made rub or make your own. A simple mix of brown sugar, paprika, garlic powder, onion powder, salt, and black pepper works wonders. The brown sugar caramelizes during cooking and creates a beautiful crust.
Apply the rub generously on all sides. Press it into the meat so it sticks. For the best results, let the rubbed ribs sit in the fridge for at least one hour. Overnight is even better. This gives the flavors time to penetrate the meat.
Bring the Ribs to Room Temperature
Take your ribs out of the fridge about 30 minutes before cooking. Letting them come to room temperature helps them cook more evenly. Cold ribs going into a hot oven can lead to uneven cooking. This small step makes a big difference in your oven-baked ribs result.
The Step-by-Step Cooking Process
Now we get to the heart of how to cook ribs in the oven at 300. Follow these steps carefully and you will have pro-level ribs every time.
Step 1: Preheat Your Oven
Set your oven to 300°F. Let it fully preheat before the ribs go in. This usually takes about 15 to 20 minutes. A properly preheated oven ensures the ribs start cooking at the right temperature from the very first minute.
Place a baking rack inside a large baking sheet or roasting pan. The rack lets air circulate around the ribs. This prevents the bottom from getting soggy. If you do not have a rack, you can crumple up aluminum foil into small balls and place them under the ribs.
Step 2: Place Ribs on the Rack
Put the ribs on the rack with the meat side facing up. Make sure they are not crowded. You want air to flow around the entire rack. If you are cooking a full rack, it might hang over the edges. That is totally fine.
Step 3: Cook Uncovered for the First Hour
Place the ribs in the oven uncovered. Cook them for about one hour at 300°F. This initial uncovered phase allows the surface to dry out slightly. This helps create a better bark or crust later on.
During this hour, the fat starts to render and the rub begins to form a flavorful crust. Do not open the oven door too often. Every time you open the door, heat escapes and your cooking time increases.
Step 4: Wrap in Aluminum Foil
After the first hour, take the ribs out. They should look slightly dried and the rub should be forming a nice crust. Now comes the wrapping step. This is a key part of the process.
Lay out two large sheets of heavy-duty aluminum foil. Place the ribs in the center. Add a few splashes of apple cider vinegar or apple juice. This creates steam inside the foil packet. The steam helps break down the connective tissue and makes the meat incredibly tender.
Wrap the ribs tightly, sealing the edges. Flip them so the seam side is up. This prevents steam from leaking out.
Step 5: Continue Cooking Wrapped
Put the wrapped ribs back in the oven. Cook for another one to two hours at 300°F. The total cook time for most racks of ribs is about two to three hours. The wrapping stage is where the ribs become fall-off-the-bone tender.
You can check for doneness by inserting a toothpick into the thickest part of the meat. If it goes in easily, your ribs are close to done. But the real test is the internal temperature.
Step 6: Unwrap and Sauce
After the wrapped cook, take the ribs out and carefully unwrap them. Be careful of the steam. It will be very hot. Now you can apply your favorite bbq sauce.
Brush the sauce on all sides. Put the ribs back in the oven uncovered. Cook for another 15 to 30 minutes. This lets the sauce caramelize and form a sticky, glossy glaze. Watch them closely during this stage so the sauce does not burn.
Step 7: Rest Before Serving
Once the ribs are done, take them out and let them rest for 15 to 20 minutes. This is just as important as the cooking itself. Resting allows the juices to redistribute throughout the meat. When you cut into them, every slice will be moist and flavorful.
Use a sharp knife or heavy-duty scissors to cut between the bones. Serve each bone as a individual portion. This is how barbecue restaurants do it, and it looks and feels professional.
How To Know When Ribs Are Done
Knowing when your ribs are fully cooked is one of the most important skills. Undercooked ribs are tough and chewy. Overcooked ribs are mushy and dry. You want that perfect sweet spot where the meat is tender but still has a slight bite.
Here are the best ways to check:
- Internal temperature: Use a meat thermometer to check the thickest part of the meat. The target is 195°F to 203°F. This is the range where collagen has fully broken down and the meat is perfectly tender.
- The bend test: Pick up the rack from one end with tongs. If it bends and cracks slightly on top, it is done. If it stays stiff, it needs more time.
- The toothpick test: Insert a toothpick into the meatiest part. If it goes in with no resistance, your ribs are ready.
- Visual cues: The meat should have pulled back from the edges of the bones by about a quarter inch. The surface should look glossy and caramelized.
Do not rely on time alone. Every oven is different and every rack of ribs varies in thickness. Use these methods together for the most accurate results.
Common Mistakes to Avoid
Even experienced cooks make mistakes with oven ribs. Here are the most common ones and how to avoid them:
Cooking at Too High a Temperature
Some people crank the oven to 350°F or higher to save time. This is a mistake. Higher temperatures cook the outside too fast while leaving the inside tough. The collagen in the ribs needs time and gentle heat to break down. Stick with 300°F for the best results.
Skipping the Wrap
Wrapping in foil is not cheating. It is a proven technique used by competition pitmasters. Without wrapping, your ribs may dry out during the long cook. The foil trap creates a mini steaming environment that keeps the meat moist and tender.
Not Removing the Membrane
This is the number one mistake home cooks make. That membrane blocks seasoning from reaching the meat. It also creates a chewy texture that no amount of cooking can fix. Always remove it before you start.
Opening the Oven Too Often
Every time you open the oven door, you lose heat and extend the cook time. Try to resist the urge to peek. Trust the process and let the oven do its work. Use the oven light to check on your ribs instead.
Saucing Too Early
Applying bbq sauce too early can cause it to burn and turn bitter. The sugar in most sauces caramelizes quickly and can scorch at high temperatures. Wait until the last 15 to 30 minutes to add your sauce.
Cutting Too Soon
Cutting into your ribs right after they come out of the oven releases all the juices. The meat will be dry and less flavorful. Be patient and let them rest for at least 15 minutes. Your wait will be rewarded.
Pro Tips for Perfect Oven Ribs Every Time
Here are some expert tips that separate good ribs from great ribs:
- Use a dry rub the night before. Overnight marination lets the flavors sink deep into the meat. This is a simple step that makes a noticeable difference.
- Spritz with apple cider vinegar. During the uncovered phase, spritz the ribs every 30 minutes. This keeps the surface moist and helps the rub form a better bark.
- Add wood chips for smoke flavor. Soak wood chips in water for 30 minutes. Wrap them in foil with holes poked in it. Place the packet on the oven floor. This adds a subtle smoky flavor without a smoker.
- Double wrap the foil. Heavy-duty foil or double layers prevent leaks. You do not want sauce or juices dripping onto the bottom of your oven.
- Let the ribs finish uncovered. The final uncovered bake with sauce creates that sticky, caramelized exterior everyone loves.
- Keep a spray bottle filled. A simple spray bottle with apple cider vinegar and water makes spritzing quick and easy.
- Use a baking sheet with edges. This catches any drips and makes cleanup much easier.
Quick Tips Summary
Here is a quick recap of the most important tips for making perfect ribs in your oven:
- Always remove the membrane before cooking.
- Use a generous amount of rub and let it sit overnight.
- Cook at a steady 300°F for even results.
- Wrap in foil after the first hour with a splash of liquid.
- Check internal temperature, not just time.
- Apply sauce only in the last 15 to 30 minutes.
- Rest the ribs for 15 to 20 minutes before cutting.
Following these tips consistently will elevate your ribs from ordinary to outstanding. How to cook ribs in the oven at 300 becomes second nature once you try it a few times.
Serving Suggestions
Great ribs deserve great sides. Here are some classic pairings that complete the meal:
- Coleslaw: The crunch and coolness of coleslaw balances the richness of ribs perfectly.
- Baked beans: A smoky, sweet bean dish complements the savory flavor of pork ribs.
- Cornbread: Sweet cornbread soaks up extra sauce and adds a comforting touch.
- Grilled corn: Charred corn on the cob is a natural pairing for any rib meal.
- Mac and cheese: Creamy, cheesy mac and cheese is a crowd-pleasing side dish.
Set these out on a big platter and let everyone serve themselves. Ribs are a social food. They taste better when shared with family and friends around the table.
Storing and Reheating Leftover Ribs
Leftover ribs are actually better the next day. The flavors have time to meld and the meat absorbs more of the sauce. Here is how to store and reheat them properly:
- Storing: Place cooled ribs in an airtight container. They will keep in the fridge for up to four days.
- Reheating in the oven: Wrap ribs in foil with a splash of apple juice. Reheat at 300°F for 15 to 20 minutes. This keeps them moist and tender.
- Reheating in the microwave: Place a damp paper towel over the ribs. Heat in short bursts of 30 seconds. This prevents them from drying out.
Never reheat ribs at high heat. It will dry them out quickly. Low and slow reheating mirrors the original cooking method and preserves the texture.
Conclusion
How to cook ribs in the oven at 300 is a skill anyone can master with a little practice and patience. The low temperature, the proper prep, and the wrapping technique all work together to create ribs that are tender, juicy, and full of flavor. You do not need expensive equipment or years of experience. You just need a good recipe and the willingness to follow the steps.
Remember to remove the membrane, apply a quality rub, and give your ribs the time they need at 300°F. The wrapping stage is what transforms tough ribs into fall-off-the-bone perfection. And never underestimate the power of a good rest before serving.
Once you try this method, you will never go back to rushed, overcooked ribs again. Your oven becomes your secret weapon for making barbecue-quality ribs any day of the week. Invite some friends over, make a big batch, and enjoy the compliments that come your way.
Now that you know the full process, it is time to fire up your oven and put these tips into action. Your first batch of oven-baked ribs might just become your new go-to recipe for any occasion.
Frequently Asked Questions
Can I use beef ribs with this oven method?
Yes, absolutely. Beef short ribs work well at 300°F, though they may need a longer cook time. Plan for about three to four hours for beef ribs. They have more connective tissue and benefit from the same low and slow approach that makes pork ribs so tender.
Do I need to flip the ribs during cooking?
No, you do not need to flip them. The oven surrounds the ribs with heat from all sides, so they cook evenly without flipping. Just make sure the meat side is facing up when you first place them on the rack.
Can I use a baking pan instead of a rack?
You can, but a rack works much better. A rack allows air to circulate underneath the ribs, preventing the bottom from becoming soggy. If you must use a pan, create foil balls underneath to elevate the ribs slightly.
How long do ribs take to cook at 300 degrees?
Most racks of ribs take about two to three hours total at 300°F. Baby back ribs tend toward the shorter end, while spare ribs may need closer to three hours. Always use the internal temperature and the bend test to confirm doneness rather than relying on time alone.
Is it better to wrap ribs in foil or butcher paper?
For oven cooking, aluminum foil is the easiest and most effective option. Butcher paper is great for smokers because it allows some smoke to pass through. In an oven, foil creates a better seal and traps more steam for tender results.
Can I make ribs ahead of time and reheat them?
Yes, ribs reheat very well. Cook them fully, let them cool, and store them in the fridge. Reheat gently in the oven wrapped in foil with a little liquid. Many barbecue pitmasters actually prefer the flavor of ribs after they have rested overnight in the fridge.