How To Make Bbq Chicken Tenders In The Oven From Scratch
Learn how to make BBQ chicken tenders in the oven from scratch using simple ingredients and easy steps. This recipe gives you crispy, juicy tenders without the hassle of deep frying. You will get restaurant-quality results right in your own kitchen with minimal effort and maximum flavor.
There is something magical about BBQ chicken tenders in the oven. They come out crispy on the outside, juicy on the inside, and loaded with that sweet, smoky flavor we all love. Best of all, you do not need a deep fryer or a lot of fancy equipment. Just a few simple ingredients, a hot oven, and about 30 minutes of your time.
Making BBQ chicken tenders in the oven from scratch is one of the easiest things you can do in the kitchen. Whether you are feeding a crowd, prepping meals for the week, or just craving a delicious snack, this recipe has you covered. I have made these countless times, and every single batch turns out perfectly. In this guide, I will walk you through every step so you can make them like a pro.
The beauty of oven-baked chicken tenders is that they are lighter and healthier than their fried counterparts. You still get that satisfying crunch, but without all the extra oil. If you have been looking for a homemade chicken tenders recipe that is quick, easy, and absolutely delicious, you are in the right place. Let us get started.
Key Takeaways
- Oven-baked BBQ chicken tenders are healthier: You get all the flavor with less oil and fewer calories compared to frying.
- The breading makes all the difference: A simple mix of breadcrumbs, spices, and a light coating of BBQ sauce creates a crispy, flavorful crust.
- Temperature and timing are critical: Baking at 425°F for about 20-25 minutes ensures juicy, fully cooked tenders every time.
- You can customize the recipe easily: Swap sauces, add different spices, or use gluten-free breadcrumbs to fit your diet.
- Meal prep is a breeze: These tenders can be baked ahead of time and reheated without losing their crunch.
- No special equipment is needed: Just a baking sheet, parchment paper, and your oven.
📑 Table of Contents
- Why Oven-Baked BBQ Chicken Tenders Are the Best Choice
- Ingredients You Will Need for Perfect BBQ Chicken Tenders
- Step-by-Step Instructions to Make BBQ Chicken Tenders in the Oven
- Tips for Getting Perfectly Crispy Chicken Tenders Every Time
- Common Mistakes to Avoid When Making BBQ Chicken Tenders
- Serving Suggestions and Fun Variations
- How to Store and Reheat Your BBQ Chicken Tenders
- Expert Insights on Making the Best BBQ Chicken Tenders
- Frequently Asked Questions About BBQ Chicken Tenders
- Conclusion
Why Oven-Baked BBQ Chicken Tenders Are the Best Choice
You might be wondering why I always recommend baking instead of frying. The answer is simple. Baking is easier, cleaner, and better for you. When you make BBQ chicken tenders in the oven, you use a fraction of the oil. That means fewer calories and less fat without sacrificing taste.
Health Benefits of Baking Over Frying
Deep frying chicken tenders adds a lot of extra calories from the oil absorbed during cooking. When you bake them, the chicken stays tender and moist on its own. You can still get a golden, crispy coating using breadcrumbs and a light spray of oil. This makes baked chicken tenders from scratch a great option for families who want healthier meals without giving up flavor.
- Lower in fat and calories: Baking uses little to no added oil.
- Easier cleanup: No grease splatters or oil to dispose of.
- Safer cooking method: No risk of oil splashing or burns.
- More consistent results: The oven cooks evenly every time.
Why Homemade Tastes Better Than Store-Bought
Store-bought frozen chicken tenders are convenient, but they often contain preservatives, excess sodium, and artificial flavors. When you make homemade BBQ chicken tenders from scratch, you control every ingredient. You can choose high-quality chicken, use your favorite BBQ sauce, and adjust the seasoning to your liking. The difference in taste is night and day.
Ingredients You Will Need for Perfect BBQ Chicken Tenders
One of the best things about this recipe is how simple the ingredient list is. You probably already have most of these items in your pantry. Here is everything you need to make BBQ chicken tenders in the oven that taste amazing.
For the Chicken
- Chicken tenderloins: About 1.5 pounds. You can also use boneless, skinless chicken breast cut into strips.
- Salt: Just a teaspoon to bring out the natural flavor.
- Black pepper: Half a teaspoon for a mild kick.
- Garlic powder: Half a teaspoon adds depth and savory flavor.
- Paprika: Half a teaspoon for a hint of smokiness and color.
For the Breading
- All-purpose flour: Half a cup for the base coating.
- Breadcrumbs: One cup of seasoned or plain breadcrumbs. Panko breadcrumbs work great for extra crunch.
- Eggs: Two large eggs to help the breading stick.
- Buttermilk: A quarter cup for extra tenderness and flavor.
For the BBQ Coating
- BBQ sauce: About half a cup of your favorite brand. You can use smoky, spicy, or honey BBQ depending on your preference.
- Honey: One tablespoon adds sweetness and helps the sauce caramelize in the oven.
- Apple cider vinegar: One teaspoon brightens up the flavor and balances the sweetness.
Step-by-Step Instructions to Make BBQ Chicken Tenders in the Oven
Now for the fun part. Follow these simple steps and you will have crispy oven chicken tenders ready in no time. Each step is designed to maximize flavor and texture.
Step 1: Prepare the Chicken
Start by patting your chicken tenderloins dry with paper towels. This is an important step because moisture prevents the breading from sticking properly. Season the chicken with salt, pepper, garlic powder, and paprika. Set the seasoned chicken aside on a clean plate while you prepare the breading station.
Step 2: Set Up Your Breading Station
You will need three shallow dishes. In the first dish, place the flour. In the second dish, whisk together the eggs and buttermilk. In the third dish, add the breadcrumbs. This three-step process is the classic breading method that ensures a thick, even coating on every tender.
Step 3: Bread the Chicken
Take each chicken strip and coat it in flour first. Shake off the excess. Then dip it into the egg mixture, making sure it is fully covered. Finally, press it into the breadcrumbs, coating all sides evenly. Place the breaded tenders on a clean plate or baking sheet lined with parchment paper.
Step 4: Preheat and Prep the Oven
Preheat your oven to 425°F. While it is heating up, line a baking sheet with parchment paper or a silicone baking mat. Lightly spray or drizzle the lining with cooking oil. This prevents sticking and helps the bottom of the tenders become crispy.
Step 5: Apply the BBQ Coating
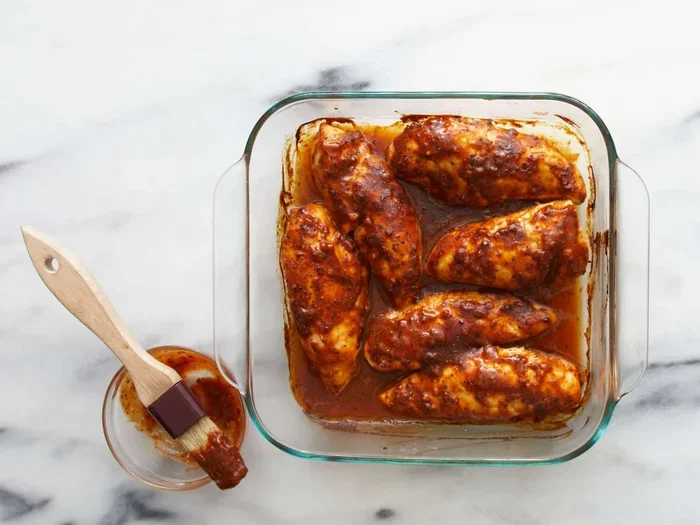
Place the breaded tenders on the prepared baking sheet. Bake them for 10 minutes at 425°F. This initial bake sets the breading. After 10 minutes, remove the tray and brush each tender generously with BBQ sauce. You can also mix the BBQ sauce with honey and apple cider vinegar for a homemade glaze. Return the tray to the oven.
Step 6: Bake Until Golden and Juicy
Bake for another 10 to 15 minutes. The internal temperature of the chicken should reach 165°F. The breading should be golden brown and firm to the touch. Remove from the oven and let the tenders rest for 3 to 5 minutes before serving. This resting time helps the juices redistribute, keeping the chicken moist.
Tips for Getting Perfectly Crispy Chicken Tenders Every Time
Getting that perfect crunch is all about technique. Here are some tried-and-true tips that will elevate your oven-baked crispy chicken every single time.
Use Panko Breadcrumbs for Extra Crunch
Panko breadcrumbs are lighter and flakier than regular breadcrumbs. They create a crunchier coating that stays crispy even after baking. If you want the best crispy chicken tenders, swap regular breadcrumbs for panko. You can find them in the international or Asian section of most grocery stores.
Do Not Skip the Resting Time
Letting the breaded tenders rest on a wire rack for 5 to 10 minutes before baking helps the coating set. This prevents the breading from falling off during cooking. It also promotes even crispiness throughout.
Use a Wire Rack Instead of a Flat Baking Sheet
Placing the tenders on a wire rack set over a baking sheet allows hot air to circulate underneath. This means the bottom gets just as crispy as the top. It is a small change that makes a big difference in your baked chicken tenders from scratch.
Double-Dip for a Thicker Coating
For an extra thick, restaurant-style crust, repeat the breading process. After the first breading, dip the tender back into the egg mixture and then into the breadcrumbs again. This creates a thicker, crunchier shell that holds up beautifully in the oven.
Common Mistakes to Avoid When Making BBQ Chicken Tenders
Even simple recipes can go wrong if you make common mistakes. Here are a few things to watch out for when making BBQ chicken tenders in the oven.
Overcrowding the Baking Sheet
It is tempting to fit as many tenders as possible on one sheet. But overcrowding traps steam and prevents the breading from crisping up. Leave space between each tender so hot air can flow freely. If you need to bake more, use a second baking sheet or cook in batches.
Using Cold Chicken Straight from the Fridge
Let your chicken come to room temperature for about 15 to 20 minutes before breading and baking. Cold chicken takes longer to cook, which can dry out the outside before the inside is done. Room temperature chicken cooks more evenly and stays juicier.
Not Checking the Internal Temperature
The only way to know for sure that your chicken is fully cooked is to use a meat thermometer. Insert it into the thickest part of the tender. The temperature should read 165°F. Guessing can lead to undercooked or overcooked chicken, and neither is enjoyable.
Applying BBQ Sauce Too Early
If you brush the BBQ sauce on too early in the baking process, it can burn and turn bitter. The sugars in the sauce caramelize quickly under high heat. Apply the sauce during the last 10 minutes of baking for the best flavor and color.
Serving Suggestions and Fun Variations
Once your BBQ chicken tenders are out of the oven, the fun is just getting started. There are so many ways to serve and customize them.
Dipping Sauces to Try
While these tenders are delicious on their own, a good dipping sauce takes them to the next level. Here are some ideas:
- Ranch dressing: The classic pairing that never disappoints.
- Honey mustard: Sweet and tangy, it complements the smoky BBQ flavor perfectly.
- Blue cheese dip: A creamy, bold option for those who love a kick.
- Sriracha mayo: Mix sriracha sauce with mayo for a spicy creamy dip.
Easy Side Dishes to Serve Alongside
BBQ chicken tenders pair well with a variety of sides. Here are some quick and easy options:
- Coleslaw: A crunchy, refreshing slaw balances the richness of the chicken.
- Baked potato wedges: Crispy on the outside, fluffy on the inside. A perfect match.
- Corn on the cob: Grilled or boiled, corn adds a sweet, summery touch.
- Simple green salad: Light and fresh, it keeps the meal balanced.
- Mac and cheese: For those days when you want a comforting, indulgent meal.
Fun Variations to Mix Things Up
Once you master the basic recipe, feel free to get creative:
- Spicy BBQ tenders: Add cayenne pepper or hot sauce to the breading mixture.
- Honey garlic BBQ tenders: Mix honey and minced garlic into the BBQ sauce for a sweet and savory twist.
- Buffalo-style tenders: Swap BBQ sauce for buffalo sauce and serve with blue cheese dip.
- Teriyaki BBQ tenders: Combine BBQ sauce with teriyaki sauce for an Asian-inspired flavor.
How to Store and Reheat Your BBQ Chicken Tenders
One of the great things about oven-baked chicken tenders is that they store and reheat beautifully. You can meal prep for the week or save leftovers for a quick lunch the next day.
Storing Leftovers
Let the tenders cool completely before storing. Place them in an airtight container and refrigerate for up to 4 days. You can also freeze cooked tenders for up to 3 months. Wrap each tender individually in plastic wrap, then place them in a freezer-safe bag.
Reheating Without Losing Crispiness
The key to reheating crispy tenders is using the oven, not the microwave. Preheat your oven to 375°F. Place the tenders on a wire rack and heat for 8 to 10 minutes. The microwave makes the breading soggy, so avoid it if you want to keep that crunch. For the best results, reheat at 375°F on a wire rack just like the original baking process.
Expert Insights on Making the Best BBQ Chicken Tenders
I have made BBQ chicken tenders in the oven hundreds of times, and I have learned a few things along the way. Here are some expert-level tips that separate good tenders from great ones.
Brine the Chicken for Extra Juiciness
Brining is the process of soaking chicken in a saltwater solution before cooking. It helps the meat retain moisture during baking. To brine your tenders, dissolve 2 tablespoons of salt in 4 cups of cold water. Submerge the chicken for 30 minutes to 2 hours. Pat dry before breading. This simple step makes a noticeable difference in juiciness.
Use Quality BBQ Sauce
The BBQ sauce is the star of this recipe. Do not use anything you would not eat on its own. Look for sauces with real ingredients and balanced sweetness. If you have a favorite local or artisan BBQ sauce, use it. The flavor of the sauce directly impacts the final taste of your tenders.
Let the Breading Set Before Baking
After breading, let the tenders sit on a wire rack for 10 to 15 minutes before placing them in the oven. This allows the coating to adhere to the chicken and form a slight seal. When it hits the hot oven, the breading crisps up more evenly and stays put.
Frequently Asked Questions About BBQ Chicken Tenders
Can I use frozen chicken tenderloins for this recipe?
Yes, you can use frozen chicken tenderloins, but you should thaw them completely before breading and baking. Thaw them in the refrigerator overnight or use the defrost setting on your microwave. Cooking frozen chicken directly can lead to uneven cooking, where the outside is done but the inside is still raw. Always ensure the internal temperature reaches 165°F for food safety.
How long do homemade BBQ chicken tenders last in the fridge?
Homemade BBQ chicken tenders in the oven last up to 4 days when stored in an airtight container in the refrigerator. Make sure they are fully cooled before sealing them in the container. If you notice any unusual smell, discoloration, or sliminess, discard them immediately. When in doubt, it is always better to be safe than sorry with leftover chicken.
Can I make these gluten-free?
Absolutely. Simply swap the all-purpose flour for a gluten-free flour blend and use gluten-free breadcrumbs. Many brands now offer excellent gluten-free panko options. The rest of the recipe stays exactly the same. The key is to make sure every ingredient in the breading station is certified gluten-free if you are cooking for someone with celiac disease or a gluten sensitivity.
What temperature should I bake BBQ chicken tenders at?
Bake your BBQ chicken tenders in the oven at 425°F. This high temperature ensures the breading crisps up quickly while the chicken cooks through evenly. If your oven runs hot or cold, you may need to adjust slightly. Using an oven thermometer can help you verify the actual temperature inside your oven, which is especially helpful for older models.
Can I air fry these chicken tenders instead?
Yes, you can absolutely use an air fryer to make BBQ chicken tenders. The process is very similar. Bread the tenders as directed, place them in the air fryer basket without overlapping, and cook at 400°F for 10 to 12 minutes. Spray them lightly with oil for extra crispiness. Brush with BBQ sauce during the last 3 to 4 minutes of cooking. Air-fried tenders come out incredibly crispy and are ready even faster than oven-baked ones.
Why are my chicken tenders dry after baking?
Dry chicken tenders are usually the result of overbaking or using chicken that was too lean. To avoid this, do not exceed the recommended baking time, and always use a meat thermometer to check for doneness at 165°F internal temperature. Brining the chicken before baking also helps retain moisture. Additionally, letting the chicken rest for 5 minutes after baking allows the juices to redistribute, keeping each tender moist and flavorful.
Conclusion
BBQ chicken tenders in the oven from scratch are one of the most satisfying meals you can make at home. They are crispy on the outside, juicy on the inside, and bursting with smoky, sweet flavor. The best part is that you do not need any special skills or equipment. With a few simple ingredients and about 30 minutes, you can create tender, delicious BBQ chicken tenders that rival any restaurant version.
This recipe is flexible, forgiving, and endlessly customizable. Whether you stick with the classic BBQ sauce coating or experiment with spicy, honey garlic, or buffalo variations, the results are always impressive. Use the tips and tricks shared in this guide to nail the breading, the timing, and the every single time.
Now that you know how to make BBQ chicken tenders in the oven, it is time to put your apron on and get cooking. Your family, friends, or even just your own hungry self will thank you. These tenders are perfect for weeknight dinners, game day snacks, lunch boxes, or weekend meal prep. Give this recipe a try today and discover how easy and rewarding homemade oven-baked chicken tenders can be.