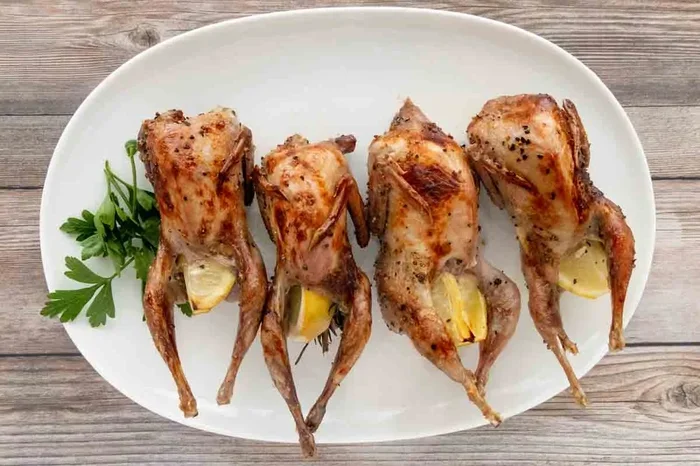
How To Cook Quail Breast In Oven For Juicy Delicious Results
Discover the secret to perfectly tender how to cook quail breast in oven with this foolproof method. Juicy quail breast comes from simple seasoning, precise temperature, and a proper rest. You will learn step-by-step techniques for oven-baked quail that stay moist and flavorful every time.
Learning how to cook quail breast in oven is easier than you think. These tiny birds deliver big flavor and impress any dinner guest. Oven-baked quail breast stays juicy when you follow a few simple steps. You do not need fancy equipment—just a hot oven and a little patience. This guide will walk you through every detail, from prep to plating.
Many people fear cooking game birds. They think quail is fancy or hard to handle. In reality, quail breast cooks fast and forgivingly. A little attention to temperature makes all the difference. You will end up with tender, flavorful meat that pairs well with many sides. Let us dive into the world of oven-baked quail.
Key Takeaways
- Room temperature matters: Always bring quail breast to room temp before baking for even cooking.
- Thermometer is essential: Use a meat thermometer to hit 165°F for safe, juicy results.
- Rest before cutting: Let the meat rest 5 minutes to retain its juices.
- Simple seasoning works best: A basic blend of salt, pepper, garlic, and herbs delivers big flavor.
- High heat sears the skin: Start with a hot oven to crisp the skin quickly.
- Bone-in vs. boneless: Both work well, but bone-in adds more flavor and moisture.
- Store leftovers properly: Keep cooked quail in the fridge for up to 3 days or freeze for longer storage.
📑 Table of Contents
Why Oven-Baked Quail Breast Is A Game-Changer
Oven-baked quail breast offers a perfect balance of convenience and elegance. The small size means it cooks quickly. You can have a restaurant-quality meal on the table in under 30 minutes. The oven provides even, surrounding heat that gently cooks the delicate meat. This method prevents the drying that often happens on a stovetop.
The Beauty Of Small Birds
Quail belongs to the small game bird family. Their breasts are petite and tender. A single quail breast serves one person generously. This makes portion control effortless. The bones add flavor during cooking, especially if you use bone-in pieces. Removing the bone after cooking gives you clean slices for plating. Many chefs prefer bone-in quail for its richer taste.
Nutritional Benefits
Quail meat is a nutritional powerhouse. It is high in protein and low in fat. Quail breast contains essential vitamins like B6 and B12. It also provides iron and zinc. Compared to chicken, quail has a more concentrated flavor. Eating small game birds like quail adds variety to your diet. It is a great way to enjoy lean, wholesome protein.
Essential Ingredients And Prep Work
Great quail starts with good prep. You do not need a long grocery list. A few simple ingredients let the natural flavor shine. Taking time to prepare the meat properly sets you up for success.
Selecting The Best Quail Breast
Look for quail breast that is pink and firm. The meat should have a mild, fresh scent. Avoid any packages with excess liquid or discoloration. You can buy boneless or bone-in quail breast. Both work well in the oven. Bone-in pieces retain more moisture during cooking. Boneless cuts cook slightly faster and are easier to slice. Choose organic or free-range quail when possible. These birds often have better flavor and texture.
Simple Seasoning Blend
A classic seasoning blend keeps things simple yet delicious. You will need:
- Kosher salt
- Freshly ground black pepper
- Garlic powder
- Dried thyme
- A pinch of smoked paprika
Mix these dry ingredients in a small bowl. The salt draws out moisture initially, which then gets reabsorbed. This process seasons the meat deeply. You can also use a store-bought poultry seasoning. Just check the label for added sugars or fillers.
Bringing Meat To Room Temperature
Take the quail breast out of the fridge 20 to 30 minutes before cooking. Cold meat cooks unevenly. The outside can overcook while the center stays raw. Room temperature meat responds better to oven heat. This small step makes a big difference in your final result. Pat the breast dry with paper towels before seasoning. Dry skin helps achieve a crispy texture.
Step-By-Step Oven Cooking Guide
Follow these steps for perfectly baked quail breast every time. The process is straightforward and hard to mess up.
Preheating And Pan Setup
Preheat your oven to 425°F. A hot oven sears the outside quickly. Use a cast-iron skillet or a small baking dish. Place a wire rack inside the pan if you have one. The rack allows air to circulate around the meat. It prevents the bottom from steaming. If you do not have a rack, use a shallow baking sheet. Lightly grease the pan with olive oil or butter.
Baking Time And Temperature
Season the quail breast generously on both sides. Place it in the preheated pan. Put the pan in the center of the oven. Bake for 12 to 15 minutes. The exact time depends on the thickness of the breast. Thinner cuts may need only 10 minutes. Thicker pieces might need up to 18 minutes. Use a meat thermometer to check the internal temperature. The safe temperature for poultry is 165°F at the thickest point. Insert the probe into the center of the breast without touching bone.
Resting The Meat
Remove the pan from the oven. Let the quail breast rest for 5 minutes. This resting period allows the juices to redistribute. Cutting too soon releases those juices onto the cutting board. The meat stays moist and tender. Tent the breast loosely with aluminum foil during resting. This keeps the heat in without overcooking the meat.
Key Takeaways: Preheat to 425°F, bake 12–15 minutes, use a thermometer, and rest for 5 minutes. These four steps guarantee success.
Pro Tips For Perfectly Juicy Quail
Even with a simple recipe, a few pro tricks elevate your quail. These tips help you avoid common pitfalls and achieve restaurant-quality results.
Use A Meat Thermometer
A meat thermometer is the single most important tool for cooking quail. Visual cues can be misleading. The meat might look done but still be under 165°F internally. Invest in a reliable instant-read thermometer. Remove the quail from the oven when it hits 160°F. The carryover heat will raise the temperature to 165°F during resting. This technique prevents overcooking and keeps the breast succulent.
Basting Techniques
Basting adds moisture and flavor. About halfway through cooking, open the oven and spoon hot pan juices over the breast. You can also melt butter with a little garlic and brush it on. The butter creates a golden, glossy finish. Basting works best for boneless quail breast. For bone-in pieces, the natural juices baste the meat from within. You can still spoon some pan drippings over the skin for extra crispness.
Avoid Overcooking
Quail breast dries out quickly once it passes 165°F. Set a timer and stay nearby. The difference between juicy and dry is just a few minutes. If you are new to cooking quail, pull it out a touch early. Carryover cooking will finish the job. Remember that the meat continues to cook on the hot pan even after removal.
Quick Tips:
- Always dry the surface before seasoning for better browning.
- Do not crowd the pan; cook one breast per serving for even heat.
- Let the oven preheat fully before inserting the pan.
- Use a digital thermometer for the most accurate reading.
- Save the pan juices for a quick pan sauce.
Flavor Variations And Serving Ideas
Once you master the basic method, you can experiment with flavors. Quail breast pairs beautifully with many seasonings and accompaniments.
Herb Butter Finish
Make a compound butter by mixing softened butter with chopped fresh herbs. Rosemary, sage, and parsley work wonderfully. Roll the butter into a log using plastic wrap. Chill it until firm. After resting the quail, slice a coin of herb butter and place it on top. The butter melts slowly, creating a rich, savory sauce. This technique adds a restaurant touch to your home cooking.
Pairing With Sides
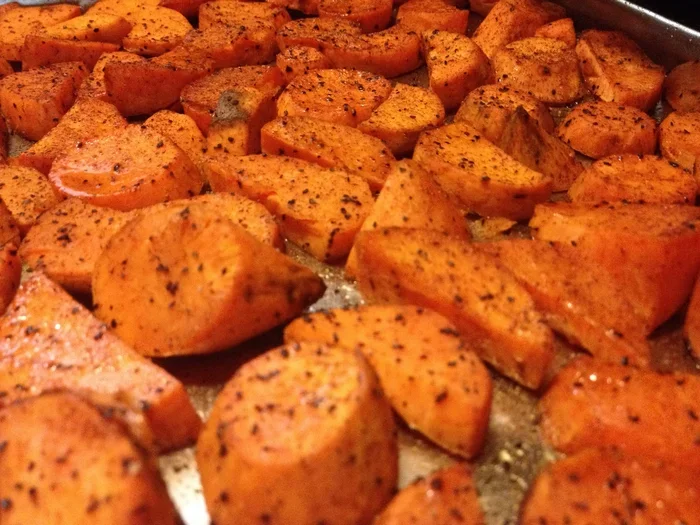
Quail breast works with a wide range of sides. Roasted root vegetables like carrots and parsnips complement the gamey flavor. A bright salad with arugula and lemon vinaigrette cuts through the richness. Creamy polenta or mashed potatoes absorb the pan juices beautifully. For a lighter option, serve with steamed green beans and lemon zest.
Storing Leftovers
Cooked quail breast stores well in the refrigerator. Place it in an airtight container within two hours of cooking. It stays fresh for up to 3 days. Reheat gently in a skillet with a splash of broth. Avoid microwaving, which can dry out the meat. You can also freeze cooked quail for up to 3 months. Thaw overnight in the refrigerator before reheating.
Seasoning Comparison Table
| Seasoning Style | Key Ingredients | Best Paired With |
|---|---|---|
| Mediterranean | Olive oil, lemon zest, oregano, garlic | Roasted vegetables, couscous |
| Herb Butter | Butter, thyme, rosemary, sage | Creamy polenta, crusty bread |
| Spicy | Cayenne, smoked paprika, cumin, brown sugar | Black beans, corn tortillas |
| Asian-Inspired | Soy sauce, ginger, honey, sesame oil | Steamed rice, stir-fried greens |
Expert Insights: Chef Maria Lopez says, “The key to perfect quail is not overcomplicating it. Let the bird shine with simple salt, pepper, and a hot oven. Resting is non-negotiable—those five minutes make the difference between good and unforgettable.”
Common Mistakes To Avoid
Even experienced cooks can slip up with quail. Knowing these mistakes helps you steer clear of disappointment.
Skipping The Rest
Cutting into quail immediately after pulling it from the oven is the most common mistake. The juices run out onto the plate, leaving dry meat. Always rest the breast for at least 5 minutes. Tent it loosely with foil. This simple pause locks in moisture and improves texture significantly.
Wrong Oven Temp
Cooking at too low a temperature dries out the breast. The meat takes too long to reach safe internal heat. On the other hand, too high a temperature burns the outside before the center cooks. Stick to 425°F for a balanced result. If your oven runs hot, reduce the temperature by 25 degrees and check early.
Not Letting It Come To Room Temp
Placing cold quail breast straight into the oven creates uneven cooking. The outside overcooks while the center lags behind. Always temper the meat for 20 to 30 minutes. This small habit ensures consistent doneness from edge to center. It is one of the easiest ways to improve your oven-baked quail.
Overcrowding The Pan
Crowding the pan traps steam and prevents proper browning. Each breast needs space for hot air to circulate. If you are cooking multiple quail, use two pans or bake in batches. Overcrowding leads to soggy skin and uneven color. Give each piece its own real estate in the oven.
Mastering how to cook quail breast in oven is a rewarding skill. You gain the ability to prepare a delicate, flavorful dish with minimal effort. The combination of simple ingredients, precise temperature, and proper resting delivers consistently juicy results. Practice the basic method once, and you will never forget it. Quail breast becomes a go-to option for elegant weeknight dinners or special occasions.
Start with the fundamental recipe. Once you feel confident, explore the flavor variations. Try the Mediterranean blend one week and the spicy rub the next. Each variation brings new dimensions to the same simple cut of meat. Your family and guests will appreciate the effort you put into this small but mighty bird.
Remember that cooking quail is forgiving. The meat is small and cooks fast, leaving little room for error. But even if you slightly overcook it, a good sauce can rescue the dish. Keep learning, keep experimenting, and enjoy the process. The oven is your best tool for unlocking the full potential of quail breast.
Frequently Asked Questions
Can I use frozen quail breast for this recipe?
Yes, you can use frozen quail breast, but thaw it completely first. Place it in the refrigerator overnight or use the cold water method. Cooking frozen meat in the oven leads to uneven results. The outside may overcook while the center remains thawed. Always pat the thawed breast dry before seasoning.
How do I know if quail breast is done without a thermometer?
Without a thermometer, check for clear juices when you pierce the thickest part. The meat should feel firm but still springy. Cut into the center and look for a slight pinkness. Fully cooked quail breast is white throughout with no traces of red. However, a thermometer remains the most reliable method for food safety.
What is the best way to reheat leftover quail breast?
Reheat leftover quail in a skillet over low heat with a splash of broth or water. Cover the pan to trap steam and keep the meat moist. Heat for 3 to 4 minutes, turning once. Avoid high heat, which dries out the delicate breast. Microwaving is not recommended because it heats unevenly.
Should I remove the skin before cooking quail breast in the oven?
Leave the skin on during cooking. It acts as a protective layer that traps moisture and renders into crispy goodness. After baking, you can remove the skin if desired, but many people enjoy the texture and flavor it adds. The skin helps the seasoning adhere better to the meat.
Can I cook quail breast on a baking sheet without a rack?
Yes, you can cook quail directly on a lined baking sheet. Place the breast on a small piece of parchment paper to prevent sticking. The result will be slightly less crispy on the bottom compared to using a rack. To get even browning, flip the breast halfway through cooking. A rack is ideal but not essential.
How long does it take to cook quail breast at 375°F instead of 425°F?
Lowering the temperature to 375°F increases cooking time to about 18 to 22 minutes. The meat will cook more gently, which can help very thin cuts stay moist. However, the skin will not crisp as much. For the best balance of juicy interior and crispy skin, 425°F is recommended. Always use a thermometer to check doneness regardless of temperature.