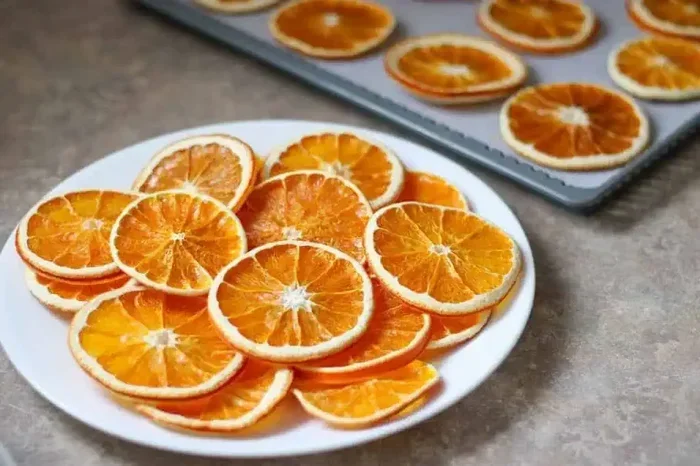
How To Dry Out Oranges In The Oven For Sweet Treats
How to dry out oranges in the oven is the easiest way to make delicious, chewy orange chips and candied peels at home. With just a few simple steps, you can turn fresh citrus into sweet treats that last for months. This guide covers preparation, drying times, and creative uses for your oven-dried oranges.
There is something truly magical about turning a simple orange into a chewy, sweet, and tangy snack right in your kitchen. How to dry out oranges in the oven is a question many home bakers and snack lovers ask, and the answer is surprisingly simple. With just a few household items and a little patience, you can create dried orange slices that rival any store-bought treat. This method unlocks a world of sweet treats and homemade dried fruit snacks without any added preservatives. You will learn the exact steps, temperatures, and tricks to get perfectly crispy orange chips every single time.
Drying citrus fruits like oranges is not a new idea. People have been citrus drying for centuries to preserve the harvest. Today, the oven method makes this ancient practice accessible to everyone. Whether you want to make candied orange peels, fruit leather, or just a healthy dried orange snack, your oven can do the work. No fancy food dehydrator is needed. This guide will walk you through the entire process from prep to storage.
By the end of this article, you will know how to select the best oranges, slice them evenly, set the right oven temperature, and dry them to perfection. You will also discover creative ways to use your oven-dried oranges in baking, cocktails, and snack ideas. Let us dive into the wonderful world of drying oranges in the oven and start making delicious treats today.
Key Takeaways
- Low heat is key: Use 170°F to 200°F and never rush the process.
- Uniform slices matter: A mandoline or sharp knife ensures even drying.
- Parchment paper prevents sticking: Always line your baking sheets.
- Flip halfway through: This gives you perfectly dried orange chips on both sides.
- Cool completely before storing: Trapped moisture leads to mold and spoilage.
- Get creative with uses: From tea to baking to cocktail garnishes, dried oranges are incredibly versatile.
📑 Table of Contents
The Magic of Oven-Dried Oranges
Oven-dried oranges are a delightful way to enjoy citrus year-round. The gentle heat of the oven removes moisture while concentrating the natural sugars. This process creates a sweet and tangy flavor that is perfect for snacking or baking. You can make orange chips that are crispy, or leave them chewy for a different texture.
The beauty of this method is its simplicity. You do not need a special dehydrator. Your regular kitchen oven works perfectly. The key is low heat and good air circulation. I will share the exact settings that work best for drying oranges in the oven. You will also learn how to adjust the process for different orange varieties like navel, Valencia, or blood oranges.
The Science Behind Drying
When you apply gentle heat, water molecules inside the orange slices begin to evaporate. The oven’s low temperature slowly draws out moisture without cooking the fruit. This preserves the bright citrus oils in the peel and the natural sugars in the flesh. The result is a dried orange snack that is intensely flavorful and naturally chewy. Understanding this simple science helps you avoid the mistake of turning up the heat, which would cook the fruit instead of drying it.
Why Choose the Oven Method
Choosing the oven method over a food dehydrator has several advantages. First, almost everyone has an oven. Second, ovens provide consistent heat. Third, you can dry large batches on multiple baking sheets. The oven method also allows you to candied orange peels or make orange zest chips right alongside the slices. This versatility makes the oven the go-to tool for citrus drying.
Another benefit is control. You can see the oranges drying and adjust the temperature if needed. With a dehydrator, you often have to guess the timing. The oven gives you visual feedback. You can watch the edges crisp up and the centers dry evenly. This hands-on approach makes the process more rewarding. Plus, the aroma of drying citrus fills your home with a warm, inviting scent that everyone loves.
Gathering Your Ingredients and Tools
Before you start drying oranges in the oven, gather everything you need. Having all tools ready makes the process smooth and fun. The ingredient list is short, and the equipment is likely already in your kitchen.
Choosing the Right Oranges
Select fresh, firm oranges with smooth skin. Organic oranges are ideal because you will use the peel. The orange zest adds wonderful flavor to dried orange snacks. Avoid oranges with soft spots or blemishes. Thick-skinned varieties like navel oranges work great for slices. Thin-skinned Valencia oranges dry quickly and become chewy. You can mix varieties for a colorful fruit leather or snack mix.
Look for oranges that are heavy for their size. That indicates plenty of juice and flavor. Wash them thoroughly under cool running water, even if you plan to peel them. This removes any residue and ensures clean homemade dried fruit. If you are using conventional oranges, consider scrubbing them with a vegetable brush to remove any wax coating.
Essential Equipment
- Sharp knife or mandoline slicer: For even, thin slices.
- Baking sheets: Rimmed sheets work best.
- Parchment paper or silicone mats: Prevents sticking.
- Wire cooling rack: Allows air circulation on all sides.
- Kitchen timer: Keeps track of drying time.
- Airtight containers: For storage after drying.
A mandoline slicer is a game-changer for uniform thickness. Uniform slices dry evenly, which is crucial for perfect oven-dried oranges. If you do not have a mandoline, a sharp chef’s knife works fine. Just aim for slices about 1/4 inch thick. Too thick and they take longer to dry. Too thin and they may crumble. You can also use a food processor with a slicing disc for faster prep, but the mandoline gives the most control. Always use a hand guard when working with a mandoline to protect your fingers.
Step-by-Step: How To Dry Out Oranges In The Oven
This is the core of the entire process. Follow these steps closely and you will have perfect results every time.
Slicing and Prepping the Oranges
Start by washing the oranges thoroughly. Dry them with a clean towel. Place the orange on a cutting board and slice off both ends. Stand the orange upright and carefully slice it into rounds about 1/4 inch thick. Try to keep the slices uniform. Uneven slices dry at different rates, leading to some burnt and some still moist.
Optional step: peel the oranges if you only want the flesh. For candied orange peels, leave the peel on and slice the peel into strips. You can also use a vegetable peeler to create long zest strips. The orange zest dries into tiny, flavorful chips that are amazing in tea or on top of dried orange snacks. If you are using the zest, pat it dry with a paper towel before placing it on the tray. This small step removes surface moisture and speeds up the initial drying phase.
The Low and Slow Drying Process
Preheat your oven to the lowest setting, ideally between 170°F and 200°F (75°C to 95°C). If your oven does not go below 200°F, prop the door open with a wooden spoon to allow moisture to escape. Line your baking sheets with parchment paper. Arrange the orange slices in a single layer without overlapping. Leave a small gap between each slice for air flow.
Place the trays in the oven on the middle rack. The oven method relies on gentle, indirect heat. Do not increase the temperature to speed things up. High heat will cook the oranges instead of drying them. You want to evaporate the water slowly, preserving the natural sugars and bright citrus flavor. This is the secret to sweet treats that taste like sunshine. Set a timer for 2 hours and check on the progress.
Checking for Doneness
Drying times vary based on orange thickness, moisture content, and oven accuracy. Check the oranges after 2 hours. They should feel dry to the touch and slightly leathery. The edges may curl slightly. If the centers are still moist, continue drying. Total time usually ranges from 3 to 6 hours. Flip the slices halfway through for even drying.
For crispy orange chips, dry them until they snap when bent. For chewy dried orange snacks, remove them when they are still slightly pliable but not wet. Let them cool completely on a wire rack. They will firm up as they cool. The final texture is the hallmark of well-made oven-dried oranges. If you are drying candied orange peels, they will become sticky and glossy as they cool. That is a sign of perfect candied peel.
Batch Drying Tips
If you have a large harvest, you can dry multiple trays at once. Just make sure your oven has enough space for proper air circulation. Rotate the trays from top to bottom and front to back every hour. This prevents hot spots and ensures all slices dry evenly. You can also dry different orange varieties on separate trays and label them for easy identification later.
Oven Temperature and Timing: The Perfect Setup
Getting the oven temperature right is the most important factor in successful citrus drying. Too hot and the oranges burn or become bitter. Too cool and they stay soggy and may mold. I will break down the ideal settings for different goals.
Recommended Settings for Different Orange Varieties
Thick-skinned navel oranges need a slightly higher temperature or longer time. Thin-skinned Valencia oranges dry faster and can scorch at 200°F. Here is a quick reference for drying oranges in the oven:
| Orange Type | Oven Temperature | Drying Time | Best Result |
|---|---|---|---|
| Navel (thick skin) | 200°F (93°C) | 4-6 hours | Chewy slices |
| Valencia (thin skin) | 170°F (77°C) | 3-4 hours | Crispy chips |
| Blood oranges | 180°F (82°C) | 3.5-5 hours | Sweet, tangy leather |
| Clementines/mandarins | 170°F (77°C) | 2.5-3.5 hours | Small, chewy bites |
These oven temperature guidelines help you avoid the common mistake of over-drying or under-drying. Always use an oven thermometer to verify the actual temperature. Many ovens run hot or cold, which affects citrus drying results.
Common Mistakes to Avoid
- Overlapping slices: This traps moisture and causes uneven drying. Use multiple trays or dry in batches.
- Too high heat: Cranking the oven to 300°F will cook the fruit, making it tough and bitter. Keep it low.
- Skipping the parchment: Direct contact with the baking sheet can cause sticking and uneven airflow.
- Not flipping halfway: The bottom slices can become too dry while the top stays moist. Flip them for consistency.
- Storing while warm: Trapped heat creates condensation, which leads to mold. Always cool completely before storing.
Avoiding these pitfalls ensures your dried orange snacks turn out perfectly every time. A little attention to detail makes a big difference in homemade dried fruit quality.
Oven vs. Dehydrator vs. Sun-Drying Comparison
While the oven method is the focus here, it helps to understand how it compares to other drying techniques. This table shows the key differences:
| Method | Temperature | Time | Pros | Cons |
|---|---|---|---|---|
| Oven | 170°F-200°F | 3-6 hours | Consistent heat, easy to monitor, large batches | Uses more energy, can cook if too hot |
| Food Dehydrator | 135°F-145°F | 8-12 hours | Low energy, hands-off, even airflow | Requires special equipment |
| Sun-Drying | Ambient air | 2-4 days | No electricity needed, traditional flavor | Weather dependent, insect risk, longer time |
The oven method strikes the best balance between control and convenience. It is faster than a dehydrator and far more reliable than sun-drying. For most home cooks, the oven is the clear winner for drying oranges in the oven.
Creative Uses for Your Dried Orange Treats
Once you have mastered drying oranges in the oven, the fun really begins. Dried oranges are incredibly versatile. They add a burst of citrus flavor to both sweet and savory dishes. I will share some of the best ways to use your oven-dried oranges.
Orange Chips and Candied Peels
The simplest use is eating them right out of the jar as a sweet treat. Orange chips make a healthy alternative to sugary snacks. They are perfect for lunchboxes, hiking trails, or movie nights. For a festive touch, dust the chips with a little powdered sugar or cinnamon. Candied orange peels can be dipped in dark chocolate for an elegant dessert. The combination of bitter chocolate and sweet citrus is irresistible. You can also roll them in shredded coconut for a tropical twist.
Incorporating Dried Oranges into Baking
Chop dried oranges and add them to muffins, scones, or banana bread. The concentrated citrus flavor elevates any baked good. You can also blend dried orange snacks into a powder and use it as a natural flavoring. This orange zest powder works wonderfully in spice rubs for meats or in homemade fruit leather recipes. Stir chopped dried oranges into oatmeal or yogurt for a sweet and tangy breakfast boost.
Making Orange Zest Powder
One of the most useful things you can do with dried orange zest is turn it into a fine powder. Simply pulse the dried zest strips in a spice grinder or clean coffee mill until they become a fine dust. Store the powder in a small jar away from heat and light. Sprinkle it over roasted vegetables, mix it into homemade granola, or add it to your morning smoothie. This orange zest powder is a secret weapon for citrus fruits lovers and adds a burst of flavor to any dish.
Infusing Water, Tea, and Cocktails
Drop a few dried orange slices into a glass of iced water for a refreshing, naturally flavored drink. They look beautiful floating in the glass. Steep slices in hot water for a soothing citrus tea. The aroma fills the kitchen and the flavor is naturally sweet. For cocktails, muddle dried orange pieces into a gin and tonic or a whiskey sour. The citrus fruits add depth and a hint of sweetness without extra sugar. You can also use them as a garnish for champagne or mocktails. Dried orange slices make wonderful additions to homemade marmalade too.
Gift Ideas and Party Favors
Jarred oven-dried oranges make wonderful homemade gifts. Package the slices in a mason jar with a ribbon and a tag. They are perfect for the holiday season or as a thank-you gift. You can also create a custom trail mix with dried oranges, almonds, and dark chocolate chips. These snack ideas are easy to assemble and always appreciated. The personal touch of homemade dried fruit shows you care and adds a special touch to any occasion.
Storing and Troubleshooting Your Dried Oranges
Proper storage keeps your dried orange snacks fresh and flavorful for months. The goal is to keep out moisture and light. I will share the best methods for preserving your homemade dried fruit.
Shelf Life and Preservation Tips
Store completely cooled oven-dried oranges in airtight glass jars or food-grade plastic containers. Keep them in a cool, dark pantry. When stored properly, dried orange slices can last up to 6 months. Candied orange peels and chocolate-covered treats may have a slightly shorter shelf life due to the added ingredients. For longer storage, you can freeze the dried oranges in vacuum-sealed bags. They will keep for up to a year in the freezer.
Always check for any signs of moisture or mold before eating. If a slice feels sticky or soft, it needs more drying time. A crisp snap means it is fully dry and ready for storage. Label your containers with the date so you can enjoy your sweet treats at their best.
Reviving Slightly Soft Slices
If your oven-dried oranges have absorbed moisture and become soft, do not throw them away. Spread them back on a parchment-lined baking sheet and return them to the oven at 170°F for another 1 to 2 hours. They will crisp up again. This is one of the great advantages of drying oranges in the oven — you can always give them a second chance.
Quick Tips for Perfect Results
- Pat the slices dry: After washing, pat the orange slices with a paper towel to remove surface moisture. This speeds up the initial drying phase.
- Use a convection setting: If your oven has a convection or fan option, use it. The circulating air dries oranges faster and more evenly.
- Rotate trays: Switch the position of the trays halfway through. The back of the oven is usually hotter, so rotating ensures even citrus drying.
- Add a light sprinkle of sugar: For extra sweetness, sprinkle a tiny bit of sugar on the slices before drying. They become candy-like orange chips.
- Experiment with spices: Toss slices with a pinch of chili powder, ginger, or vanilla extract before drying for a unique sweet treat.
Expert Insight: The Role of Humidity
Humidity in your kitchen can significantly affect drying time. On a humid day, add an extra hour to the drying process. If your house is very damp, consider running a dehumidifier or drying the oranges in the evening when humidity drops. The oven method works best in dry, warm environments. Understanding this one factor can elevate your homemade dried fruit from good to exceptional.
Conclusion
Learning how to dry out oranges in the oven opens up a delicious world of sweet treats and homemade dried fruit. From crispy orange chips to chewy dried orange snacks and glossy candied orange peels, the possibilities are endless. You now have all the knowledge to select the best oranges, prep them correctly, set the right oven temperature, and dry them to perfection. The oven method is simple, forgiving, and incredibly rewarding. I encourage you to try it this weekend and fill your kitchen with the wonderful aroma of drying citrus. Once you start making your own oven-dried oranges, you will never go back to store-bought versions. Enjoy the process, experiment with flavors, and share your sweet treats with friends and family.
Frequently Asked Questions
Can I use any type of orange for drying?
Yes, you can use navel, Valencia, blood, clementines, or mandarins. Thicker-skinned varieties take longer, while thin-skinned ones dry quickly. Each type offers a slightly different texture and flavor for your dried orange snacks.
Do I need to peel the oranges before drying?
It depends on what you want to make. For orange chips, leave the peel on for extra flavor and nutrients. For candied orange peels, keep the peel and slice it into strips. If you only want the flesh, peel them first and slice the orange meat into rounds.
How long do dried oranges last?
When stored in airtight containers in a cool, dark place, oven-dried oranges last up to 6 months. Frozen dried oranges can last up to a year. Always check for moisture or mold before eating.
Can I dry oranges in a toaster oven?
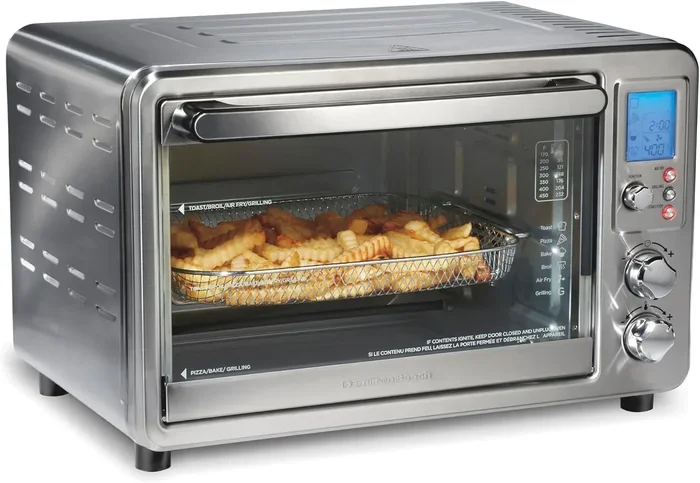
Absolutely. A toaster oven works just as well for drying oranges in the oven. Use the lowest heat setting and prop the door open slightly for moisture escape. The smaller size can actually be an advantage for quick batches.
Are oven-dried oranges healthy?
Yes, they are a natural, no-added-sugar snack packed with fiber and vitamin C. The drying process concentrates the nutrients and natural sugars, making them a healthier alternative to processed candies. They are a perfect sweet treat for guilt-free snacking.
What else can I do with dried orange peels?
Dried orange peels can be used in tea blends, ground into powder for seasoning, added to homemade marmalade, or infused into vinegar and oils. They also make beautiful natural decorations for cakes and cocktails. The citrus fruits peels are incredibly versatile.