How To Calibrate A Whirlpool Gas Oven For Perfect Results
Calibrating your Whirlpool gas oven is essential for accurate baking and roasting. When your oven runs too hot or too cold, this step-by-step guide shows you how to fix it using a simple oven thermometer and the calibration screw. You’ll discover how to check temperature accuracy, adjust settings, and troubleshoot common issues to keep your oven performing perfectly.
Your Whirlpool gas oven should hit the exact temperature you set. But sometimes it runs too hot or too cold. That throws off your baking and roasting. How To Calibrate A Whirlpool Gas Oven is a simple skill that saves time, food, and frustration. You do not need special training. A basic oven thermometer and a screwdriver are all you need. This guide walks you through the entire process step by step. You will learn to spot calibration problems, make the adjustment, and keep your oven accurate for years.
Many home cooks ignore small temperature errors. Over time, those errors ruin cakes, burn roasts, and leave bread underdone. Gas ovens naturally drift as parts wear. The good news is that most Whirlpool models allow easy manual calibration. You can fix a 25°F to 50°F offset in just minutes. Let us walk you through it. You will be amazed how simple it is.
Key Takeaways
- Oven calibration ensures true-to-set temperatures: A properly calibrated Whirlpool gas oven delivers consistent baking and roasting results every time.
- You only need a basic oven thermometer and a screwdriver: The entire calibration process is simple, safe, and takes just 20 minutes.
- Watch for warning signs like uneven browning or long cook times: These often point to a temperature offset that calibration can fix.
- The calibration screw is usually behind the temperature knob: Adjusting it by a small amount can correct a 25–50°F error.
- Regular checks keep your oven accurate: Re-test every few months or after a major self-clean cycle.
- Know when to call a pro: If the temperature sensor or control board fails, professional oven repair is the safest choice.
📑 Table of Contents
Why Oven Calibration Matters
Oven calibration means adjusting the temperature setting so it matches the actual heat inside the cavity. When your oven is off by even 25 degrees, your food suffers. Cookies spread too much. Meats cook unevenly. Breads fail to rise properly. Gas oven calibration keeps your baking results reliable. It also saves energy because the oven does not overheat or run too long to compensate.
Think of calibration like tuning a musical instrument. A slightly off note ruins the whole song. A slightly off temperature ruins the whole dish. Whirlpool ovens are built to last, but the thermostat can drift over time. Normal wear, frequent self-clean cycles, and door seal wear all contribute. Regular calibration catches these small drifts before they become big problems.
How Temperature Accuracy Affects Your Food
When the oven runs 25°F too hot, baked goods brown too fast on the outside while staying raw inside. Custards crack. Custard pies weep. Savory roasts dry out. On the flip side, an oven running too cold leaves you with pale, doughy results. You might be tempted to raise the set temperature, which only masks the real issue. Calibration fixes the root cause. It brings the actual cavity temperature back to the dial setting.
Signs Your Whirlpool Gas Oven Needs Calibration
You do not need a special tool to spot the first signs. Your senses and your cooking results give clear clues. Pay attention to these common symptoms that point to a calibration problem.
- Food browns unevenly. One side of the pan is dark while the other is pale. This often means hot spots or a temperature offset.
- Baking times have changed. A cake that used to take 30 minutes now needs 45. Or cookies burn in half the usual time.
- The oven does not preheat properly. You wait longer than usual for the preheat indicator to drop.
- You rely on the “peek” method. You open the door constantly because the food looks done too early or too late.
- Your oven thermometer shows a different number than the dial. This is the most direct sign of a calibration drift.
If you notice two or more of these signs, it is time to check your Whirlpool gas oven calibration. The fix is quick and does not require a technician.
Quick Tip: Test with a Simple Oven Thermometer
Before you touch any screws, hang a basic oven thermometer on the middle rack. Set the oven to 350°F and wait 20 minutes after it beeps. Look at the thermometer. If it reads 325°F or 375°F, you have a clear offset. Write that number down. You will need it for the adjustment.
Tools You Will Need for Calibration
Gather everything before you start. The process is smooth when you have your tools ready. You do not need expensive equipment.
| Tool | Purpose | Where to Find It |
|---|---|---|
| Oven thermometer | Measures actual cavity temperature | Kitchen supply store or online |
| Flat-head screwdriver | Turns the calibration screw | Household toolbox |
| Small flashlight | Illuminates the back of the knob | Any flashlight or phone light |
| Paper and pen | Records temperature offset | Kitchen notepad |
| Your oven manual | Confirms model-specific steps | Whirlpool website or manual book |
A basic oven thermometer costs under $10 and gives you reliable readings. Choose one with a hanging hook and a clear dial. Avoid digital probe thermometers for this test because they measure air temperature less accurately in a hot oven. The flat-head screwdriver should fit snugly into the calibration screw. A worn or too-big screwdriver can slip and damage the screw head.
Where to Find Your Whirlpool Oven Manual
If you do not have the paper manual, visit the Whirlpool support website. Enter your model number. You will find a digital copy with calibration instructions specific to your oven. Some newer models have a digital control panel that lets you enter a temperature offset. Older models use a physical screw behind the knob. The manual tells you which type you have.
How To Calibrate A Whirlpool Gas Oven: The Complete Guide
Now we get to the heart of the process. How To Calibrate A Whirlpool Gas Oven follows a clear sequence. You will test, measure, adjust, and verify. Take your time and work carefully. The steps below apply to most Whirlpool gas oven models. If your oven has a digital display, the process is slightly different, but the core idea is the same.
Step 1: Locate the Calibration Screw
First, turn off the oven and let it cool completely. Pull the oven rack out slightly. Look at the back of the temperature knob. You will see a small hole or a tiny set screw. That is the calibration screw. Shine your flashlight behind the knob. On some models, the screw is hidden under a small plastic cap. Gently pry off the cap with a flat-head screwdriver or a butter knife.
Do not confuse the calibration screw with the set screw that holds the knob on. The calibration screw is usually smaller and sits right next to the knob shaft. Refer to your manual if you are unsure. Never force anything. If the screw does not turn easily, stop and check your identification.
Step 2: Establish Your Baseline with an Oven Thermometer
Hang your oven thermometer on the middle rack. Close the door. Set the oven to 350°F. Wait for the oven to preheat fully and for the thermostat to cycle at least twice. This stabilizes the temperature. Then read the thermometer through the oven window without opening the door.
Write down the actual temperature. If the thermometer reads 350°F exactly, your oven is already perfectly calibrated. If it reads 325°F, your oven is running 25°F low. If it reads 375°F, it is 25°F high. Most ovens have an acceptable range of plus or minus 10 to 15 degrees. Anything beyond that needs adjustment.
Step 3: Make the Adjustment
Now you adjust the calibration screw. Use a flat-head screwdriver. Turn the screw slowly. The direction matters. On most Whirlpool ovens, turning the screw clockwise raises the temperature setting. Turning it counterclockwise lowers the setting. But always double-check your manual. Some models reverse this.
Make small turns. A quarter turn at a time is plenty. After each turn, wait a few minutes for the oven to stabilize, then recheck the thermometer. You are aiming for the thermometer to read exactly 350°F when the dial says 350°F. This process is called setting the temperature offset. Once you hit the target, stop turning.
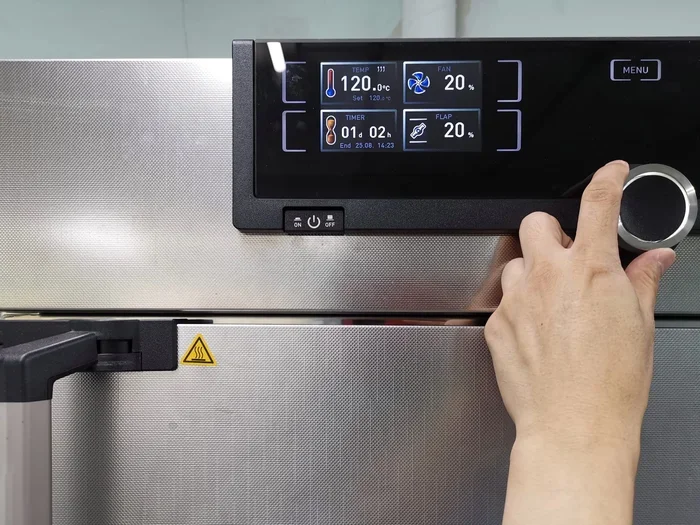
For digital ovens, you will use the control panel instead. Look for the calibration or offset setting in the menu. Enter the difference between your target and actual temperature. The oven will apply the correction automatically. Digital models often allow offsets up to 35 degrees in either direction.
Step 4: Verify the Calibration
After adjusting, run a second test. Set the oven to 350°F again. Wait for it to fully preheat and cycle. Check the thermometer. It should now read 350°F or very close. If it is still off, repeat the adjustment. Make another quarter turn and test again. Most ovens need only one or two small adjustments.
Also test at a different temperature, like 375°F or 400°F. Calibration is not always perfectly linear across the range. If the oven is accurate at 350°F but off by 10 degrees at 400°F, that is usually normal. A small residual error at the high end is acceptable.
Expert Insight: The Role of the Oven Temperature Sensor
Inside your oven, a metal probe called the temperature sensor monitors the cavity heat. It sends data to the control board. If the sensor is dirty, bent, or failing, it gives false readings. This can mimic a calibration problem. Before you adjust the screw, gently clean the sensor with a soft cloth. Make sure it is not touching the oven wall. A clean sensor ensures your calibration holds longer.
Common Calibration Errors and How to Fix Them
Sometimes the calibration process does not go smoothly. You might run into a few common hiccups. Here is how to handle them calmly.
Oven Runs Too Hot After Adjustment
If you turned the screw clockwise to raise the set temperature but the oven now runs too hot, you went too far. Turn the screw back counterclockwise by a small amount. Test again. Remember, the screw affects the relationship between the dial and the actual gas flow. A tiny change makes a big difference.
Oven Still Reads Low Even After Adjustment
This can happen if the calibration screw has reached its limit. Most ovens allow an offset of plus or minus 25 to 35 degrees. If your oven is off by more than that, the problem may be a faulty temperature sensor or a worn thermostat. In that case, call a qualified appliance repair technician. Do not force the screw further.
The Calibration Screw Spins Freely Without Effect
If the screw turns but nothing changes, you might be adjusting the wrong screw. Double-check that you are turning the calibration screw, not the knob retention screw. Consult your model’s manual for a diagram. On some older Whirlpool ovens, the calibration screw is located inside the temperature knob itself, not behind it. You remove the knob to access it.
Digital Display Shows an Error Code After Calibration
Some digital ovens display a fault code if they detect a calibration conflict. F1, F2, or F3 codes often relate to temperature sensor issues. After a manual calibration, unplug the oven for 60 seconds and plug it back in. This resets the control board. If the code returns, the sensor may need replacement. Visit the Whirlpool parts website to find the correct sensor for your model.
Common Mistakes to Avoid
- Adjusting the screw while the oven is hot. Always work on a cool oven to avoid burns and to get accurate readings.
- Making large turns. A full turn can overshoot the correction. Quarter turns are the safe choice.
- Ignoring the door seal. A worn gasket lets heat escape, making the oven seem too cold. Replace the seal if it looks brittle or loose.
- Calibrating right after a self-clean cycle. The oven needs to cool completely and stabilize before you test. Wait at least an hour.
- Relying on the built-in temperature light. The preheat indicator is a rough guide, not a precision tool. Always use a separate thermometer.
Maintaining Accurate Temperatures Long-Term
Calibration is not a one-time fix. Your oven needs periodic checks to stay accurate. A few simple habits keep your Whirlpool gas oven performing at its best for years.
Quick Tips for Ongoing Accuracy
- Test your oven every 3 to 6 months. A quick 350°F check takes only 15 minutes and catches drift early.
- Clean the oven interior regularly. Grease and food splatter on the walls and floor can affect heat circulation. Use a gentle oven cleaner or a baking soda paste.
- Check the door seal monthly. Run your hand around the closed door. You should not feel heat leaking out. A damaged seal wastes energy and throws off temperature.
- Avoid opening the door too often. Each time you open the door, the temperature drops 25 to 50 degrees. Wait until the baking time is nearly complete before checking.
- Use the correct rack position. The middle rack offers the most even heat. Upper racks brown faster. Lower racks cook more slowly.
When to Call a Professional
If your oven still shows a large temperature error after calibration, the problem may be deeper than a simple offset. A failing oven temperature sensor, a worn thermostat, or a faulty control board can all cause persistent inaccuracy. These parts are not user-serviceable on most models. A certified Whirlpool technician can diagnose the issue safely. They have the tools to test the sensor resistance and the control board output.
Also call a pro if you smell gas during the calibration process. Gas leaks are dangerous and require immediate attention. Turn off the gas supply valve, open a window, and leave the house. Call your gas company or emergency services from outside.
Key Takeaways for Oven Calibration Success
- Always use an independent oven thermometer. The dial or digital display can lie. A $10 thermometer tells the truth.
- Make tiny adjustments. Quarter turns give you fine control and prevent overshooting.
- Document your offset. Write down how many degrees your oven was off and which direction you turned the screw. This saves time on future checks.
- Combine calibration with routine cleaning. A clean oven heats more evenly and maintains calibration longer.
- Know your model’s limits. Some older Whirlpool ovens cannot be calibrated beyond a certain range. The manual will tell you the maximum offset allowed.
How To Calibrate A Whirlpool Gas Oven is one of the simplest maintenance tasks you can do at home. It takes less than half an hour and costs nothing but a few minutes of your time. A calibrated oven means better cookies, juicier roasts, and bread that rises just right. You gain confidence in your cooking because you trust the temperature. No more guessing, no more opening the door to peek. Your oven works for you, not against you. Keep that thermometer handy, check your calibration regularly, and enjoy perfect results every time you turn on the heat.
Frequently Asked Questions
How do I know if my Whirlpool gas oven needs calibration?
Use a simple oven thermometer set to 350°F. If the thermometer reads more than 15 degrees off from the set temperature, your oven likely needs calibration. Uneven browning, changed baking times, and a preheat indicator that stays on too long are also clear signs.
Can I calibrate my oven without a thermometer?
You can, but it is not recommended. Without a thermometer you have no way to measure the actual cavity temperature, so you cannot know if the adjustment is correct. A basic oven thermometer is an inexpensive and essential tool for this task.
What is the calibration screw and where is it?
The calibration screw is a small set screw located behind the temperature knob or inside the knob itself. It controls the relationship between the dial setting and the gas valve opening. Shine a flashlight behind the knob to find a tiny hole with a screw inside.
Is it safe to adjust the oven temperature myself?
Yes, it is completely safe. You are not touching any gas lines or electrical components. You are only adjusting a small mechanical screw that fine-tunes the thermostat. Just make sure the oven is off and cool before you start.
How often should I recalibrate my oven?
Check your oven calibration every 3 to 6 months. Frequent use, heavy self-clean cycles, and age can cause the thermostat to drift. A quick test with a thermometer takes only a few minutes and keeps your baking results consistent.
What if my oven still shows wrong temperature after calibration?
If the temperature remains off by more than 25 degrees after adjustment, the problem may be a faulty temperature sensor, a worn thermostat, or a failing control board. These parts require professional diagnosis and replacement. Contact a certified Whirlpool service technician for help.