How To Broil Chicken In Toaster Oven For Juicy Results
Broiling chicken in a toaster oven is one of the fastest and easiest ways to get restaurant-quality results at home. This guide walks you through every step, from choosing the right chicken cuts to nailing the perfect internal temperature. You will learn how to preheat, season, cook, and rest your chicken like a pro. Whether you prefer chicken breast or chicken thighs, this method delivers juicy chicken with a crispy finish every single time.
Key Takeaways
- Preheat your toaster oven: Always preheat on broil for at least 5 minutes before placing chicken inside.
- Use a wire rack: Elevating chicken on a wire rack ensures even heat circulation and crispy results on all sides.
- Watch the internal temperature: Chicken is done at 165°F (74°C). Use a food thermometer to avoid overcooking.
- Flip halfway through: Turning your chicken midway promotes even browning and juiciness.
- Let it rest: Resting chicken for 5 minutes locks in juices and keeps meat tender.
- Adjust for cut size: Thicker pieces need lower rack placement and longer cook times; thinner pieces cook fast.
- Avoid common mistakes: Skipping the preheat, overcrowding the tray, and not flipping are the top errors to avoid.
📑 Table of Contents
- Why Broiling Chicken In A Toaster Oven Works So Well
- How To Prepare Your Chicken For Broiling
- Step By Step Guide To Broiling Chicken In A Toaster Oven
- Tips For Juicy And Crispy Broiled Chicken
- Common Mistakes To Avoid When Broiling Chicken
- Serving And Storing Broiled Chicken
- Comparison: Broiling Chicken In A Toaster Oven Vs Regular Oven
- Frequently Asked Questions
- Conclusion
Why Broiling Chicken In A Toaster Oven Works So Well
A toaster oven is one of the most underrated kitchen tools you own. It heats up fast, uses less energy, and broils chicken beautifully. When you broil chicken in a toaster oven, you get intense top-down heat that sears the surface quickly. This creates a crispy golden exterior while keeping the inside moist.
Many people think a full-size oven is the only way to cook chicken properly. But a toaster oven does the same job in a fraction of the time. It preheats in minutes, uses minimal counter space, and is perfect for cooking one to four servings. If you live alone, have a small kitchen, or just want faster dinners, this method is a game changer.
The broiler function sends heat from above, similar to a grill. This means your chicken gets that charred, caramelized look without needing an outdoor grill. The result? Juicy chicken with a crispy, flavorful crust that tastes like it came from a high-end restaurant.
The Benefits Of Using A Toaster Oven For Broiling
There are several reasons why a toaster oven shines when broiling chicken. First, it heats up much faster than a conventional oven. You save time waiting for it to reach temperature. Second, the smaller interior space concentrates heat around the food, which speeds up cooking and promotes better browning.
Third, toaster ovens use significantly less electricity or gas than a full-size oven. This saves you money on your energy bill. Fourth, cleanup is easier because most toaster oven trays and racks fit in the dishwasher. Finally, you have more control over the broiler setting and can adjust the rack position quickly.
What You Need Before You Start
Before you begin, gather a few essential items. You will need a toaster oven with a broil function. A wire rack or broiling pan works best for airflow. Have aluminum foil ready for easy cleanup. You will also need a food thermometer to check doneness safely.
Make sure you have your seasoning prepared ahead of time. Simple salt, pepper, garlic powder, and paprika work wonderfully. Olive oil or melted butter helps the seasoning stick and promotes browning. Keep a pair of tongs nearby for flipping the chicken safely.
How To Prepare Your Chicken For Broiling
Proper preparation is the secret to perfect broil chicken every time. Skipping this step leads to uneven cooking and bland results. Taking just a few extra minutes here makes a huge difference in the final dish.
Choosing The Right Chicken Cuts
Not all chicken cuts broil the same way. Chicken breast is lean and cooks quickly, but it can dry out if you are not careful. Chicken thighs have more fat, which keeps them juicy even at high heat. Bone-in pieces like drumsticks and thighs are very forgiving and hard to overcook.
For the best results, choose pieces that are similar in thickness. This ensures even cooking time across all the chicken. If using breast, try to buy thick-cut pieces or pound them to an even thickness. Avoid pieces that are paper thin, as they will dry out fast under the broiler.
Seasoning And Marinating Tips
Seasoning your chicken at least 30 minutes before cooking lets the flavors penetrate the meat. A simple dry rub of salt, pepper, garlic powder, onion powder, and smoked paprika works beautifully for most recipes. Toss the pieces in a little oil first so the seasoning adheres well.
If you prefer a marinade, a mix of olive oil, lemon juice, and herbs works great. Marinate for 30 minutes to 2 hours. Do not marinate longer than 4 hours with acidic ingredients like lemon or vinegar, as they can break down the meat texture. Pat the chicken dry before placing it in the oven for the best browning.
Step By Step Guide To Broiling Chicken In A Toaster Oven
Now that your chicken is prepped, it is time to cook. Follow these steps carefully for juicy results every time. This process works for almost any chicken cut.
Preheating And Rack Position
The first step is to preheat your toaster oven on the broil setting. Most ovens need about 5 minutes to reach full broil temperature. Leave the rack in the upper third position. This puts the chicken close enough to the heating element for a good sear without burning.
Place a wire rack inside a broiling pan or on a baking sheet lined with aluminum foil. The wire rack is essential because it allows hot air to circulate under the chicken. This prevents the bottom from steaming and helps achieve even crispiness. If you do not have a wire rack, you can use aluminum foil balls to elevate the chicken slightly.
Cooking Times For Different Cuts
Cooking time varies depending on the type and thickness of the chicken. Here is a general guide to help you plan:
- Chicken breast halves (boneless, skinless): 10 to 14 minutes, flipping once halfway through.
- Chicken thighs (bone-in, skin-on): 18 to 22 minutes, flipping once.
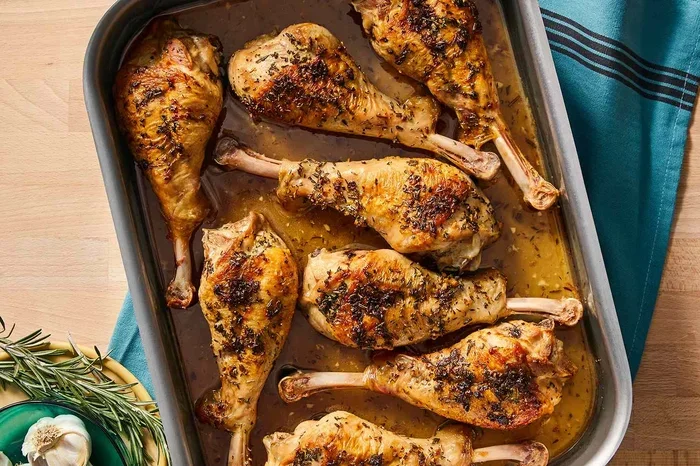
- Drumsticks: 16 to 20 minutes, flipping once.
- Chicken wings: 10 to 14 minutes, flipping once.
These times are approximate. Always use a food thermometer to check the internal temperature. The chicken is safe to eat when it reaches 165°F (74°C) in the thickest part. Remember that the chicken will continue to cook slightly after you remove it from the oven.
Flipping And Checking Doneness
About halfway through the cooking time, open the oven and carefully flip each piece. Use tongs to avoid burning your fingers. Flipping ensures both sides get equal exposure to the high heat of the broiler. This is the key to even browning and crispy chicken on all sides.
After flipping, watch the chicken closely. Broiling can go from perfectly done to burnt in just a minute or two. Check for visual cues like golden-brown color and charred edges. Then use your food thermometer to confirm the internal temperature has reached 165°F. If not, continue broiling for 1 to 2 minutes and check again.
Tips For Juicy And Crispy Broiled Chicken
Getting the perfect balance of crispy outside and juicy inside takes a little technique. Here are some expert tips that make a noticeable difference in your results.
Using A Wire Rack Vs Aluminum Foil
A wire rack is the best tool for broiling chicken in a toaster oven. It lifts the meat off the pan and allows heat to reach underneath. This creates a crispy texture on both sides. If you line the pan with aluminum foil, make sure the rack sits above it so air can still flow freely.
Some people skip the rack and place chicken directly on foil. This works, but the bottom side will be softer and less crispy. The trade-off is easier cleanup. For the best of both worlds, use a wire rack on a foil-lined pan. You get crispy chicken and minimal mess.
Temperature And Timing Secrets
One of the biggest secrets to juicy chicken is not overcooking it. Chicken breast is especially prone to drying out. Remove it from the oven when the internal temperature is around 160°F. The carryover heat will bring it up to the safe 165°F while it rests. This keeps the meat tender and moist.
Another tip is to start with chicken at room temperature. Take it out of the refrigerator 15 to 20 minutes before cooking. Cold chicken placed under a hot broiler cooks unevenly, with the outside overcooking before the inside is done. Room temperature chicken cooks more evenly and reduces the risk of dry, tough meat.
Basting For Extra Moisture
Basting is an easy trick that takes your broiled chicken to the next level. About halfway through cooking, open the oven and brush the chicken with melted butter, olive oil, or pan juices. This adds flavor and moisture to the surface. It also helps the seasoning stick and promotes a deeper golden color.
You can also baste with a marinade or glaze during the last few minutes of cooking. A honey mustard glaze or a simple lemon butter sauce caramelizes beautifully under the broiler. Just be careful with sugary glazes, as they can burn quickly under high heat. Apply them in the last 2 to 3 minutes only.
Expert Insight: Professional chefs recommend letting the chicken come to room temperature before broiling. This simple step reduces cooking time by about 20% and ensures the chicken cooks evenly from edge to center. It is a small change that makes a big difference.
Common Mistakes To Avoid When Broiling Chicken
Even experienced cooks make mistakes when broiling chicken. Knowing what to avoid saves time, money, and a lot of frustration. Here are the most common errors and how to prevent them.
Skipping The Preheat
Never place chicken in a cold toaster oven. The broiler needs to be fully hot before the chicken goes in. Skipping the preheat means the chicken starts cooking slowly and steams instead of searing. This leads to pale, soggy skin instead of crispy, golden-brown results.
Always give your oven at least 5 minutes on the broil setting. You should see the heating element glowing red. That is your signal that the oven is ready. Place the chicken in quickly once it reaches full heat.
Overcrowding The Pan
It is tempting to fit as much chicken as possible on the tray. But overcrowding blocks airflow and causes uneven cooking. Pieces that touch each other steam instead of broil, creating soggy spots. Leave at least half an inch of space between each piece.
If you need to cook a large batch, use two trays and rotate them. Cooking in smaller batches may take a little longer, but the results are far superior. Each piece gets direct exposure to the broiler heat, which is the whole point of this cooking method.
Not Flipping The Chicken
One of the biggest mistakes is leaving the chicken on one side the entire time. The broiler heats from above, so the top gets crispy while the bottom stays pale and soft. Flipping halfway through ensures both sides brown evenly and the chicken cooks through consistently.
Set a timer for halfway through the cooking time and flip promptly. Use tongs to turn the pieces gently. Avoid pressing down on the chicken with a spatula, as this squeezes out juices and dries out the meat.
Ignoring The Internal Temperature
Guessing whether chicken is done is risky and not worth the food safety concern. Undercooked chicken can cause illness, and overcooked chicken is dry and tough. A food thermometer is the only reliable way to know your chicken is perfectly cooked.
Insert the thermometer into the thickest part of the meat, avoiding the bone. Wait a few seconds for the reading to stabilize. The target is 165°F (74°C). If you are cooking chicken breast, pull it at 160°F and let carryover heat finish the job during resting.
Serving And Storing Broiled Chicken
Once your chicken is done, proper resting and storage make all the difference in taste and texture. Do not skip the rest step, and follow safe storage guidelines to enjoy your meals later.
How Long To Rest Broiled Chicken
Let the chicken rest for at least 5 minutes after removing it from the oven. This allows the juices to redistribute throughout the meat. If you cut into it immediately, the juices run out and the chicken becomes dry and less flavorful.
Tent the chicken loosely with aluminum foil during resting. This keeps it warm without trapping steam, which would make the skin soggy. After 5 minutes, your chicken will be juicy, tender, and ready to serve.
Best Ways To Store Leftover Chicken
Store leftover broiled chicken in an airtight container in the refrigerator within 2 hours of cooking. Properly stored chicken stays fresh for 3 to 4 days. Reheat gently in the toaster oven at 350°F for 5 to 8 minutes to keep the skin crispy.
Avoid reheating in the microwave, as it makes the skin soft and rubbery. The toaster oven reheats evenly and restores some of the original crispiness. For longer storage, freeze cooked chicken in freezer-safe bags for up to 3 months. Thaw overnight in the refrigerator before reheating.
Comparison: Broiling Chicken In A Toaster Oven Vs Regular Oven
Wondering how a toaster oven compares to a full-size oven for broiling chicken? Here is a side-by-side look at the key differences:
| Factor | Toaster Oven | Regular Oven |
|---|---|---|
| Preheat Time | 3 to 5 minutes | 10 to 15 minutes |
| Cooking Time | Faster (smaller space) | Slower (larger space) |
| Energy Use | Lower | Higher |
| Crispiness | Excellent (close heat) | Good |
| Batch Size | 1 to 4 servings | 4 to 8+ servings |
| Cleanup | Easy (smaller parts) | More involved |
| Best For | Small meals, quick dinners | Large meals, meal prep |
For most home cooks cooking one to four servings, a toaster oven is the better choice. It is faster, uses less energy, and produces excellent crispiness. A regular oven makes more sense when cooking for a large group or preparing big batches for the week.
Frequently Asked Questions
Can I broil frozen chicken in a toaster oven?
It is not recommended to broil frozen chicken directly. Frozen chicken cooks unevenly, with the outside overcooking before the inside thaws. Always thaw chicken in the refrigerator overnight or use the cold water method before broiling. This ensures safe, even cooking and better flavor.
What is the best temperature setting for broiling chicken in a toaster oven?
Use the high broil setting on your toaster oven. Most toaster ovens have a single broil setting that runs at high heat, usually around 500°F to 550°F. If your oven has a low and high broil option, choose high for chicken. The intense top-down heat is what creates the crispy exterior.
Do I need to flip chicken when broiling in a toaster oven?
Yes, flipping is highly recommended. The broiler heats from above, so the top side gets crispy while the bottom stays pale. Flipping halfway through cooking ensures both sides brown evenly and the chicken cooks through properly. Use tongs to flip gently and avoid piercing the meat.
How do I know when broiled chicken is done?
The only reliable way to check doneness is with a food thermometer. Insert it into the thickest part of the chicken and look for an internal temperature of 165°F (74°C). Visual cues like golden-brown color and clear juices are helpful, but the thermometer is the most accurate tool.
Can I use aluminum foil in a toaster oven when broiling?
Yes, you can line the baking tray with aluminum foil for easier cleanup. However, do not cover the wire rack or the chicken itself with foil, as this blocks airflow and prevents crisping. Keep the foil only on the pan underneath the rack to catch drips and simplify washing.
Why is my broiled chicken dry and tough?
Dry chicken usually results from overcooking or using lean cuts without enough fat. Chicken breast is especially prone to drying out. To prevent this, pull the chicken off the heat at 160°F and let carryover heat finish cooking. Also, brine or marinate the chicken beforehand to add moisture, and always let it rest for 5 minutes after cooking.
Conclusion
Broiling chicken in a toaster oven is one of the simplest and most rewarding cooking techniques you can master. It is fast, efficient, and delivers consistently delicious results. With the right preparation, timing, and attention to detail, you can serve up juicy chicken with a crispy, golden crust that everyone will love.
Remember to always preheat your oven, use a wire rack for airflow, flip the chicken halfway through, and check the internal temperature with a food thermometer. These small steps make a big difference in the quality of your finished dish. Avoid the common mistakes we covered, and you will be well on your way to broiler perfection.
Whether you are cooking a quick weeknight dinner or preparing meals for the family, the toaster oven has you covered. It is a versatile tool that turns out crispy chicken and juicy chicken with ease. Start experimenting with different seasonings, cuts, and glazes to find your favorite combination. Once you get the hang of it, you will never go back to a full-size oven for this simple task.
Now that you know exactly how to broil chicken in a toaster oven, it is time to put these tips into action. Fire up your oven, season your favorite cuts, and enjoy a delicious, homemade meal in under 20 minutes. Happy cooking!