How To Tell When Oven Brisket Is Done The Right Way
Knowing how to tell when oven brisket is done is the skill that separates good barbecue from great barbecue. You will learn the exact internal temperature to target, how to read visual cues like the bark and juice color, and why resting time matters just as much as cooking time. This guide gives you everything you need to pull a perfect brisket from your oven every single time.
There is nothing quite like the aroma of a slow-cooked brisket filling up your kitchen. But here is the thing that trips up so many home cooks. You can follow every step perfectly, and still end up with a tough, dry piece of meat if you pull it too early or wait too long. That is exactly why learning how to tell when oven brisket is done matters so much.
Brisket is not like a steak. You cannot just check the clock and expect perfect results. It is a tough cut full of connective tissue that needs time, heat, and patience to break down into something tender and juicy. The good news is that once you understand the signs, you will never second-guess yourself again.
This guide covers everything you need to know. From internal temperatures and visual cues to the trusty fork test, we will walk you through each method step by step. Whether you are a beginner or a seasoned griller looking to sharpen your skills, you will find practical advice you can use right away.
Key Takeaways
- Target Temperature: The ideal internal temp for oven brisket is between 195°F and 205°F for maximum tenderness.
- Use a Meat Thermometer: A reliable probe thermometer is the single most important tool for checking doneness.
- Look for Visual Cues: A deep mahogany bark, clean juices, and a jiggly texture are strong signs your brisket is ready.
- The Probe Test Matters: If a probe slides in like butter, your brisket is done.
- Rest Your Brisket: Always rest for at least one hour wrapped in butcher paper or foil to let juices redistribute.
- Avoid Common Mistakes: Do not rush the cook, skip the rest, or rely solely on cook time.
- Low and Slow Wins: Cooking at 225°F to 275°F gives you the best results for oven-braised brisket.
📑 Table of Contents
- What Does It Mean When Brisket Is Done?
- The Internal Temperature You Are Looking For
- Visual and Texture Signs of Doneness
- The Probe and Fork Test Methods
- Common Mistakes That Lead to Overcooked or Undercooked Brisket
- Expert Tips for Perfect Oven Brisket
- How Long Should You Cook Brisket in the Oven?
- Conclusion
What Does It Mean When Brisket Is Done?
When people ask if brisket is done, they are really asking two things. First, is it safe to eat? Second, is it tender and enjoyable? The answer to the first question is straightforward. The USDA recommends an internal temperature of 145°F for most meats. But brisket is not most meats. This cut needs to go much further to become truly tender.
The collagen inside brisket starts breaking down around 160°F and keeps going the higher you push the temperature. By the time the internal temp reaches 195°F to 205°F, the collagen has turned into gelatin. That is what gives you that melt-in-your-mouth texture. So when we talk about brisket doneness, we are really talking about tenderness, not just food safety.
The Difference Between Done and Perfect
Here is something many people do not realize. There is a big difference between brisket that is merely done and brisket that is perfect. Done means it is cooked through and safe to eat. Perfect means it has that silky, juicy bite with a beautiful crust on the outside. Achieving perfection takes more than just hitting a number on a thermometer. It requires attention to texture, color, and feel.
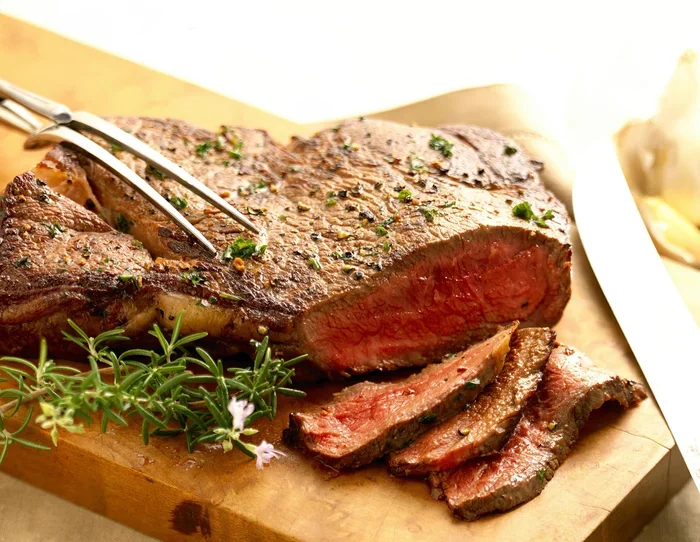
A perfectly cooked brisket will have a dark, crunchy bark on the outside. The inside should be juicy and tender, with a slight pink smoke ring near the surface. The juices should run clear, not pink or red. And when you poke it with a probe or a fork, it should feel soft and give way easily. These are the details that separate a great brisket from an average one.
The Internal Temperature You Are Looking For
The most reliable way to check if your brisket is done is by using a meat thermometer. This is not optional. Guessing will almost always lead to disappointment. A good instant-read or leave-in probe thermometer takes all the guesswork out of the equation.
Target Temperature Ranges
Here are the key temperature benchmarks you should know:
- 160°F to 170°F: This is when the brisket hits the “stall.” Evaporative cooling kicks in, and the temperature stops rising for a while. Do not panic. This is completely normal.
- 180°F to 190°F: The collagen is starting to break down, but the meat may still be slightly tough.
- 195°F to 205°F: This is the sweet spot. The collagen has fully converted to gelatin, and the brisket will be tender and juicy.
- Above 210°F: You are pushing into overcooked territory. The meat can become mushy and dry.
The best practice is to start checking the internal temperature around the 180°F mark. Insert the probe into the thickest part of the flat, avoiding any fat pockets. Take readings in two or three spots to get an accurate picture.
Why the Stall Happens
One of the most confusing parts of cooking brisket is the stall. Around 150°F to 170°F, the temperature seems to plateau and refuse to go any higher. This happens because the moisture evaporating from the surface is cooling the meat, just like sweat cools your skin. Some cooks wrap the brisket in butcher paper or foil to push through this stage faster. This technique is called the “Texas crutch,” and it works well for speeding up the cook without drying out the meat.
If you choose to wrap, do it when the bark has set and the internal temp hits around 165°F. Use pink butcher paper for the best results, as it allows some steam to escape while still trapping enough heat to move past the stall.
Visual and Texture Signs of Doneness
A thermometer is your best friend, but your eyes and hands can tell you a lot too. Experienced pitmasters use visual and tactile cues to confirm doneness. Learning to read these signs will make you a much more confident cook.
Checking the Bark
The bark is the dark, flavorful crust that forms on the outside of the brisket during cooking. A well-developed bark should be deep brown to mahogany in color. It should feel firm and slightly crunchy when you press it with your finger. If the bark is pale or soft, the brisket may need more time. If it is black and charred, the heat may be too high.
A good bark forms when the rub sugars and proteins caramelize over low heat. This is one of the reasons why cooking at the right temperature matters so much. Too hot, and you burn the outside before the inside is ready. Too low, and you never develop that beautiful crust.
The Juice Test
Another visual cue is the color of the juices. When you poke a hole in the thickest part of the brisket or tilt the pan slightly, watch the liquid that comes out. Clear, golden juices are a great sign. Pink or red juices mean the brisket still needs more time. Cloudy or dark brown juices can indicate overcooking.
This is sometimes called the brisket juice test, and it is a simple but effective way to gauge progress. Just be careful not to let too much moisture escape, especially if you have wrapped the brisket.
Texture and Color of the Meat
When you slice into the brisket, the meat should pull apart easily with a gentle tug. It should not require force or a knife to separate the fibers. The color inside should be a consistent grayish-brown with a hint of pink near the outer edges. A bright red center means the brisket is undercooked.
For the flat section, look for a smooth, even texture. For the point, which has more intramuscular fat, you want to see that fat has rendered down and the meat feels soft and almost custard-like. This is a hallmark of a well-cooked brisket.
The Probe and Fork Test Methods
Beyond temperature, there are two classic tests that pitmasters use to confirm brisket doneness. These are the probe test and the fork test. Both are simple, effective, and worth mastering.
The Probe Test
The probe test is probably the most reliable method. You simply insert a thermometer probe or a thin skewer into the thickest part of the brisket, especially the flat. If it slides in and out with no resistance, like warm butter, your brisket is done. If it feels like it is hitting a firm spot, the collagen has not fully broken down yet, and you need to keep cooking.
Some cooks describe this as the brisket being “probe tender.” It is the gold standard for doneness. Do not be afraid to test in multiple spots. The flat and the point can cook at different rates, so check both areas.
The Fork Test
The fork test is a close second in reliability. Take a regular kitchen fork and insert it into the thickest part of the meat. Give it a gentle twist. If the meat fibers separate easily and the fork slides in without much effort, you are good. If the meat resists and the fibers stay intact, keep cooking.
This test works well because it mimics what happens when you bite into the brisket. If a fork can break it apart, your teeth will have no trouble. Just be gentle with the twist. You do not want to tear the meat apart completely.
Combining Both Tests
The smartest approach is to use both tests together. Check the temperature first, then confirm with the probe or fork test. This gives you a double layer of confidence. If the temp is in the target range and the probe slides in smoothly, you can pull that brisket with total certainty.
Common Mistakes That Lead to Overcooked or Undercooked Brisket
Even experienced cooks make mistakes. The key is knowing what to avoid so your next cook comes out better. Here are the most common errors people make when cooking brisket in the oven.
Relying Only on Cook Time
Every recipe will tell you to cook brisket for a certain number of hours. But cook time is just a rough estimate. The actual time depends on the size of the brisket, the thickness of the cut, the oven temperature, and even the shape of your oven. A 4-pound brisket might be done in 6 hours, while a 7-pound one could take 10. Always use a thermometer, not the clock.
Skipping the Rest
Resting is not optional. When you pull the brisket out of the oven, the juices are under pressure and concentrated in the center. If you cut into it right away, all those juices will run out onto the cutting board, leaving you with dry meat. Let the brisket rest for at least one hour, wrapped in butcher paper or foil. Some pitmasters rest for up to two hours in a cooler wrapped in towels. This is called a cooler rest, and it produces incredibly juicy results.
Opening the Oven Too Often
Every time you open the oven door, you lose heat and moisture. This can extend the cook time and dry out the surface. Resist the urge to peek every 20 minutes. Check the temperature quickly and close the door. Trust the process.
Cooking at Too High a Temperature
It is tempting to crank up the oven to speed things along. But brisket needs low, gentle heat to break down all that tough connective tissue. The ideal oven temperature is between 225°F and 275°F. Higher temperatures will give you a tough, chewy exterior and an undercooked interior. Patience is the key ingredient here.
Ignoring the Shape of the Brisket
Not all briskets are the same. The flat is thinner and cooks faster than the point, which is thicker and fattier. If you have a whole packer brisket, the point will always lag behind the flat. This means you may need to adjust your approach, such as folding the point under or positioning the thicker end closer to the heat source.
Expert Tips for Perfect Oven Brisket
Now that you know the signs of doneness and the common pitfalls, here are some expert-level tips to take your oven brisket to the next level.
Choose the Right Cut
Start with a high-quality brisket. Look for good marbling, which is the thin white streaks of fat running through the meat. More marbling means more flavor and more juice during the long cook. A USDA Choice or Prime grade brisket will give you better results than a Select grade. If you can find a local butcher, even better.
Season Generously
A simple salt and pepper rub works beautifully, but do not be afraid to add garlic powder, paprika, or cumin. The rub forms the foundation of your bark, so take it seriously. Apply the rub at least one hour before cooking, or even the night before, and let it sit in the fridge uncovered. This helps form a better crust.
Use a Disposable Pan with a Rack
Place the brisket on a rack inside a disposable aluminum pan. The rack elevates the meat and allows heat to circulate evenly underneath. The pan catches the drippings and keeps your oven clean. Add a small amount of liquid, like beef broth or apple juice, to the pan for extra moisture.
Monitor Your Oven Temperature
Oven thermostats are not always accurate. Use an oven thermometer to verify the actual temperature inside. Even a 25-degree difference can change your cook time significantly. If your oven runs hot, dial it back a bit. If it runs cold, nudge it up.
Slice Against the Grain
When it is time to serve, always slice against the grain. This means cutting perpendicular to the muscle fibers. It makes the meat much easier to chew and more enjoyable to eat. The grain direction changes between the flat and the point, so adjust your slicing accordingly for each section.
Save the Leftovers
Brisket leftovers are some of the best leftovers you will ever have. Store them in an airtight container in the fridge for up to four days. Reheat gently in a covered dish with a splash of broth to keep them moist. You can also freeze cooked brisket for up to three months.
How Long Should You Cook Brisket in the Oven?
Cook time varies based on the size of the brisket and the oven temperature. As a general rule, plan for about 1 to 1.5 hours per pound at 225°F. A 5-pound brisket will take roughly 5 to 7 hours. A larger 8 to 10-pound packer could take 12 to 16 hours.
These times are just estimates. Always rely on temperature and tenderness rather than the clock. The brisket is done when it reaches 195°F to 205°F internally and passes the probe and fork tests. Remember, every brisket is different, and the cook time will reflect that.
If you are short on time, you can increase the oven temperature to 275°F, which will cut the cook time by about 25%. Just keep a close eye on the internal temperature and the texture. Higher heat means less time for collagen to break down, so you need to be more precise about when to pull the meat.
Conclusion
Learning how to tell when oven brisket is done is a skill that pays off every single time you cook. The combination of internal temperature, visual cues, and tactile tests gives you everything you need to judge doneness with confidence. There is no single magic number or trick. It is the sum of all these factors working together.
Use your thermometer as the primary guide, but do not ignore what your eyes and hands are telling you. Check the bark, the juices, and the texture. Run the probe test and the fork test. And never rush the rest. When you put all these pieces together, you will consistently produce brisket that is juicy, tender, and full of flavor.
So the next time you place a brisket in the oven, remember what you have learned here. Trust the process, pay attention to the signs, and enjoy the incredible results. Perfect brisket is within your reach, and now you have the knowledge to make it happen.
Frequently Asked Questions
What is the best internal temperature for oven brisket?
The ideal internal temperature for oven brisket is between 195°F and 205°F. At this range, the collagen has fully broken down into gelatin, giving you maximum tenderness and juiciness. Always use a reliable meat thermometer to check multiple spots.
Can you overcook brisket in the oven?
Yes, you can overcook brisket. If the internal temperature exceeds 210°F, the meat can become mushy and dry. The proteins tighten up and squeeze out moisture. Always monitor the temperature closely and pull the brisket as soon as it reaches the target range.
How do you know if brisket is undercooked?
An undercooked brisket will have a tough, chewy texture and a pink or red center when sliced. The juices will run pink rather than clear, and a probe or fork will meet resistance when inserted. If you notice these signs, return the brisket to the oven and continue cooking until it reaches 195°F.
Should I wrap my brisket while cooking in the oven?
Wrapping, also known as the Texas crutch, can help push the brisket through the stall and keep it moist. Use pink butcher paper for the best results, as it allows some steam to escape. Wrap when the internal temp reaches about 165°F and the bark has set.
How long should I rest my brisket after cooking?
Rest your brisket for at least one hour after pulling it from the oven. For even better results, rest it for two hours wrapped in butcher paper inside a cooler with towels. This allows the juices to redistribute throughout the meat, making it much juicier when sliced.
What size brisket is best for oven cooking?
A whole packer brisket weighing 8 to 12 pounds is ideal for oven cooking. It gives you both the flat and the point, which offer different textures and flavors. If you are cooking for fewer people, a 4 to 5-pound flat cut works well too. Adjust your cook time based on the weight.